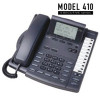
Uniden 410 English Owners Manual - Page 11
Verifying Station And Line Configuration, Verifying System Configuration, Installation Checklist
 |
View all Uniden 410 manuals
Add to My Manuals
Save this manual to your list of manuals |
Page 11 highlights
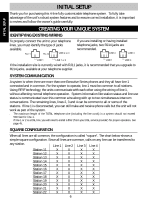
INITIAL SETUP INITIAL SETUP QUICK SETUP (cont.) VERIFYING STATION AND LINE CONFIGURATION 1 . Press LINE 1 . The LINE INDICATOR will light green and the speakerphone LED will light red. 2 . The station ID will appear in the display to indicate the station is in use. 3 . Dial the telephone number for line 2. The LINE INDICATOR for line 2 should flash red. If the line indicator, for the line you called, does not flash, check to make sure lines are correctly installed. 4 . Repeat step 2 and call the telephone numbers for line 3 and 4. 5 . If the indicators of the lines you called flashed, you have successfully installed this station! VERIFYING SYSTEM CONFIGURATION To verify that all stations are communicating, 1 . Press and hold PAGE ALL . 2 . "PAGING" and the station icons for all properly connected stations will appear in the Station Status Display. It may take a moment for all the icons to appear. 3 . Check to see if all stations connected to line 1, appear in the display. If they did, the system is successfully configured. If all the stations do not appear in the display, note the station(s) that did not appear in the display. Go to the noted station and make sure the lines are connected and in the correct line jacks. INSTALLATION CHECKLIST ❑ AC adapter is connected at stations ❑ Line cords have been connected ❑ Line 1 is common on all stations ❑ All stations have been assigned an extension number ❑ The time and date have been set at all stations 11
-
 1
1 -
2
-
3
-
4
-
5
-
 6
6 -
 7
7 -
 8
8 -
 9
9 -
 10
10 -
 11
11 -
 12
12 -
 13
13 -
 14
14 -
 15
15 -
 16
16 -
17
-
18
-
19
-
20
-
21
-
22
-
23
-
24
-
25
-
26
-
27
-
28
-
29
-
30
-
31
-
32
-
33
-
34
-
35
-
36
-
37
-
38
-
39
-
40
-
41
-
42
-
43
-
44
-
45
-
46
-
47
-
48
-
49
-
50
 |
 |
