ViewSonic CD4220 User Guide
ViewSonic CD4220 - 42" LCD Flat Panel Display Manual
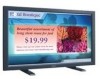 |
UPC - 766907278019
View all ViewSonic CD4220 manuals
Add to My Manuals
Save this manual to your list of manuals |
ViewSonic CD4220 manual content summary:
- ViewSonic CD4220 | User Guide - Page 1
ViewSonic® CD4220 LCD Commercial Display IMPORTANT: Please read this User Guide to obtain important information on installing and using your product in a safe manner, as well as registering your product for future service. Warranty information contained in this User Guide will describe your limited - ViewSonic CD4220 | User Guide - Page 2
CONFIGURATION 2 ...29 ADVANCED OPTION...30 Controlling the LCD monitor via RS-232C Remote Control 34 Appendix: Installing and removing stands 35 Features ...36 Troubleshooting...37 Specifications...38 Customer Support 39 Limited Warranty 40 CD4620/CD4220 RS232 Protocol 44 ViewSonic CD4220 i - ViewSonic CD4220 | User Guide - Page 3
Information For U.S.A. This equipment has been tested and found to comply with the limits energy and, if not installed and used in accordance with the instruction manual, may cause harmful interference to radio communications. operation of this systems according to local law. ViewSonic CD4220 1 - ViewSonic CD4220 | User Guide - Page 4
guide for further instructions. 7. Do not block any ventilation openings. Install the equipment in accordance with the manufacturer's instructions replacement of the outlet. 10. Protect the power cord 14. Refer all servicing to qualified service personnel. Service is required when ViewSonic CD4220 2 - ViewSonic CD4220 | User Guide - Page 5
steel containing up to 0.35% lead by weight, aluminium containing up to 0.4% lead by weight and as a cooper alloy containing up to 4% lead by weight. ViewSonic CD4220 3 - ViewSonic CD4220 | User Guide - Page 6
you to print the registration form, which you may mail or fax to ViewSonic. For Your Records Product Name: Model Number: Document Number: Serial Number: Purchase Date: CD4220 ViewSonic 42" LCD Commercial Display VS11895 CD4220-1_UG_ENG Rev. 1A 11-19-07 Product disposal at end of product life - ViewSonic CD4220 | User Guide - Page 7
COLOR MONITOR: y DO NOT REMOVE MONITOR BACK COVER. There are no user serviceable monitor. y If the monitor has been exposed to rain or water. y If the monitor has been dropped or the cabinet damaged. y If the monitor does not operate normally by following operating instructions ViewSonic CD4220 5 - ViewSonic CD4220 | User Guide - Page 8
: y LCD monitor y Power Cord y Video Signal Cable y User's Manual in CD Wizard y Wireless Remote Control and AAA Batteries y Quick Start Guide (A4) LCD monitor Quick Start Guide Video Signal Cable CD Wizard Power cored For North America Remote control & AAA batteries ViewSonic CD4220 6 - ViewSonic CD4220 | User Guide - Page 9
the signal from the remote control (when using the wireless remote control). Glows green when the LCD monitor is in active and glows red when the LCD is in POWER OFF mode. When the LCD is user mode, press both of "S" and "T" and hold simultaneously for three (3) seconds. ViewSonic CD4220 7 - ViewSonic CD4220 | User Guide - Page 10
the computer or a multi-connected CD4220 monitor. Connect the OUT connector with the RS-232C IN connector of CD4220 monitor. VIDEO IN/OUT VIDEO IN RGB signals from a computer. * This connector does not support analog input. AUDIO is supported via HDMI. RGB 2 IN (mini D-Sub 15 pin) ViewSonic CD4220 8 - ViewSonic CD4220 | User Guide - Page 11
Wireless Remote Control POWER button Switches the power on/off. * If LED Power Indicator on the monitor is not glowing, then no controls will work. PICTURE MODE button Selects from picture mode, [STANDARD function on/off. VOLUME - button decrease Decrease the audio output level. ViewSonic CD4220 9 - ViewSonic CD4220 | User Guide - Page 12
m/23 ft. from the front of the LCD monitor's remote control sensor and at a horizontal and vertical angle of within 30° within a distance of about 3 m/10 ft. CAUTION: Important, the remote control system may steam. 7 Other than to install the batteries, do not open the remote. ViewSonic CD4220 10 - ViewSonic CD4220 | User Guide - Page 13
protective sheet, which was wrapped around the LCD monitor when it was packaged, beneath the LCD monitor so as not to scratch the panel. 2. to "Safety Precautions, Maintenance & Recommended Use" section of this manual for proper selection of AC power cord. 5. Switch on the . ViewSonic CD4220 11 - ViewSonic CD4220 | User Guide - Page 14
. 10. Recommended monitor in the direction shown below: Do not place monitor in landscape in any other manner. How to set-up 1. Remove the stands(legs). 2. The " " logo should be on the LEFT side when facing the monitor. Remove the stands (legs) Clockwise Counterclockwise ViewSonic CD4220 - ViewSonic CD4220 | User Guide - Page 15
or ceiling mount brackets. y Do not sleep where the monitor may topple over or fall in case of an earthquake or other disaster. 3. Ventilation Requirements for enclosure mounting To allow heat to disperse, leave space between surrounding objects as shown in the diagram below. ViewSonic CD4220 13 - ViewSonic CD4220 | User Guide - Page 16
any kind of earthquake or disaster. y Do not sleep where the monitor may topple over or fall in case of an earthquake or other disaster. y Before moving the monitor, remove the rope that is securing the monitor. Failure to do so may result in injury or breakdown of the monitor. ViewSonic CD4220 14 - ViewSonic CD4220 | User Guide - Page 17
Before making connections: 7 First turn off the power of all the attached equipment and make connections. 7 Refer to the user manual included with each separate piece of equipment. Wiring Diagram DVD HD PC VCR LCD monitor (second monitor) Equipment with Digital interface ViewSonic CD4220 15 - ViewSonic CD4220 | User Guide - Page 18
Video RGB signal cable (mini D-sub 15 pin to mini D-sub 15 pin). y When connecting one or more LCD monitors, use the RGB OUT connector (mini D-sub 15 pin). y The AUDIO IN 1, 2, 3 or HDMI can be Audio input. To audio output To analog RGB output LCD monitor (second monitor) ViewSonic CD4220 16 - ViewSonic CD4220 | User Guide - Page 19
that is equipped with a digital interface compliant with the DVI (Digital Visual Interface) standard. Connect the LCD Monitor to a Computer with a Digital Output y The RGB 1, RGB 1 IN connector accepts a HDMI cable. be output to the RGB OUT connector. * Cables are not supply. ViewSonic CD4220 17 - ViewSonic CD4220 | User Guide - Page 20
Refer to your DVD player owner's manual for more information. Connect the LCD Monitor to a DVD Player y To connect the DVD/HD In connector (BNC) on the LCD monitor, use a separately available BNC connector the AUDIO INPUT button. You can select HDMI only when RGB 1 is selected. ViewSonic CD4220 18 - ViewSonic CD4220 | User Guide - Page 21
your stereo amplifier to your LCD monitor. Refer to your amplifier owner's manual for more information. Connect the LCD Monitor to a Stereo Amplifier y Turn on the LCD monitor and the amplifier only after all . y The AUDIO OUT jack outputs sound from the selected Audio input. ViewSonic CD4220 19 - ViewSonic CD4220 | User Guide - Page 22
LCD monitor power indicator will turn green while powered on or red in off mode. The monitor can Main Power Switch is used to power off the LCD monitor, the remote control and the power button will not on the Main Power button on the LCD monitor. 3. Using the remote control. NOTE: Before operating the remote - ViewSonic CD4220 | User Guide - Page 23
Green Red Red On Green Blinking Red, Green Red Blinking * See troubleshooting Using Power Management The LCD monitor follows the VESA approved DPM Power Management function. The power management function is not displayed. REAL: Image will be displayed 1 by 1 pixel. ZOOM ZOOM ViewSonic CD4220 21 - ViewSonic CD4220 | User Guide - Page 24
Input mode ←Input Signal Colour System mode ←Audio input mode ←Picture Size mode PIP or POP ←Main picture Information ←Sub picture Information ←Main picture Information ViewSonic CD4220 22 - ViewSonic CD4220 | User Guide - Page 25
, or control which you like. Press INPUT button to decide Press EXIT button to exit. OSD Screen S or T button INPUT button - or ﹢ button EXIT button ViewSonic CD4220 23 - ViewSonic CD4220 | User Guide - Page 26
setting. y Select "Yes" and press "SET" button to restore to factory preset data. y Press "EXIT" button to cancel and then return to the previous menu. ViewSonic CD4220 24 - ViewSonic CD4220 | User Guide - Page 27
setting. y Select "Yes" and press "SET" button to restore the factory preset data. y Press "EXIT" button to cancel and then return to the previous menu. ViewSonic CD4220 25 - ViewSonic CD4220 | User Guide - Page 28
AUDIO setting. y Select "YES" and press "SET" button to restore the factory preset. y Press "EXIT" button to cancel and then return to the previous menu. ViewSonic CD4220 26 - ViewSonic CD4220 | User Guide - Page 29
setting. y Select "Yes" and press "SET" button to restore the factory preset data. y Press "EXIT" button to cancel and then return to the previous menu. ViewSonic CD4220 27 - ViewSonic CD4220 | User Guide - Page 30
management mode when RGB1,2 sync is lost. y Selecting VIDEO "ON", the monitor will go to power management mode after about 10 minutes delay from when DVD/HD and VIDEO input signal is lost. LANGUAGE y preset data. Press "EXIT" button to cancel and return the previous menu. ViewSonic CD4220 28 - ViewSonic CD4220 | User Guide - Page 31
y A time between 1 to 10 seconds is available. OFF TIMER y To select OFF TIMER mode ON/OFF. y In the OFF TIMER menu, you can preset the monitor to automatically power down. y A position of the OSD menu. MONITOR INFORMATION y Indicates the model and serial number of your monitor. ViewSonic CD4220 29 - ViewSonic CD4220 | User Guide - Page 32
y SECONDARY: CD4220 monitors other than the first one multi-connected via RS-232C are designated as SECONDARY. y LOCK: Disable the monitor control by infrared wireless remote controller. y Keep pressing "DISPLAY" button during 5 sec or more, this setting will return to "NORMAL" ViewSonic CD4220 30 - ViewSonic CD4220 | User Guide - Page 33
displaying moving images and using a moving screen saver at regular intervals whenever the screen is idle or turning off the monitor when not in use. Please set "POWER SAVE", "SCREEN SAVER", "DATE &TIME" and "SCHEDULE" functions to further reduce the risk of Image persistence. ViewSonic CD4220 31 - ViewSonic CD4220 | User Guide - Page 34
off the monitor by remote control, or use Power Management Function of monitor or use Schedule Function of monitor. 3. { { ± { { ± { { { ± ± { ± ± {:Supported ±: Not supported MAIN Press the "PIP ON/OFF" buttons on the remote control to change between 338 dots ViewSonic CD4220 32 - ViewSonic CD4220 | User Guide - Page 35
of the first CD4220 monitor is set to PRIMARY and those of the other monitors are set to monitors. 4. Direct the remote controller at the remote control signal sensor of the PRIMARY monitor. OSD appears on the monitor button on the control panel of the monitor to display the OSD screen and change - ViewSonic CD4220 | User Guide - Page 36
controlled by connecting a personal computer with a RS-232C terminal. Functions that can be controlled by a personal computer are: Connection LCD Monitor + PC NOTE: We have two kinds of RS-232 protocol including serious connection and no serious connection that can use by user. ViewSonic CD4220 34 - ViewSonic CD4220 | User Guide - Page 37
sheet on the fl at surface, such as a desk. 2. Place monitor on the protective sheet. 3. Remove screws with a screwdriver and place them in a safe place for reuse. Screws Longer portion comes to the front. Stands * Stand is not supply. (Stand sold as an option accessory) ViewSonic CD4220 35 - ViewSonic CD4220 | User Guide - Page 38
by allowing the monitor to send its capabilities (such as screen size and resolutions supported) directly to Allows for the monitor to be mounted on a wall or an arm using any third party compliant device. VIEWSONIC recommends using mounting interface state will be indicated. ViewSonic CD4220 36 - ViewSonic CD4220 | User Guide - Page 39
supported mode has been selected on the display card or system being used. (Please consult display card or system manual to change graphics mode.) • Check the monitor LED on monitor is blinking • A certain failure might have occurred, please contact your nearest authorized VIEWSONIC service facility. - ViewSonic CD4220 | User Guide - Page 40
Supported G) Up and Down 178°, Left and Right 178° (typ.) @CR>10 1100 mm / 43.34 inches 15.625 / 15.734, 31.5 - 80 % (Without condensation) -20 - 60 °C / -4 - 140 °F 10 - 90% (Without condensation)/90%-3.5%x(Temp-40°C) regarding over 40°C 1022 mm (W) /CI User's Manual in CD, QSG, Power Cord - ViewSonic CD4220 | User Guide - Page 41
South Africa www.viewsoniceurope.com www.viewsoniceurope.com/uk/Support/Calldesk.htm United Kingdom www.viewsoniceurope.com /uk/ www.viewsoniceurope.com/uk/Support/Calldesk.htm United States www.viewsonic.com T= 1-800-688-6688 F= 1-909-468-1202 [email protected] ViewSonic CD4220 39 - ViewSonic CD4220 | User Guide - Page 42
instructions ViewSonic Customer Sup- port (Please refer to Customer Support page). You will need to provide your product's serial number. 2. To obtain warranty service, you will be required to provide (a) the original dated sales slip, (b) your name, (c) your address, (d) a description of the problem - ViewSonic CD4220 | User Guide - Page 43
For warranty information and service on ViewSonic products sold outside of the U.S.A. and Canada, contact ViewSonic or your local ViewSonic dealer. The warranty www.viewsoniceurope.com under Support/Warranty Information. 4.3: ViewSonic LCD Warranty ViewSonic CD4220 Page 2 of 2 LCD_LW02 Rev. 1e 06 - ViewSonic CD4220 | User Guide - Page 44
modification, unauthorized attempted repair, or failure to follow instructions supplied with the product. b. Any damage of the service charges. How to get service: For information about receiving service under warranty, contact ViewSonic Customer Support (Please refer to the attached Customer Support - ViewSonic CD4220 | User Guide - Page 45
Service (Centro Autorizado de Servicio) within Mexico: Name, address, of manufacturer and importers: México, Av. de la Palma #8 Piso 2 Despacho 203, Corporativo Interpalmas, Col. San Fernando Huixquilucan, Estado de México Tel: (55) 3605-1099 http://www.viewsonic 10 LINEAS Services SUPPORT: ViewSonic - ViewSonic CD4220 | User Guide - Page 46
CD4620/CD4220 RS232 protocol Table of Content 1 Introduction ...45 2 Description...45 2.1 Hardware specification ...45 2.2 Communication Setting...45 11/14/2007 V1.2 Update base on vender confirmation Applicable model CD4620 CD4220 by Tony Kao Tony Kao Tony Kao Jane Chen ViewSonic CD4220 44 - ViewSonic CD4220 | User Guide - Page 47
Display and PC or other control unit with RS232 protocol. Viewsonic CD4620 and CD4220 contain with 2 set of protocol command 1. Protocol 1, with ID This set protocol allow user to assign the ID in the command to control the specify ID monitor 2. Protocol 2, without ID The set protocol is best for - ViewSonic CD4220 | User Guide - Page 48
0x0D 5.2 Set-Function Listing The PC can control the LCD Monitor for specific actions. The Set-Function command allows you to control the LCD monitor behavior in a remote sit through the RS232 port. The Set Format) Name Length ID Command Type Command Value1 Value2 Value3 CR ViewSonic CD4220 46 - ViewSonic CD4220 | User Guide - Page 49
0x39 0x73 0x24 0x30 0x37 No Reply. Value3 0x36 CR 0x0D CD4620/CD4220 set-function table Set Function Power Input Select Contrast Brightness Sharpness Color PANORAMA 8 s 2 32 000 : English 001 : French 002 : Spanish 003 : Germany 004 : Italian 005 : Simplified ViewSonic CD4220 47 - ViewSonic CD4220 | User Guide - Page 50
timeout 8 Volume 8 Mute 8 Off Timer 8 PIP Mode 8 PIP Sound select 8 PIP position 8 PIP Input 8 Monitor ID 8 Key Pad 8 Remote Control 8 Key Pad 8 Factory reset 8 Chinese 006 : Russian s 3 33 on the HDTV. s ~ 7E 0 Rests HDTV to factory setting ViewSonic CD4220 48 - ViewSonic CD4220 | User Guide - Page 51
5.3 Get-Function Listing The PC can interrogate the LCD Monitor for specific information. The Get-Function packet format consists of 5 bytes which is similar to the Set-Function Reply (Hex Format) Name Length ID Command Type CR Hex 0x34 0x30 0x35 0x2D 0x0D CR 0x0D ViewSonic CD4220 49 - ViewSonic CD4220 | User Guide - Page 52
Command Type CR Hex 0x34 0x30 0x37 0x2D 0x0D PC Get-function command to CD4620/CD4220 LCD Monitor Get Function Length ID Command Command Response Range Comments Type Code (ASCII) Code Get-ACK 8 g z 7A 0 This command is used to test the communication link. ViewSonic CD4220 50 - ViewSonic CD4220 | User Guide - Page 53
LCD Monitor will send "-" (02Dh) and "CR" bytes to PC if the command is not valid. Value Range: Three bytes ASCII value range Command Code: Function command code in ASCII CD4620/CD4220 set command : YPbPr 005 : S-Video 000 ~ 100 Comments Controlled power status: ON or Standby ViewSonic CD4220 51 - ViewSonic CD4220 | User Guide - Page 54
5 Mute 5 6 Off Timer 5 7 PIP Mode 5 9 PIP Sound select 5 : PIP position 5 ; PIP Input 5 < Monitor ID Key Pad 5 = 5 A Remote Control 5 B Key Pad 5 C Factory reset 5 ~ 24 000 ~ 100 25 000 on the HDTV. 7E 0 Rests HDTV to factory setting ViewSonic CD4220 52 - ViewSonic CD4220 | User Guide - Page 55
special command "Get-ACK" is used to test the communication link between PC and the LCD Monitor. The LCD Monitor shall response to "Get-ACK" command with LCD Monitor will send "+" (02Bh); "CR" bytes to PC after receiving the command indicating that the communication link is OK ViewSonic CD4220 53 - ViewSonic CD4220 | User Guide - Page 56
the status of the HDTV power. 001: ON HDTV response: 000 = HDTV is in standby 001 = HDTV is ON z 7A 0 This command is used to test the communication link. ViewSonic CD4220 54 - ViewSonic CD4220 | User Guide - Page 57
that in this mode the RCU shall have no effect on the monitor function. For example: "+Volume" will not change the volume the RS232 port. Remote Control pass-through packet format from LCD monitor to PC(ASCII) Name Length RCU-Code1 RCU-Code2 CR Byte Code (HEX) 0F 10 11 12 15 16 17 1A 1B 1C 1D - ViewSonic CD4220 | User Guide - Page 58
-
 1
1 -
 2
2 -
 3
3 -
 4
4 -
 5
5 -
 6
6 -
 7
7 -
8
-
9
-
10
-
11
-
12
-
13
-
14
-
15
-
16
-
17
-
18
-
19
-
20
-
21
-
22
-
23
-
24
-
25
-
26
-
27
-
28
-
29
-
30
-
31
-
32
-
33
-
34
-
35
-
36
-
37
-
38
-
39
-
40
-
41
-
42
-
43
-
44
-
45
-
46
-
47
-
48
-
49
-
50
-
51
-
52
-
53
-
54
-
55
-
56
-
57
-
58
 |
 |
ViewSonic
®
CD4220
LCD Commercial Display
Model No. : VS11895
IMPORTANT:
Please read this User Guide to obtain important
information on installing and using your product in a safe manner, as
well as registering your product for future service.
Warranty information
contained in this User Guide will describe your limited coverage from
ViewSonic Corporation, which is also found on our web site at http://
www.viewsonic.com in English, or in specific languages using the
Regional selection box in the upper right corner of our website.
“Antes de operar su equipo lea cuidadosamente las instrucciones en
este manual”