Vizio M420NV M420NV User Manual - Page 17
Remote Control Buttons - program without remote
 |
UPC - 845226003271
View all Vizio M420NV manuals
Add to My Manuals
Save this manual to your list of manuals |
Page 17 highlights
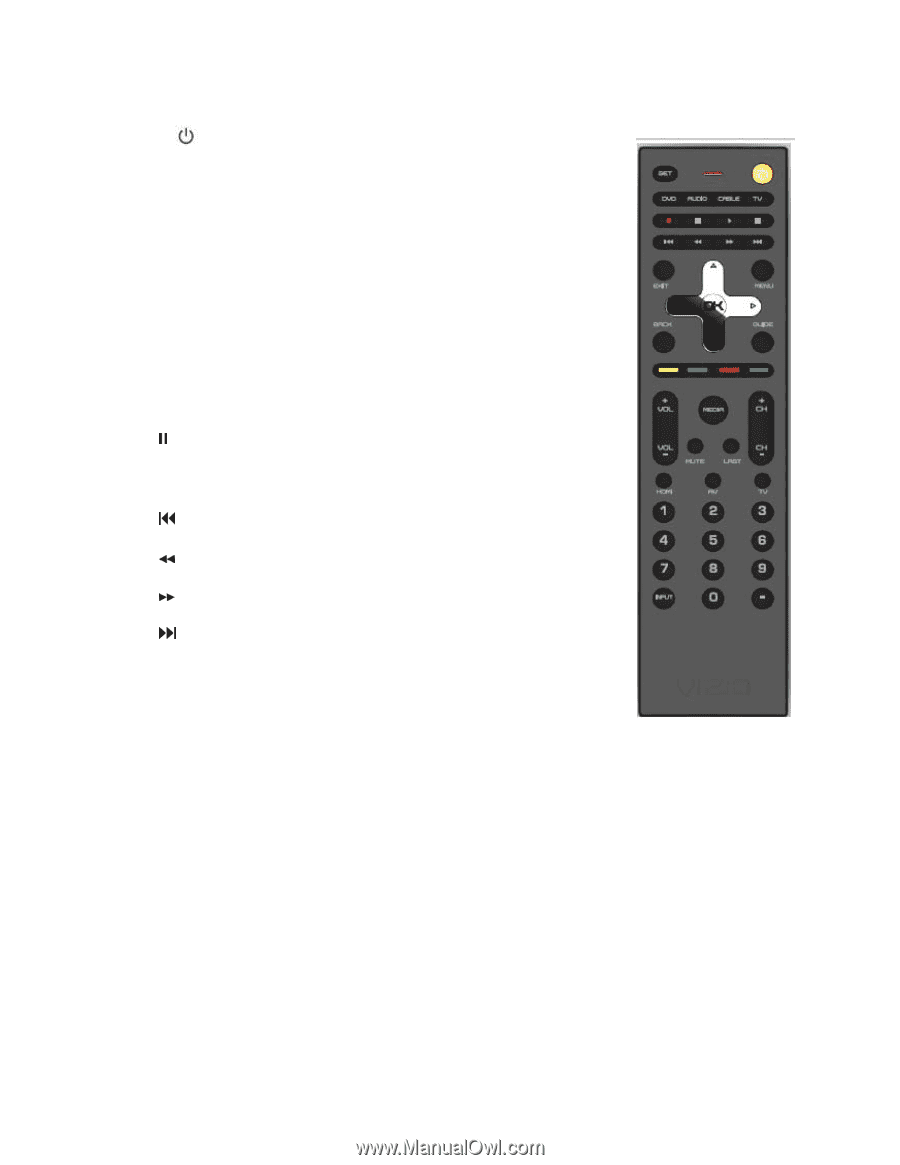
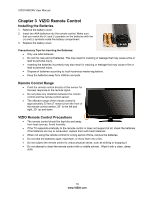
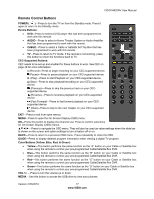
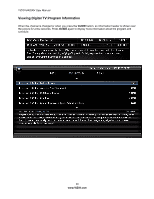
VIZIO M420NV User Manual Remote Control Buttons POWER ( )-Press to turn the TV on from the Standby mode. Press it again to return to the Standby mode. Device Buttons: • DVD-Press to select a DVD player that has been programmed to work with this remote. • AUDIO-Press to select a Home Theater System or Audio Amplifier that has been programmed to work with this remote. • CABLE-Press to select a Cable or Satellite Set Top Box that has been programmed to work with this remote. • TV-Press to return to TV mode. If the remote is not working, press this button to return the functions back to TV. CEC-Supported Buttons: CEC needs to be set up and enabled for these buttons to work. See CEC on page 46 for more information. ● (Record)-Press to begin recording on your CEC-supported device. (Pause)-Press to pause playback on your CEC-supported device. ► (Play)-Press to start Playback on your CEC-supported device. ■ (Stop)-Press to stop playback/recording on your CEC-supported device. (Previous)-Press to skip the previous track on your CECsupported device. (Reverse)-Press to reverses playback on your CEC-supported device. (Fast Forward)-Press to fast forward playback on your CECsupported device. (Next)-Press to skip to the next chapter on your CEC-supported device. EXIT-Press to exit from open menus. MENU-Press to open the On-Screen Display (OSD) menu. OK-Press this button to display the Channel List. Press to confirm selections for On-Screen Display (OSD) menus Press to navigate the OSD menu. They will also be used as value settings when the slide bar is shown on the screen and option settings to turn a feature off or on. BACK-Press to return to a previous OSD menu. Press repeatedly to close the OSD. GUIDE-Press to display detailed program information when viewing a digital TV program. Color Buttons (Yellow, Blue, Red, & Green): • Yellow-This button performs the same function as the "A" button on your Cable or Satellite box when using the remote to control your pre-programmed Cable/Satellite Box DVR. • Blue-This button performs the same function as the "B" button on your Cable or Satellite box when using the remote to control your pre-programmed Cable/Satellite Box DVR. • Red-This button performs the same function as the "C" button on your Cable or Satellite box when using the remote to control your pre-programmed Cable/Satellite Box DVR. • Green-This button performs the same function as the "D" button on your Cable or Satellite box when using the remote to control your pre-programmed Cable/Satellite Box DVR. VOL +/- -Press to turn the volume up or down. MEDIA - Use this button to access the USB drive to view your pictures. Version 2/23/2010 17 www.VIZIO.com
-
 1
1 -
2
-
3
-
4
-
5
-
6
-
7
-
8
-
9
-
10
-
11
-
 12
12 -
 13
13 -
 14
14 -
 15
15 -
 16
16 -
 17
17 -
 18
18 -
 19
19 -
 20
20 -
 21
21 -
 22
22 -
23
-
24
-
25
-
26
-
27
-
28
-
29
-
30
-
31
-
32
-
33
-
34
-
35
-
36
-
37
-
38
-
39
-
40
-
41
-
42
-
43
-
44
-
45
-
46
-
47
-
48
-
49
-
50
-
51
-
52
-
53
-
54
-
55
-
56
-
57
-
58
-
59
-
60
-
61
-
62
-
63
-
64
-
65
-
66
-
67
-
68
-
69
-
70
-
71
-
72
-
73
-
74
-
75
-
76
-
77
-
78
 |
 |