Weider Club C 725 English Manual - Page 13
Attach the Weight Carriage Base 20 to the Rear
 |
View all Weider Club C 725 manuals
Add to My Manuals
Save this manual to your list of manuals |
Page 13 highlights
15. Orient the Center Upright (13) as shown. Attach 15 the Center Upright to the Rear Base (9) with two M10 x 85mm Button Bolts (125), two M10 Washers (83), and two M10 Nylon locknuts (116). Do not Tighten the Nylon Locknuts yet. 13 125 9 125 83 116 16. Attach the Weight Carriage Base (20) to the Rear 16 Base (9) with two M10 x 75mm Button Bolts (130) and two M10 Washers (83). Do not tighten the Button Bolts yet. 9 20 83 130 83 17. Orient the Weight Bumper (30) as shown, and slide it downward onto the Weight Carriage 17 Upright (21). Next, orient the Weight Carriage Upright (21) as shown, and insert it into the Weight Carriage Base (20). Then, press the Upright Foot (29) onto the Weight Carriage Upright. 13 30 21 Welded Washers 20 29
-
 1
1 -
2
-
3
-
4
-
5
-
6
-
7
-
 8
8 -
 9
9 -
 10
10 -
 11
11 -
 12
12 -
 13
13 -
 14
14 -
 15
15 -
 16
16 -
 17
17 -
 18
18 -
19
-
20
-
21
-
22
-
23
-
24
-
25
-
26
-
27
-
28
-
29
-
30
-
31
-
32
-
33
-
34
-
35
-
36
-
37
-
38
-
39
-
40
-
41
-
42
-
43
-
44
 |
 |
13
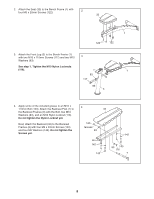
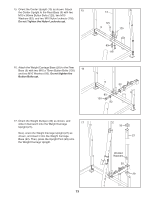
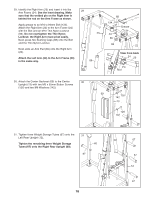
16. Attach the Weight Carriage Base (20) to the Rear
Base (9) with two M10 x 75mm Button Bolts (130)
and two M10 Washers (83).
Do not tighten the
Button Bolts yet.
16
20
9
83
83
130
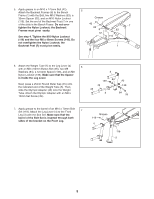
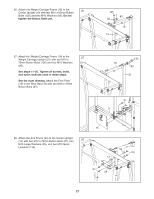
15. Orient the Center Upright (13) as shown. Attach
the Center Upright to the Rear Base (9) with two
M10 x 85mm Button Bolts (125), two M10
Washers (83), and two M10 Nylon locknuts (116).
Do not Tighten the Nylon Locknuts yet.
13
9
83
125
125
15
116
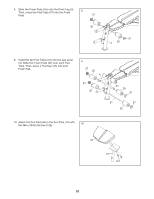
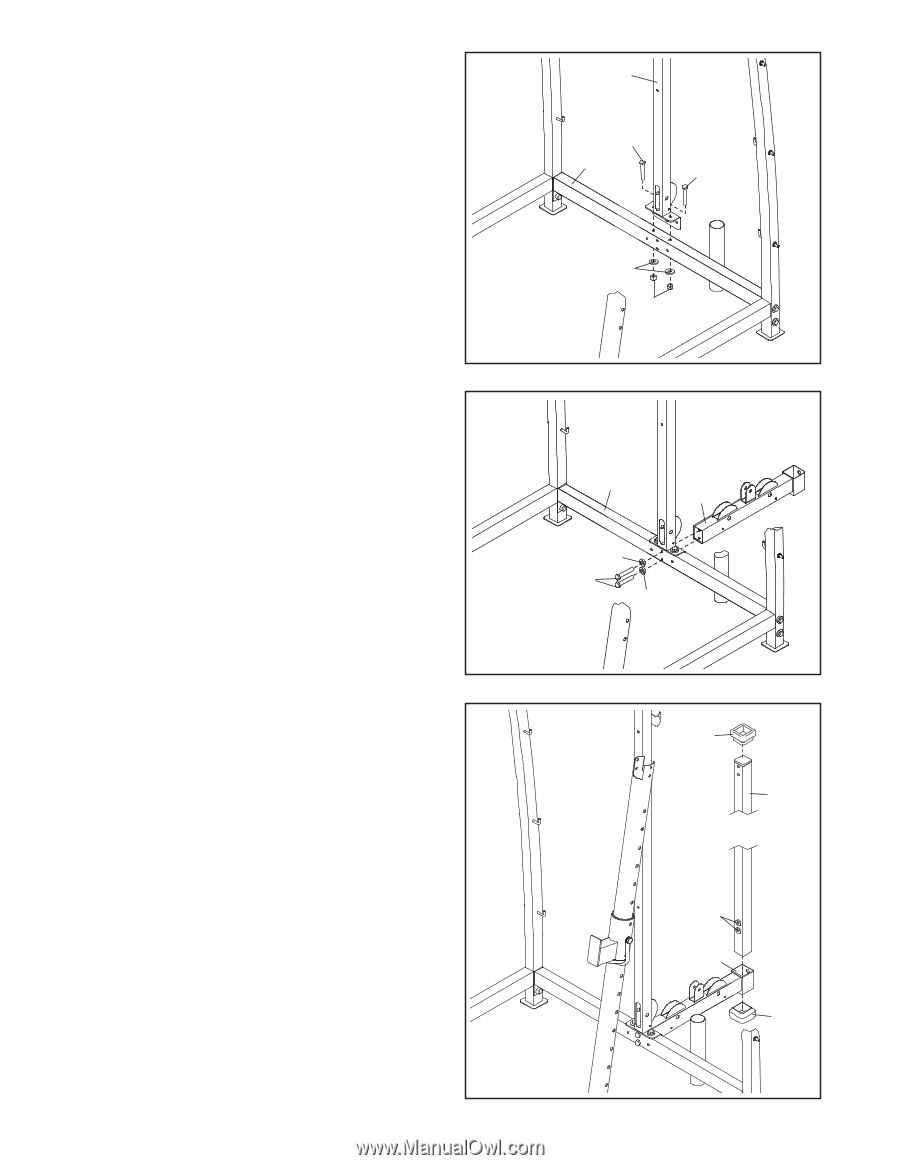
17. Orient the Weight Bumper (30) as shown, and
slide it downward onto the Weight Carriage
Upright (21).
Next, orient the Weight Carriage Upright (21) as
shown, and insert it into the Weight Carriage
Base (20). Then, press the Upright Foot (29) onto
the Weight Carriage Upright.
17
29
21
30
20
Welded
Washers