Weider Club C 725 English Manual - Page 23
Cable Trap and the Half Pulley Guards are ori
 |
View all Weider Club C 725 manuals
Add to My Manuals
Save this manual to your list of manuals |
Page 23 highlights
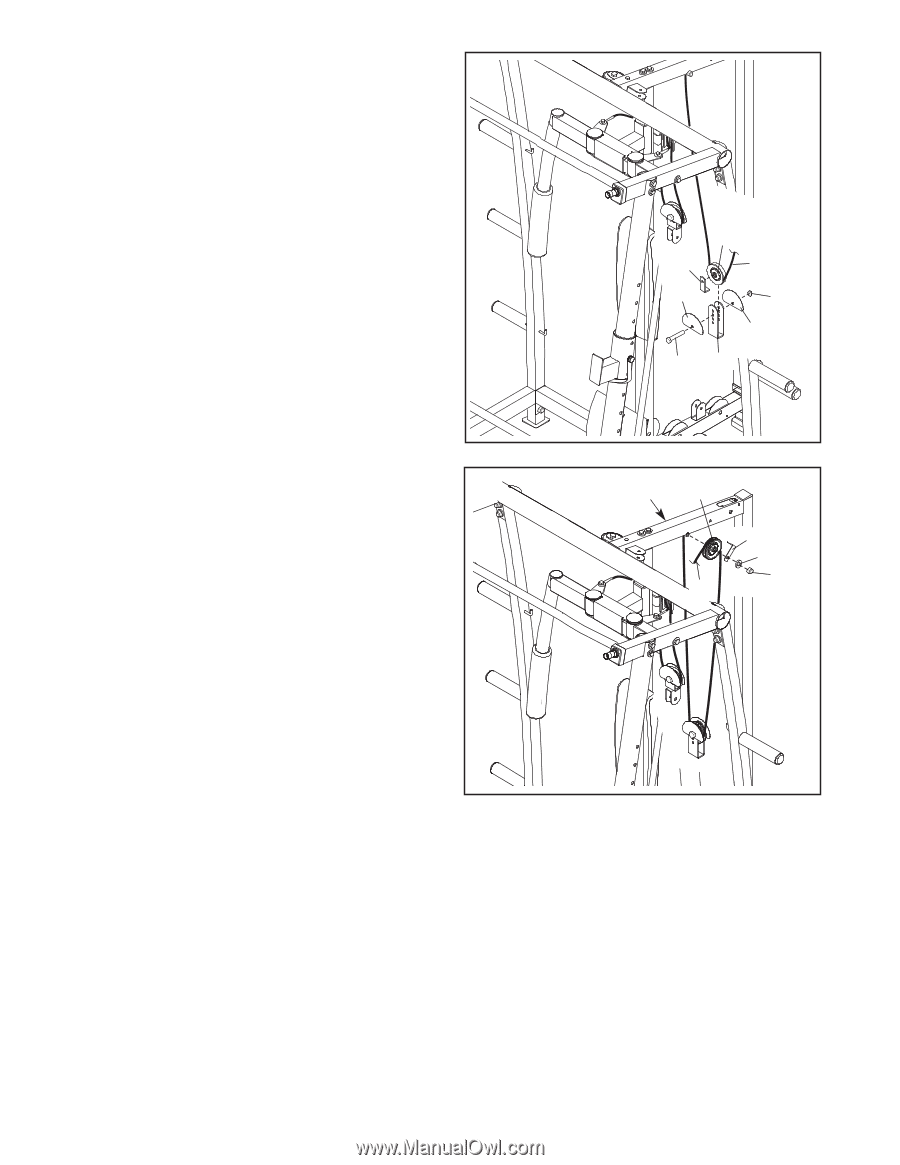
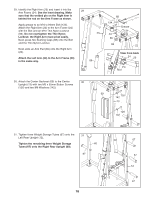
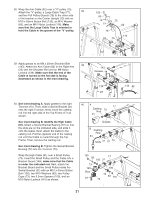
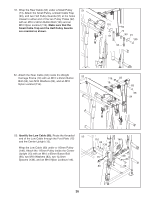
44. Wrap the High Cable (81) under a Small Pulley 44 (74). Attach the Small Pulley, a Small Cable Trap (93), and two Half Pulley Guards (91) to the sec- ond hole from the top of the "U"-bracket (90) with an M10 x 52mm Button Bolt (135) and an M10 Nylon Locknut (116). Make sure that the Small Cable Trap and the Half Pulley Guards are ori- ented as shown. 45. Wrap the High Cable (81) over a Small Pulley 45 (74). Next, remove the M10 Nylon Locknut (116) attached in step 43. Slide the Small Pulley, a Small Cable Trap (93), and an M10 Washer (83) onto the M10 x 125mm Button Bolt (141) inserted in step 43. Then, tighten the Nylon Locknut onto the Button Bolt. Make sure that the Small Cable Trap is oriented to hold the Cable in the groove of the Small Pulley. 74 93 81 91 116 91 135 90 141 74 93 83 116 81 23
-
 1
1 -
2
-
3
-
4
-
5
-
6
-
7
-
8
-
9
-
10
-
11
-
12
-
13
-
14
-
15
-
16
-
17
-
 18
18 -
 19
19 -
 20
20 -
 21
21 -
 22
22 -
 23
23 -
 24
24 -
 25
25 -
 26
26 -
 27
27 -
 28
28 -
29
-
30
-
31
-
32
-
33
-
34
-
35
-
36
-
37
-
38
-
39
-
40
-
41
-
42
-
43
-
44
 |
 |