Western Digital WD1200JB User Manual (pdf) - Page 11
Power on Your Computer
 |
UPC - 718037104522
View all Western Digital WD1200JB manuals
Add to My Manuals
Save this manual to your list of manuals |
Page 11 highlights
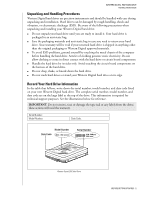
WESTERN DIGITAL EIDE HARD DRIVE INSTALLATION GUIDE 4. Secure the Hard Drive: Secure the Western Digital hard drive in an available 3.5-inch drive bay (typically adjacent to the floppy disk drive) using the four mounting screws provided. Note: For proper grounding, be sure to use all four screws. Æ Mounting frame Power on Your Computer 1. Replace and secure the system cover, reconnect the power cord, and power on the system. This concludes the hard drive installation process. 2. At startup, your system BIOS should auto-detect the hard drive with a series of system messages identifying the Western Digital hard drive. If there is no hard drive detection or an error message appears, you will have to enter the system BIOS to set up the hard drive. If the drive was detected, you may now format and partition the drive. a) To configure the system BIOS, proceed to the next section on page 8. b) To format and partition the drive, skip to "Data Lifeguard Tools v11.0" on page 9. INSTALL THE HARD DRIVE - 7
-
 1
1 -
2
-
3
-
4
-
5
-
 6
6 -
 7
7 -
 8
8 -
 9
9 -
 10
10 -
 11
11 -
 12
12 -
 13
13 -
 14
14 -
 15
15 -
 16
16 -
17
-
18
-
19
-
20
-
21
-
22
-
23
-
24
-
25
-
26
-
27
-
28
-
29
-
30
-
31
-
32
-
33
-
34
-
35
-
36
 |
 |
