Western Digital WD1200JB User Manual (pdf) - Page 20
My Computer
 |
UPC - 718037104522
View all Western Digital WD1200JB manuals
Add to My Manuals
Save this manual to your list of manuals |
Page 20 highlights
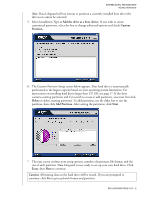
WESTERN DIGITAL EIDE HARD DRIVE INSTALLATION GUIDE 8. After Data Lifeguard has completed formatting and partitioning the drive, the setup summary screen outlines all of the steps completed. Click Done to exit the software. 9. Remove the CD from the CD-ROM drive to begin using your new Western Digital drive as additional storage. A new drive letter and icon will appear under My Computer. 10. This concludes the hard drive setup process. Your Western Digital hard drive is now ready to use. DATA LIFEGUARD TOOLS V11.0 - 16
-
 1
1 -
2
-
3
-
4
-
5
-
6
-
7
-
8
-
9
-
10
-
11
-
12
-
13
-
14
-
 15
15 -
 16
16 -
 17
17 -
 18
18 -
 19
19 -
 20
20 -
 21
21 -
 22
22 -
 23
23 -
 24
24 -
 25
25 -
26
-
27
-
28
-
29
-
30
-
31
-
32
-
33
-
34
-
35
-
36
 |
 |

WESTERN DIGITAL EIDE HARD DRIVE
DATA LIFEGUARD TOOLS V11.0 - 16
INSTALLATION GUIDE
8.
After Data Lifeguard has completed formatting and partitioning the drive, the setup
summary screen outlines all of the steps completed. Click
Done
to exit the software.
9.
Remove the CD from the CD-ROM drive to begin using your new Western Digital drive
as additional storage. A new drive letter and icon will appear under
My Computer
.
10. This concludes the hard drive setup process. Your Western Digital hard drive is now ready
to use.