Xerox M15I WorkCentre M15/M15i User Guide
Xerox M15I - WorkCentre B/W Laser Manual
 |
UPC - 095205024050
View all Xerox M15I manuals
Add to My Manuals
Save this manual to your list of manuals |
Xerox M15I manual content summary:
- Xerox M15I | WorkCentre M15/M15i User Guide - Page 1
WorkCentre M15/M15i User Guide 604P13220 - Xerox M15I | WorkCentre M15/M15i User Guide - Page 2
law or hereinafter granted, including without limitations, material generated from the software programs which are displayed on the screen, such as icons, screen displays, looks etc. Xerox®, The Document Company®, the digital X® and all Xerox products mentioned in this publication are trademarks of - Xerox M15I | WorkCentre M15/M15i User Guide - Page 3
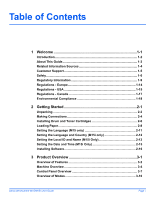
Making Connections 2-4 Installing Drum and Toner Cartridges 2-6 Loading Paper 2-8 Setting the Language (M15 only 2-11 Setting the Language and Country (M15i only 2-12 Setting the Local ID and Name (M15i Only 2-13 Setting the Date and Time (M15i Only 2-15 Installing Software 2-16 3 Product - Xerox M15I | WorkCentre M15/M15i User Guide - Page 4
Paper 5-2 Media Specifications 5-8 6 Fax (M15i Only 6-1 Faxing Procedure 6-2 Fax Features 6-6 Advanced Fax Features 6-8 Fax Job Management 6-11 Dialing Methods 6-14 Receiving a Fax 6-19 Fax Reports 6-24 7 Print 7-1 Printing Procedure 7-2 Printing Options 7-4 8 Scan (M15i Only 8-1 TWAIN - Xerox M15I | WorkCentre M15/M15i User Guide - Page 5
Error Messages 11-13 Resetting the Machine 11-21 12 Specifications 12-1 Introduction 12-2 Printer Specifications 12-3 Fax Specifications 12-4 Scanner and Copier Specifications 12-5 General Specifications 12-6 Media Specifications 12-7 13 Index 1 Xerox WorkCentre M15/M15i User Guide Page - Xerox M15I | WorkCentre M15/M15i User Guide - Page 6
Page iv Xerox WorkCentre M15/M15i User Guide - Xerox M15I | WorkCentre M15/M15i User Guide - Page 7
1 Welcome Ø Introduction 1-2 Ø About This Guide 1-3 Ø Related Information Sources 1-4 Ø Customer Support 1-5 Ø Safety 1-6 Ø Regulatory Information 1-9 Ø Environmental Compliance 1-18 Xerox WorkCentre M15/M15i User Guide Page 1-1 - Xerox M15I | WorkCentre M15/M15i User Guide - Page 8
. There are two WorkCentre M15 configurations available: - WorkCentre M15: A copier and printer with Document Glass and optional Automatic Document Feeder (ADF). - WorkCentre M15i: A copier, printer, fax and scanner with an Automatic Document Feeder (ADF). l For instructions on unpacking and - Xerox M15I | WorkCentre M15/M15i User Guide - Page 9
are displayed in Italic typeface. EXAMPLE Xerox WorkCentre M15/M15i Used to emphasise the selection of a feature mode or button. Ø Select the paper supply source required by pressing [Paper Supply]. Located in the margins and used to provide l For instructions on loading media, additional or - Xerox M15I | WorkCentre M15/M15i User Guide - Page 10
Welcome Related Information Sources Information available for the WorkCentre M15/M15i consists of: - This User Guide - The Quick Start Guide - The Installation Sheet Page 1-4 Xerox WorkCentre M15/M15i User Guide - Xerox M15I | WorkCentre M15/M15i User Guide - Page 11
side cover using the release latch and then open the front door. The serial number is located on the panel above the Print Cartridge. The Xerox Welcome Center or local representative telephone number is provided when the WorkCentre M15/M15i is installed. For convenience and future reference, please - Xerox M15I | WorkCentre M15/M15i User Guide - Page 12
XEROX materials only. Follow all warnings and instructions marked on, or supplied with the product. This WARNING Mark alerts users to the possibility of personal injury. This WARNING Mark alerts users to heated surfaces. WARNING a hazardous situation. Page 1-6 Xerox WorkCentre M15/M15i User Guide - Xerox M15I | WorkCentre M15/M15i User Guide - Page 13
is manufactured under a registered ISO9002 Quality system. If you need additional safety information concerning this XEROX product or XEROX supplied materials you may call the following number: EUROPE +44 (0) 1707 353434 USA/CANADA 1 800 928 6571 Xerox WorkCentre M15/M15i User Guide Page 1-7 - Xerox M15I | WorkCentre M15/M15i User Guide - Page 14
/CANADA This XEROX product is certified by the following Agency using the Safety Standards listed. Agency: UNDERWRITERS LABORATORIES Standard: UL 1950 3rd Edition. Certification is based on reciprocity agreements, which include requirements for Canada. Page 1-8 Xerox WorkCentre M15/M15i User Guide - Xerox M15I | WorkCentre M15/M15i User Guide - Page 15
be required to take adequate measures. WARNING: This product is certified manufactured new functions or the connection of external devices may impact this certification. Please contact your local XEROX Limited representative for a list of approved accessories. Xerox WorkCentre M15/M15i User Guide - Xerox M15I | WorkCentre M15/M15i User Guide - Page 16
WARNING: Shielded cables must be used with this equipment to maintain compliance with Council Directive 89/336/EEC. FCC Part 15 This frequency energy and, if not installed and used in accordance with the instruction manual, may cause harmful interference to 1-10 Xerox WorkCentre M15/M15i User Guide - Xerox M15I | WorkCentre M15/M15i User Guide - Page 17
body. Xerox equipment which has been properly and regularly serviced and maintained XEROX equipment safe? ANSWER: All XEROX equipment supplied by XEROX Limited and their authorized distributors conforms to all relevant safety legislation and standards. Xerox WorkCentre M15/M15i User Guide - Xerox M15I | WorkCentre M15/M15i User Guide - Page 18
Support will be pleased to advise you on such testing. QUESTION: I require records of all tests. ANSWER: After safety testing, your XEROX Limited Customer Service Engineer will provide you with a certificate which details the results of all tests completed. Page 1-12 Xerox WorkCentre M15/M15i - Xerox M15I | WorkCentre M15/M15i User Guide - Page 19
ALL TIMES. Please contact us if you have any queries regarding the information provided in this document. Environment, Health and Safety XEROX Limited Bessemer Road Welwyn Garden City Hertfordshire AL7 1HE England Telephone Number: +44 (0) 1707 353434 Xerox WorkCentre M15/M15i User Guide Page 1-13 - Xerox M15I | WorkCentre M15/M15i User Guide - Page 20
United Kingdom France Ireland Portugal Finland Italy Spain In the event of problems, you should contact your local Xerox to external control software or to external control apparatus not authorized by Xerox, will invalidate its certification. Page 1-14 Xerox WorkCentre M15/M15i User Guide - Xerox M15I | WorkCentre M15/M15i User Guide - Page 21
FAX machine refer to "Setting the Local ID and Name (M15i Only)" on page 2-13 and follow the steps provided. Data Coupler Information This equipment complies with Part ) provided with the installation kit. See installation instructions for details. Xerox WorkCentre M15/M15i User Guide Page 1-15 - Xerox M15I | WorkCentre M15/M15i User Guide - Page 22
equipment connected to the telephone line, ensure the installation of this Xerox equipment does not disable your alarm equipment. If you have questions about what will disable alarm equipment, consult your Telephone Company or a qualified installer. Page 1-16 Xerox WorkCentre M15/M15i User Guide - Xerox M15I | WorkCentre M15/M15i User Guide - Page 23
Users should ensure for their own protection the electrical ground connections of the power utility, telephone lines and internal metallic water pipe system, if present, are appropriate electric inspection authority or electrician, as appropriate. Xerox WorkCentre M15/M15i User Guide Page 1-17 - Xerox M15I | WorkCentre M15/M15i User Guide - Page 24
designed this product to comply with the guidelines of the ENERGY STAR® program of the Environmental Protection Agency. As an ENERGY STAR® Partner, XEROX has determined that this product meets the ENERGY STAR® guidelines for energy efficiency. Page 1-18 Xerox WorkCentre M15/M15i User Guide - Xerox M15I | WorkCentre M15/M15i User Guide - Page 25
Drum and Toner Cartridges 2-6 Ø Loading Paper 2-8 Ø Setting the Language (M15 only 2-11 Ø Setting the Language and Country (M15i only) . . 2-12 Ø Setting the Local ID and Name (M15i Only) . . . . 2-13 Ø Setting the Date and Time (M15i Only 2-15 Ø Installing Software 2-16 Xerox WorkCentre M15 - Xerox M15I | WorkCentre M15/M15i User Guide - Page 26
from the LCD. Ø Remove all tapes and packing materials. Tape LCD 2 Ø Pull the Scan Unlock Switch located on the bottom of the scanner module to unlock the scanner. Ø Pull open the paper cassette and remove the packing material. Scanner Module Page 2-2 Xerox WorkCentre M15/M15i User Guide - Xerox M15I | WorkCentre M15/M15i User Guide - Page 27
Getting Started 3 Ø Ensure the following components are available: USB Cable AC Power Cord Telephone Line Cord Software User Documentation Starter Toner Cartridge Drum Cartridge Xerox WorkCentre M15/M15i User Guide Page 2-3 - Xerox M15I | WorkCentre M15/M15i User Guide - Page 28
shown and fasten the side screws. NOTE:The ADF is an option on the M15 2 Telephone Line (M15i Only) Ø Connect the Telephone Line Cord from the wall jack to the LINE jack. Ø If required, connect an answering machine and/or telephone to the EXT jack. Page 2-4 Xerox WorkCentre M15/M15i User Guide - Xerox M15I | WorkCentre M15/M15i User Guide - Page 29
connecting the power cord. For details refer to "Unpacking" on page 2-2. Ø Connect the AC Power Cord to the machine and a power outlet. Ø Press the ON/OFF switch to the ON ( I ) position. The machine displays 'WARMING UP PLEASE WAIT...' ON/OFF Switch Xerox WorkCentre M15/M15i User Guide Page 2-5 - Xerox M15I | WorkCentre M15/M15i User Guide - Page 30
1 Ø Pull the release latch to open the side cover. 2 Ø Open the front cover. 3 Ø Unpack the new drum cartridge. Be careful not to touch the surface of the drum. Ø Slide the drum cartridge into the slot on the right side of the opening. Page 2-6 Xerox WorkCentre M15/M15i User Guide - Xerox M15I | WorkCentre M15/M15i User Guide - Page 31
Ø Turn the toner locking lever upwards. Ø Slide the new toner cartridge in until it locks in place. 6 Ø Turn the toner locking lever downwards until it locks in place. Ø Close the front cover and the side cover. The product returns to Standby mode. Xerox WorkCentre M15/M15i User Guide Page - Xerox M15I | WorkCentre M15/M15i User Guide - Page 32
Getting Started Loading Paper 1 Ø Pull open the paper cassette. 2 Ø Push down on the pressure plate until it locks into position. Page 2-8 Xerox WorkCentre M15/M15i User Guide - Xerox M15I | WorkCentre M15/M15i User Guide - Page 33
of 550 sheets of 80 g/m2 (20 lb) plain paper. LGL FOLIO A4 LTR 4 Ø Fan the paper and insert it into the cassette. 5 Ø Ensure that the paper is positioned under the snubber. Do not fill above the Maximum Fill Line. Max Fill Line Snubber Xerox WorkCentre M15/M15i User Guide Page 2-9 - Xerox M15I | WorkCentre M15/M15i User Guide - Page 34
6 Ø Position the side guide by squeezing the lever and sliding it toward the stack of paper, until it gently touches the side of the stack. Do not allow the guide to press against the edge of the paper tightly. Ø Close the paper cassette. Page 2-10 Xerox WorkCentre M15/M15i User Guide - Xerox M15I | WorkCentre M15/M15i User Guide - Page 35
/Exit], the first menu displays. WorkCentre M15 SYSTEM DATA [PAPER SIZE...] 2 Ø Scroll to 'SELECT LANGUAGE' using the key. Ø Using the or navigation keys select the language required. Ø Press [Enter]. WorkCentre M15 SELECT LANGUAGE [ENGLISH] Xerox WorkCentre M15/M15i User Guide Page 2-11 - Xerox M15I | WorkCentre M15/M15i User Guide - Page 36
selected, choose the required option and press [Enter]. Ø If necessary, press [Menu/Exit] [Menu/Exit] to save and exit. WorkCentre M15i SELECT LANGUAGE [ENGLISH] WorkCentre M15i SELECT COUNTRY? 1: YES 2: NO WorkCentre M15i SELECT COUNTRY [ UK ] Page 2-12 Xerox WorkCentre M15/M15i User Guide - Xerox M15I | WorkCentre M15/M15i User Guide - Page 37
Ø Enter the fax telephone number. If a number has already been entered it is displayed. Press [Clear/Clear All] to delete the current entry and enter the correct number. Ø Press [Enter] when the correct telephone number displays. WorkCentre M15i FAX: Xerox WorkCentre M15/M15i User Guide Page 2-13 - Xerox M15I | WorkCentre M15/M15i User Guide - Page 38
the ID. Ø Enter a name or company name using the numeric keypad. WorkCentre M15i ID: : KEY 1 2 3 4 5 6 7 8 9 0 ASSIGNED NUMBERS, LETTERS OR CHARACTERS 1> Space A > B> C > 2 D > E > F > 3 G > H > I > 4 J > K > L > 5 M > N > O > 6 P > Q and exit. Page 2-14 Xerox WorkCentre M15/M15i User Guide - Xerox M15I | WorkCentre M15/M15i User Guide - Page 39
faxing. The time and date are printed on all faxes sent. Follow the instructions below to set the date and time. 1 Ø Press [Menu/Exit], the first menu displays. WorkCentre M15i SYSTEM DATA [PAPER to save and exit. WorkCentre M15i 11-12-2002 15:00 Xerox WorkCentre M15/M15i User Guide Page 2-15 - Xerox M15I | WorkCentre M15/M15i User Guide - Page 40
and Windows will open it for you. Open: D:\XINSTALL.EXE OK Cancel Browse... Ø Follow the on-screen instructions to complete the software installation. Ø After installing the software reboot the PC. Ø For Windows 95/98 eject the CD after re-start. Page 2-16 Xerox WorkCentre M15/M15i User Guide - Xerox M15I | WorkCentre M15/M15i User Guide - Page 41
3 Product Overview Ø Overview of Features 3-2 Ø Machine Overview 3-4 Ø Control Panel Overview 3-7 Ø Overview of Modes 3-10 Ø Using Characters 3-11 Xerox WorkCentre M15/M15i User Guide Page 3-1 - Xerox M15I | WorkCentre M15/M15i User Guide - Page 42
/M15i can be connected to a PC for printing. Print drivers are provided and enable the following functions: Ø Image Quality adjustments Ø Image position adjustments Ø Reduction or enlargement of an image Ø Addition of standard or customized watermarks Page 3-2 Xerox WorkCentre M15/M15i User Guide - Xerox M15I | WorkCentre M15/M15i User Guide - Page 43
faxed via a telephone line. Functions such as speed dialing, delayed send and polling are available. There are also a number of fax reports available which provide users with information about items such as scheduled jobs, stored fax numbers and transmissions. Xerox WorkCentre M15/M15i User Guide - Xerox M15I | WorkCentre M15/M15i User Guide - Page 44
: Xerox WorkCentre M15 - Copier and Printer This configuration has copying and printing capabilities. A Document Cover is supplied as standard and an Automatic Document Feeder (ADF) can be purchased as an option. Xerox WorkCentre M15i - Copier, Printer, Fax and Scanner This configuration has copying - Xerox M15I | WorkCentre M15/M15i User Guide - Page 45
: Automatic Document Feeder Control Panel Document Guides Document Input Tray Document Collate Tray Paper Guides Bypass Tray Side Cover Scanner Module Paper Cassette Front Cover Release Latch NOTE: This picture represents a WorkCentre M15i. Xerox WorkCentre M15/M15i User Guide Page 3-5 - Xerox M15I | WorkCentre M15/M15i User Guide - Page 46
ADF Connector USB Connector Document Cover Document Glass Telephone Connections EXT. LINE Output Tray Paper Cassette AC Power Cord Connector Parallel Connector On/Off Switch Paper Exit Extension NOTE: This picture represents a WorkCentre M15i. Page 3-6 Xerox WorkCentre M15/M15i User Guide - Xerox M15I | WorkCentre M15/M15i User Guide - Page 47
and AutoFit features are also available. Use to adjust contrast level prior to copying, faxing or scanning. Use to select a paper supply source between Cassette and Bypass in Copy or Fax mode. Use to select the original type of original being scanned. Xerox WorkCentre M15/M15i User Guide Page 3-7 - Xerox M15I | WorkCentre M15/M15i User Guide - Page 48
the currently selected feature setting. • Scan Mode - Use to return to Standby mode. • Fax Mode - Use to clear an incorrect fax number. Press twice to clear all programmed settings and return to Standby mode. Illuminates when a system error occurs. Page 3-8 Xerox WorkCentre M15/M15i User Guide - Xerox M15I | WorkCentre M15/M15i User Guide - Page 49
a job. Use to stop an operation at any time. Any operation originating from the PC should be cancelled at the PC. Use to clear the copy quantity when entering a number, or clear the currently selected feature setting. Illuminates when a system error occurs. Xerox WorkCentre M15/M15i User Guide - Xerox M15I | WorkCentre M15/M15i User Guide - Page 50
Selected Scan The Scan mode is available on the WorkCentre M15i only. Use the Scan mode to scan images which can be stored and retrieved on a PC. When the machine is in Scan mode the standby screen displays Status WorkCentre M15i READY TO SCAN Page 3-10 Xerox WorkCentre M15/M15i User Guide - Xerox M15I | WorkCentre M15/M15i User Guide - Page 51
is printed on the same button, move the cursor by pressing , then press the button labeled with the letter required. The cursor moves to the right and the next letter appears in the display. Ø When all the letters have been entered, press [Enter]. Enter Xerox WorkCentre M15/M15i User Guide Page - Xerox M15I | WorkCentre M15/M15i User Guide - Page 52
] is pressed, all the characters are deleted. Inserting a Pause With some telephone systems an access code (9 for example) is required and a second dial tone is heard. In this instance a pause will appear in the display at the corresponding location. Page 3-12 Xerox WorkCentre M15/M15i User Guide - Xerox M15I | WorkCentre M15/M15i User Guide - Page 53
4 Copy Ø Copying Procedure 4-2 Ø Copy Features 4-6 Xerox WorkCentre M15/M15i User Guide Page 4-1 - Xerox M15I | WorkCentre M15/M15i User Guide - Page 54
used, select the Paper Type. Ø Press [Enter] to save the selection. Paper Supply Key Enter Key i When copying onto a paper size smaller than A4/Letter, the printed image may be offset and not reproduce correctly, even when Auto Fit is selected. . Page 4-2 Xerox WorkCentre M15/M15i User Guide - Xerox M15I | WorkCentre M15/M15i User Guide - Page 55
guides to just touch the edges of the originals. i Up to 30 sheets of 80 g/m2 (20lb bond) paper can be loaded. Weight ranges from 45 - 105 g/m2 (12.5 - 28lb). Sizes range from B5 to Legal (7" x 10" to 8.5" x 14" ). Refer to "Scanner and Copier cover. Xerox WorkCentre M15/M15i User Guide Page 4-3 - Xerox M15I | WorkCentre M15/M15i User Guide - Page 56
l The maximum copy quantity is 999. Enter the Quantity Ø Use the Numeric Keypad to enter the number of copies required. Ø If necessary, press [Clear/Clear All] to clear the current quantity and enter a new quantity. Numeric Keypad Clear/Clear All Key Page 4-4 Xerox WorkCentre M15/M15i User Guide - Xerox M15I | WorkCentre M15/M15i User Guide - Page 57
Copy 6 Press Start Ø Press [Start] to begin scanning. Ø If Collated is selected the originals have been scanned, use the key to select [NO] and press [Enter]. Printing commences and copies are delivered to the Output Tray. Navigation Keys Start Key Xerox WorkCentre M15/M15i User Guide Page 4-5 - Xerox M15I | WorkCentre M15/M15i User Guide - Page 58
Copy Paper Supply] to display the current setting. Ø Press [Paper Supply] repeatedly until the required setting displays. Ø Press [Enter] to save the selection. Ø If using the Bypass Tray, select the type of paper being loaded and press [Enter]. Page 4-6 Xerox WorkCentre M15/M15i User Guide - Xerox M15I | WorkCentre M15/M15i User Guide - Page 59
Copy Lighten/Darken l Use to adjust the contrast for a document containing faint or dark images and to reduce background. Manual There are 5 contrast settings available. Ø Press [Lighten/Darken] repeatedly until 'MANUAL again and completes the job. Xerox WorkCentre M15/M15i User Guide Page 4-7 - Xerox M15I | WorkCentre M15/M15i User Guide - Page 60
along Glass. Scan side 1 and when prompted, turn over the short edge of the paper. the original and select [YES] to scan side 2. Repeat the procedure until all originals have been scanned. Then use the key to select [NO] and press [Enter]. Page 4-8 Xerox WorkCentre M15/M15i User Guide - Xerox M15I | WorkCentre M15/M15i User Guide - Page 61
Use the following instructions to return the Copy feature selections back to the default settings: Ø Press [Clear/Clear All] twice. Ø When the machine has reset the Copy features, 'READY TO COPY' displays. WorkCentre M15 READY TO COPY 100% 001 Xerox WorkCentre M15/M15i User Guide Page 4-9 - Xerox M15I | WorkCentre M15/M15i User Guide - Page 62
Copy Page 4-10 Xerox WorkCentre M15/M15i User Guide - Xerox M15I | WorkCentre M15/M15i User Guide - Page 63
fv 5 Paper and Other Media Ø Loading Paper 5-2 Ø Media Specifications 5-8 Xerox WorkCentre M15/M15i User Guide Page 5-1 - Xerox M15I | WorkCentre M15/M15i User Guide - Page 64
can hold a maximum of 550 sheets of 80 g/m2 (20 lb) plain paper. i When copying onto a paper size smaller than A4/Letter, the printed image may be offset and not reproduce correctly, even when Auto Fit is selected. 1 Ø Pull open the paper cassette. Page 5-2 Xerox WorkCentre M15/M15i User Guide - Xerox M15I | WorkCentre M15/M15i User Guide - Page 65
, lift the rear guide out of the current position and into the required position. Rear Guide i The paper cassette can hold a maximum of 550 sheets of 80 g/m2 (20 lb) plain paper. LGL FOLIO A4 LTR 4 Ø Fan the paper and insert it into the cassette. Xerox WorkCentre M15/M15i User Guide Page 5-3 - Xerox M15I | WorkCentre M15/M15i User Guide - Page 66
6 Ø Position the side guide by squeezing the lever and sliding it toward the stack of paper, until it gently touches the side of the stack. Do not allow the guide to press against the edge of the paper tightly. Ø Close the paper cassette. Page 5-4 Xerox WorkCentre M15/M15i User Guide - Xerox M15I | WorkCentre M15/M15i User Guide - Page 67
"System Data Settings" on page 9-3 for further information. When copying onto a paper size smaller than A4/Letter, the printed image may be offset and not reproduce correctly, even when Auto Fit laid, without being touched by hands, on a flat surface. Xerox WorkCentre M15/M15i User Guide Page 5-5 - Xerox M15I | WorkCentre M15/M15i User Guide - Page 68
or fanning them back and forth. Straighten the edges on a level surface. 3 l Hold transparencies by the edges and avoid touching the print side. Ø Load the print material with the print side facing down and against the right edge of the tray. Page 5-6 Xerox WorkCentre M15/M15i User Guide - Xerox M15I | WorkCentre M15/M15i User Guide - Page 69
copying, press [Paper Supply] on the control panel until 'BYPASS' displays, then press [Enter]. Ø Select the 'PAPER TYPE' being loaded using the or navigation keys and press [Enter]. If printing, select the correct paper source from the software application. Xerox WorkCentre M15/M15i User Guide - Xerox M15I | WorkCentre M15/M15i User Guide - Page 70
10 NO 0 YES 10 NO 0 YES 10 NO 0 YES 30 NO 0 YES 30 NO 0 YES 10 NO 0 YES 10 NO 0 YES 10 i a. b. Depending on paper thickness, maximum capacity may be reduced. Feed one sheet at a time through the Bypass Tray if jams occur. Page 5-8 Xerox WorkCentre M15/M15i User Guide - Xerox M15I | WorkCentre M15/M15i User Guide - Page 71
-quality, laser printer grade paper in the WorkCentre M15/M15i. Ø Damaged, curled, or damp paper can cause jams and image quality problems. Follow these simple rules to store paper: - Store paper in dry conditions, away from extreme heat or cold, such as radiators or open windows. - During storage - Xerox M15I | WorkCentre M15/M15i User Guide - Page 72
instructions provided with the special paper are read and carried out. These guidelines provide important information regarding how to achieve the highest print quality with special papers. Ø It is recommended that special paper printing, which can cause paper jams Xerox WorkCentre M15/M15i User Guide - Xerox M15I | WorkCentre M15/M15i User Guide - Page 73
6 Fax (M15i Only) Ø Faxing Procedure 6-2 Ø Fax Features 6-6 Ø Advanced Fax Features 6-8 Ø Fax Job Management 6-11 Ø Dialing Methods 6-14 Ø Receiving a Fax 6-19 Ø Fax Reports 6-24 Xerox WorkCentre M15/M15i User Guide Page 6-1 - Xerox M15I | WorkCentre M15/M15i User Guide - Page 74
i Up to 30 sheets of 80 g/m2 (20lb bond) paper can be loaded. Weight ranges from 45 - 105 g/m2 (12.5 - 28lb). Sizes range from B5 to Legal (7" x 10" to 8.5" x 14" ). Refer to "Scanner and Copier Specifications" on page 12-5 for full ADF specifications. Page 6-2 Xerox WorkCentre M15/M15i User Guide - Xerox M15I | WorkCentre M15/M15i User Guide - Page 75
ADF or cover. l On completion of the job, ensure the ADF is closed. 2 Select the Copy/Fax/Scan key Ø Ensure 'FAX' displays. Ø If not, press the [Copy/Fax/Scan] key repeatedly until 'FAX MODE' displays and press [Enter]. Copy/Fax/Scan Key Enter Key Xerox WorkCentre M15/M15i User Guide Page 6-3 - Xerox M15I | WorkCentre M15/M15i User Guide - Page 76
, use the navigation keys to select the incorrect number and then press the correct number. Pressing the [Clear/Clear All] key will delete the entire fax number entered. Numeric Keypad Navigation Keys Clear/Clear All Key Page 6-4 Xerox WorkCentre M15/M15i User Guide - Xerox M15I | WorkCentre M15/M15i User Guide - Page 77
Fax (M15i Only) 5 Press Start Ø Press [Start] to begin scanning. Ø If scanning originals using the When all the originals have been scanned, use the key to select [NO] and press [Enter]. Faxing commences and the fax is sent. Navigation Keys Start Key Xerox WorkCentre M15/M15i User Guide Page 6-5 - Xerox M15I | WorkCentre M15/M15i User Guide - Page 78
This is available only if the remote machine also supports Super Fine resolution. Scan Options l If the fax. Ø Press [Scan Options] repeatedly to scroll through the choices. Ø When the correct setting displays, press [Enter] to save the selection. Page 6-6 Xerox WorkCentre M15/M15i User Guide - Xerox M15I | WorkCentre M15/M15i User Guide - Page 79
the Fax Features Use the following instructions to return the Fax feature selections back to the default settings: Ø Press [Clear/Clear All] twice. The LCD displays the date and time and FAX. WorkCentre M15i 11 - DEC - 2002 15:11 100% FAX Xerox WorkCentre M15/M15i User Guide Page 6-7 - Xerox M15I | WorkCentre M15/M15i User Guide - Page 80
PM for 12-hour format using the or keys. Press [Enter] to confirm the start time. The originals are scanned into memory and stored ready for transmission at the specified time. The display shows the memory % available and the number of pages scanned. Page 6-8 Xerox WorkCentre M15/M15i User Guide - Xerox M15I | WorkCentre M15/M15i User Guide - Page 81
the document in the Bulletin Board memory or 'OFF' to store the document in standard memory. Ø Press [Enter].The originals are scanned and stored in memory ready for polling. The display shows the memory % available and the number of pages stored. Xerox WorkCentre M15/M15i User Guide Page 6-9 - Xerox M15I | WorkCentre M15/M15i User Guide - Page 82
no poll code. Then press [Enter]. If an immediate poll is required, the machine dials the remote machine and retrieves the document. If a time has been set, the machine dials the remote machine at the specified time to retrieve the document. Page 6-10 Xerox WorkCentre M15/M15i User Guide - Xerox M15I | WorkCentre M15/M15i User Guide - Page 83
again. WorkCentre M15i PRESS [STOP] TO CANCEL WorkCentre M15i 11 - DEC - 2002 15:11 100% FAX i The machine can be set to print a Confirmation Report automatically after each transmission, refer to page "Fax Reports" on page 6-24 for details Xerox WorkCentre M15/M15i User Guide Page 6-11 - Xerox M15I | WorkCentre M15/M15i User Guide - Page 84
perform two functions simultaneously. Ø When the machine performs dual tasks, press [Job Status] to view the current status of the other operation. Each time [Job Status] is pressed, the status of the two operations displays alternately. Job Status Page 6-12 Xerox WorkCentre M15/M15i User Guide - Xerox M15I | WorkCentre M15/M15i User Guide - Page 85
Enter]. If cancelling an operation a confirmation message displays. If adding to an operation the total pages scanned and the number of pages added displays. WorkCentre M15i ARE YOU SURE? 1:YES 2:NO WorkCentre M15i TOTAL PAGES = 006 ADDED PAGES = 002 Xerox WorkCentre M15/M15i User Guide Page 6-13 - Xerox M15I | WorkCentre M15/M15i User Guide - Page 86
originals and ensure the LCD displays FAX. If not, press the [Copy/Fax/Scan] key until 'FAX MODE' displays and press [Enter]. Ø Use the Numeric Keypad to enter the telephone number of the remote fax machine. Ø Press [Start] or [Enter] to send the fax. Page 6-14 Xerox WorkCentre M15/M15i User Guide - Xerox M15I | WorkCentre M15/M15i User Guide - Page 87
and ensure the LCD displays FAX. If not, press the [Copy/Fax/Scan] key until 'FAX MODE' displays and press [Enter]. Ø Program the features required for the job. Ø Press [Speed Dial] and enter the 1 or 2 digit Speed Dial number. Ø Press [Enter]. Xerox WorkCentre M15/M15i User Guide Page 6-15 - Xerox M15I | WorkCentre M15/M15i User Guide - Page 88
FAX. If not, press the [Copy/Fax/Scan] key until 'FAX MODE' displays and press [Enter]. Ø Press [Menu/Exit]. 'SYSTEM DATA' displays. Ø Press or press [Enter]. until 'GROUP DIAL' displays, then Ø Press [Enter] to select 'NEW exit press [Menu/Exit]. Page 6-16 Xerox WorkCentre M15/M15i User Guide - Xerox M15I | WorkCentre M15/M15i User Guide - Page 89
To change the Group Name enter the new name using the Numeric Keypad then press Copy/Fax/Scan] key until 'FAX multiple MODE' displays and press [Enter]. recipients using Group Dial. Ø Program the features required for the job fax to each location. Xerox WorkCentre M15/M15i User Guide Page 6-17 - Xerox M15I | WorkCentre M15/M15i User Guide - Page 90
'FAX MODE' displays and press [Enter]. Ø Press [Redial/Pause] for 2 seconds. The Redial Memory in the machine retains the last 10 numbers dialled. Ø Press or until the required number displays and press [Enter]. The originals are scanned and faxed. Page 6-18 Xerox WorkCentre M15/M15i User Guide - Xerox M15I | WorkCentre M15/M15i User Guide - Page 91
ANS/FAX l In ANS/FAX mode if a fax tone is detected the machine automatically switches to FAX mode. Use this mode if connecting a telephone answering machine to the WorkCentre M15i. If the machine detects a fax tone, it automatically switches to FAX mode. Xerox WorkCentre M15/M15i User Guide Page - Xerox M15I | WorkCentre M15/M15i User Guide - Page 92
' displays, then press [Enter]. Ø Press or to select the required receive mode. Ø Press [Enter] to save the setting. Ø Press [Menu/Exit] to save and exit. WorkCentre M15i SYSTEM SETUP [RECEIVE MODE...] Page 6-20 Xerox WorkCentre M15/M15i User Guide - Xerox M15I | WorkCentre M15/M15i User Guide - Page 93
Key WorkCentre M15i SYSTEM DATA [PAPER SIZE...] 3 Ø Press or until 'SYSTEM SETUP' displays, then press [Enter]. WorkCentre M15i SYSTEM SETUP [RECEIVE MODE...] 4 Ø Press or until 'SECURE RECEIVE' displays. WorkCentre M15i SECURE RECEIVE [OFF...] Xerox WorkCentre M15/M15i User Guide Page - Xerox M15I | WorkCentre M15/M15i User Guide - Page 94
until 'FAX MODE' displays and press [Enter]. WorkCentre M15i SECURE RECEIVE [ON...] WorkCentre M15i ENTER PASSCODE [_ _ _ _] 2 Ø Press [Menu/Exit]. 'SYSTEM DATA' displays. Copy/Fax/Scan Key Enter Key WorkCentre M15i SYSTEM DATA [PAPER SIZE...] Page 6-22 Xerox WorkCentre M15/M15i User Guide - Xerox M15I | WorkCentre M15/M15i User Guide - Page 95
to select PRINT and press [Enter]. Ø If required, enter the 4 digit passcode and press [Enter]. The faxes are printed. WorkCentre M15i SYSTEM SETUP [RECEIVE MODE...] WorkCentre M15i SECURE RECEIVE [OFF...] WorkCentre M15i SECURE RECEIVE [PRINT...] Xerox WorkCentre M15/M15i User Guide Page 6-23 - Xerox M15I | WorkCentre M15/M15i User Guide - Page 96
to more than one location. Printing a Report Ø Press [Reports]. 'MSG. CONFIRM' displays. Ø Press [Reports] repeatedly until the required report displays, then press [Enter]. The select report is printed. WorkCentre M15i REPORTS [MSG. CONFIRM] Page 6-24 Xerox WorkCentre M15/M15i User Guide - Xerox M15I | WorkCentre M15/M15i User Guide - Page 97
7 Print Ø Printing Procedure 7-2 Ø Printing Options 7-4 Xerox WorkCentre M15/M15i User Guide Page 7-1 - Xerox M15I | WorkCentre M15/M15i User Guide - Page 98
. Printer Driver software must be loaded on the PC to enable printing. The WorkCentre M15/M15i should be powered on and paper loaded in one of the paper trays. 1 Create or Open the Document Ø Open the application required for the document. Ø Select an existing document or create a new document - Xerox M15I | WorkCentre M15/M15i User Guide - Page 99
Print l For information on the Printer Settings available, refer to page "Printing Options" on page 7-4. 3 Select OK to Print Ø To accept the programming selections and send the job to Print, select [OK]. The job is sent to the WorkCentre M15/M15i for printing. Xerox WorkCentre M15/M15i User Guide - Xerox M15I | WorkCentre M15/M15i User Guide - Page 100
software applications allow changes to be made to the printer settings prior to printing. This includes options such as paper size, paper orientation and margin settings. Selections made in the application usually override settings selected in the printer driver. Page 7-4 Xerox WorkCentre M15/M15i - Xerox M15I | WorkCentre M15/M15i User Guide - Page 101
Windows 2000/XP Ø Select the File > Print or File > Page Setup command from within any Windows application. Or Ø Select the Xerox WorkCentre printer from the Printers folder, click the right mouse button, then select Printing Preferences from the drop-down list. Xerox WorkCentre M15/M15i User Guide - Xerox M15I | WorkCentre M15/M15i User Guide - Page 102
the Printers folder, any settings made will become the default settings for the printer. Settings made when the Printer Properties are accessed through an application File menu and Print or Page Setup will remain active until the application being used is closed. Page 7-6 Xerox WorkCentre M15/M15i - Xerox M15I | WorkCentre M15/M15i User Guide - Page 103
displayed printer driver screen. If the tip of the mouse pointer is rested on top of a control, Microsoft Windows will display a brief Help Tip about that control. If the right mouse button selects a control, the Help system provides more detailed information. Xerox WorkCentre M15/M15i User Guide - Xerox M15I | WorkCentre M15/M15i User Guide - Page 104
Print Page 7-8 Xerox WorkCentre M15/M15i User Guide - Xerox M15I | WorkCentre M15/M15i User Guide - Page 105
8 Scan (M15i Only) Ø TWAIN Scanner Program 8-2 Ø Scanning Procedure 8-3 Xerox WorkCentre M15/M15i User Guide Page 8-1 - Xerox M15I | WorkCentre M15/M15i User Guide - Page 106
instructions, please refer to "Installing Software" on page 2-16. The TWAIN Scanner settings are fully described in the TWAIN Driver Help program. An alternative method for color scanning is to use PaperPort. PaperPort is an advanced software program that is provided with the WorkCentre M15i - Xerox M15I | WorkCentre M15/M15i User Guide - Page 107
i Up to 30 sheets of 80 g/m2 (20lb bond) paper can be loaded. Weight ranges from 45 - 105 g/m2 (12.5 - 28lb). Sizes range from B5 to Legal (7" x 10" to 8.5" x 14" ). Refer to "Scanner and Copier Specifications" on page 12-5 for full ADF specifications. Xerox WorkCentre M15/M15i User Guide Page 8-3 - Xerox M15I | WorkCentre M15/M15i User Guide - Page 108
to scan the document and retrieve it at the PC. i When using Paperport software to scan your job, the application will create a separate file for each scanned page of the job. These separate pages can then be merged within the Paperport application. Page 8-4 Xerox WorkCentre M15/M15i User Guide - Xerox M15I | WorkCentre M15/M15i User Guide - Page 109
(M15i only) . . . 9-8 Ø Setting the Local ID and Name (M15i Only) . . . . . 9-9 Ø Setting the Date and Time (M15i Only 9-11 Ø System Setup Options 9-12 Ø Memory Clear 9-16 Ø Adjusting Speaker Volume (M15i Only 9-17 Ø Reports 9-18 Ø ControlCentre 5.0 9-20 Xerox WorkCentre M15/M15i User Guide - Xerox M15I | WorkCentre M15/M15i User Guide - Page 110
following menus contain settings available for customizing: Ø System Data Ø System Setup The machine can also be customised remotely at a PC or workstation using ControlCentre 5.0. Page 9-2 Xerox WorkCentre M15/M15i User Guide - Xerox M15I | WorkCentre M15/M15i User Guide - Page 111
and fax tones can be heard, enter the Rcv Code and press [Start]. Use to set the length of time the machine remains idle before switching to reduced power. Use to switch off the Power Save feature. The machine remains ready with a minimum warm-up time. Xerox WorkCentre M15/M15i User Guide Page - Xerox M15I | WorkCentre M15/M15i User Guide - Page 112
0 - 30mm (1.2") Intervals from 1 to 15 minutes can be entered. Redial attempts can be entered from 0 to 9. Between 1 and 7 rings can be set. With this option it is not necessary to wait until documents are sent before sending or storing other fax jobs. Page 9-4 Xerox WorkCentre M15/M15i User Guide - Xerox M15I | WorkCentre M15/M15i User Guide - Page 113
ON OFF 12 HOUR 24 HOUR DESCRIPTION Set to ON to enable the page number and date and time of reception to be printed on each page of each received transmission. The machine can be configured to display time using either a 12-hour or 24-hour format. Xerox WorkCentre M15/M15i User Guide Page 9-5 - Xerox M15I | WorkCentre M15/M15i User Guide - Page 114
entry is required, use the Numeric Keypad to enter the setting data. Ø Press [Enter]. Ø Press [Menu/Exit] to save and exit. WorkCentre M15i SYSTEM DATA [PAPER SIZE...] WorkCentre M15i SYSTEM DATA [MESSAGE CONF.] WorkCentre M15i MESSAGE CONF. [1: ON] Page 9-6 Xerox WorkCentre M15/M15i User Guide - Xerox M15I | WorkCentre M15/M15i User Guide - Page 115
/Exit], the first menu displays. WorkCentre M15 SYSTEM DATA [PAPER SIZE...] 2 Ø Scroll to 'SELECT LANGUAGE' using the key. Ø Using the or navigation keys select the language required. Ø Press [Enter]. WorkCentre M15 SELECT LANGUAGE [ENGLISH] Xerox WorkCentre M15/M15i User Guide Page 9-7 - Xerox M15I | WorkCentre M15/M15i User Guide - Page 116
selected, choose the required option and press [Enter]. Ø If necessary, press [Menu/Exit] [Menu/Exit] to save and exit. WorkCentre M15i SELECT LANGUAGE [ENGLISH] WorkCentre M15i SELECT COUNTRY? 1: YES 2: NO WorkCentre M15i SELECT COUNTRY [ UK ] Page 9-8 Xerox WorkCentre M15/M15i User Guide - Xerox M15I | WorkCentre M15/M15i User Guide - Page 117
Ø Enter the fax telephone number. If a number has already been entered it is displayed. Press [Clear/Clear All] to delete the current entry and enter the correct number. Ø Press [Enter] when the correct telephone number displays. WorkCentre M15i FAX: Xerox WorkCentre M15/M15i User Guide Page 9-9 - Xerox M15I | WorkCentre M15/M15i User Guide - Page 118
the ID. Ø Enter a name or company name using the numeric keypad. WorkCentre M15i ID: : KEY 1 2 3 4 5 6 7 8 9 0 ASSIGNED NUMBERS, LETTERS OR CHARACTERS 1> Space A > B> C > 2 D > E > F > 3 G > H > I > 4 J > K > L > 5 M > N > O > 6 P > Q and exit. Page 9-10 Xerox WorkCentre M15/M15i User Guide - Xerox M15I | WorkCentre M15/M15i User Guide - Page 119
faxing. The time and date are printed on all faxes sent. Follow the instructions below to set the date and time. 1 Ø Press [Menu/Exit], the first menu displays. WorkCentre M15i SYSTEM DATA [PAPER to save and exit. WorkCentre M15i 11-12-2002 15:00 Xerox WorkCentre M15/M15i User Guide Page 9-11 - Xerox M15I | WorkCentre M15/M15i User Guide - Page 120
required. The number entered will be added to the beginning of each fax sent. To switch the ringer off, set to the left. Set to the right for a loud ring tone. Set to ON to enable an alarm sound. ON OFF Set to ON to enable a key sound. Page 9-12 Xerox WorkCentre M15/M15i User Guide - Xerox M15I | WorkCentre M15/M15i User Guide - Page 121
, or select IMAGE if the machine is used for copying documents containing shading or color. Orientation l Use to set the default orientation. PORTRAIT LANDSCAPE Set PORTRAIT for Long Edge Feed documents and LANDSCAPE for Short Edge Feed documents. Xerox WorkCentre M15/M15i User Guide Page 9-13 - Xerox M15I | WorkCentre M15/M15i User Guide - Page 122
Machine Administration Timeout l Use to set the period of time before the machine returns to standby mode. 0, 30, 60, 120, 300 Sets the number of seconds the machine remains idle before returning to standby mode. Page 9-14 Xerox WorkCentre M15/M15i User Guide - Xerox M15I | WorkCentre M15/M15i User Guide - Page 123
the option. Ø If a alphanumerical entry is required, use the Numeric Keypad to enter the setting data. Ø Press [Enter]. Ø Press [Menu/Exit] to save and exit. Xerox WorkCentre M15/M15i User Guide WorkCentre M15 RECEIVE MODE [TEL / FAX] Page 9-15 - Xerox M15I | WorkCentre M15/M15i User Guide - Page 124
's memory can be cleared: SYSTEM ID The fax number and name are cleared from the machine's Job Operations reserved are also canceled. TX-RX Clears all records of transmissions and receptions. JOURNAL Clearing the Memory Use the following instructions 9-16 Xerox WorkCentre M15/M15i User Guide - Xerox M15I | WorkCentre M15/M15i User Guide - Page 125
M15i Only) 1 Ø Ensure 'FAX' displays. Ø If not, press the [Copy/Fax/Scan] key repeatedly until 'FAX MODE' displays and press [Enter]. 2 Ø Press [Manual to Standby mode. Copy/Fax/Scan Key Enter Key WorkCentre M15i VOLUME L [ _ _ g _ _ _ _ ] H Xerox WorkCentre M15/M15i User Guide Page 9-17 - Xerox M15I | WorkCentre M15/M15i User Guide - Page 126
automatically after sending documents to more than one location. Communication Report Power Failure This report is printed out automatically when power is restored after a power failure occurs and Report there is data loss due to the power failure. Page 9-18 Xerox WorkCentre M15/M15i User Guide - Xerox M15I | WorkCentre M15/M15i User Guide - Page 127
the first menu; MSG. CONFIRM. 2 Ø Press [Reports] repeatedly until the report required for printing displays, then press [Enter]. The selected report will be printed. WorkCentre M15 REPORTS [MSG. CONFIRM] WorkCentre M15 REPORTS [MSG. CONFIRM] Xerox WorkCentre M15/M15i User Guide Page 9-19 - Xerox M15I | WorkCentre M15/M15i User Guide - Page 128
Xerox WorkCentre M15/M15i ControlCentre 5.0 utility is installed automatically. l For information on installing WorkCentre M15/ M15i software, please refer to "Installing Software" on page 2-16. Running ControlCentre 5.0 Use the following instructions to run ControlCentre 5.0: Ø Start the Windows - Xerox M15I | WorkCentre M15/M15i User Guide - Page 129
run, the settings on the machine and on ControlCentre 5.0 will be automatically updated to the latest settings made either on the machine or on ControlCentre 5.0. Xerox WorkCentre M15/M15i User Guide Page 9-21 - Xerox M15I | WorkCentre M15/M15i User Guide - Page 130
Fax System Data settings. Reads the current settings in the WorkCentre M15/M15i machine then refreshes ControlCentre 5.0 with the machine's current setting. Downloads the settings made in ControlCentre 5.0 to the WorkCentre M15/ M15i machine. Page 9-22 Xerox WorkCentre M15/M15i User Guide - Xerox M15I | WorkCentre M15/M15i User Guide - Page 131
Machine Administration Advanced Tab l For details on the System Setup options, please refer to "System Setup Options" on page 9-12. Click on the [Advanced] tab to change the default Fax System Setup options. Xerox WorkCentre M15/M15i User Guide Page 9-23 - Xerox M15I | WorkCentre M15/M15i User Guide - Page 132
phonebook entry to be edited in a separate Edit dialog box Deletes a selected phonebook entry Allows the phonebook entries to be downloaded from ControlCentre 5.0 to the WorkCentre M15/ M15i machine Phonebook entries Deletes all phonebook entries Page 9-24 Xerox WorkCentre M15/M15i User Guide - Xerox M15I | WorkCentre M15/M15i User Guide - Page 133
and how many jams have occurred on the machine. Number of scans using the Document Glass Number of prints performed by the machine Number of jams in the ADF Number of scans using the ADF Number of prints using the drum Number of jams during printing Xerox WorkCentre M15/M15i User Guide Page 9-25 - Xerox M15I | WorkCentre M15/M15i User Guide - Page 134
Firmware Update Tab Click on the [Firmware Update] tab to update the firmware of the machine. l This feature should be used by an Xerox Service Representative. Please contact the local Xerox representative or authorized dealer for further information. Page 9-26 Xerox WorkCentre M15/M15i User Guide - Xerox M15I | WorkCentre M15/M15i User Guide - Page 135
10 Maintenance Ø Cleaning 10-2 Ø Ordering Supplies 10-4 Ø Customer Replaceable Units 10-5 Xerox WorkCentre M15/M15i User Guide Page 10-1 - Xerox M15I | WorkCentre M15/M15i User Guide - Page 136
towel with water. Ø Open the ADF or document cover. Ø Wipe the surface of the Document Glass and CVT glass until they are clean and dry. Ø Wipe the underside of the white document cover until it is clean and dry. Ø Close the ADF or document cover. Page 10-2 Xerox WorkCentre M15/M15i User Guide - Xerox M15I | WorkCentre M15/M15i User Guide - Page 137
keeps the Control Panel and LCD free from dust and dirt. To remove finger prints and smudges, clean the Control Panel and LCD screen with a soft, Automatic Document Feeder, Collate Tray, Paper Cassette and the outside areas of the WorkCentre M15/M15i. Xerox WorkCentre M15/M15i User Guide Page 10-3 - Xerox M15I | WorkCentre M15/M15i User Guide - Page 138
Drum Cartridge 113R00663 113R00663 To obtain supplies, contact the local Xerox office, giving the company name, the product number and its serial number. Use the space below to keep a record of the telephone number. Supplies Telephone Number: Page 10-4 Xerox WorkCentre M15/M15i User Guide - Xerox M15I | WorkCentre M15/M15i User Guide - Page 139
, remove the toner cartridge and gently shake it to temporarily re-establish the print quality. Shaking the cartridge re-distributes the remaining toner in the cartridge. This procedure can only be performed once prior to changing the Toner Cartridge. Xerox WorkCentre M15/M15i User Guide Page - Xerox M15I | WorkCentre M15/M15i User Guide - Page 140
Maintenance 1 Ø Pull the release latch to open the side cover. 2 Ø Open the front cover. 3 Ø Turn the toner locking lever upwards to release the toner cartridge. Ø Remove the toner cartridge from the machine. Page 10-6 Xerox WorkCentre M15/M15i User Guide - Xerox M15I | WorkCentre M15/M15i User Guide - Page 141
Turn the toner locking lever downwards until it locks in place. Ø Close the front cover, then the side cover. Ø The LCD displays 'NEW TONER? 1. YES 2. NO'. Using the navigation keys select '1. YES' and press [Enter]. The product returns to Standby mode. Xerox WorkCentre M15/M15i User Guide Page - Xerox M15I | WorkCentre M15/M15i User Guide - Page 142
notification fax message, then press [Enter]. Ø Enter the Serial Number of the product, then press [Enter]. l The product serial number is located on the machine, behind the front door. Refer to "Customer Support" on page 1-5 for further information. Page 10-8 Xerox WorkCentre M15/M15i User Guide - Xerox M15I | WorkCentre M15/M15i User Guide - Page 143
life of a drum. The LCD displays 'DRUM WARNING' when the drum is near the end of life. Approximately 1,000 more copies can be made, but a replacement cartridge in should be available. Replace the drum cartridge when copy/print quality becomes degraded. Xerox WorkCentre M15/M15i User Guide Page 10 - Xerox M15I | WorkCentre M15/M15i User Guide - Page 144
open to open the front cover. 2 Ø Turn the toner locking lever upwards to unlock the toner cartridge, then pull the toner cartridge out. l The toner cartridge must be removed to replace the drum cartridge. 3 Ø Pull out the used drum cartridge. Page 10-10 Xerox WorkCentre M15/M15i User Guide - Xerox M15I | WorkCentre M15/M15i User Guide - Page 145
Maintenance 4 Ø Unpack the new drum cartridge and slide it in place, making sure not to touch the surface of the drum. 5 Ø Reinstall the toner cartridge, then lock the lever. Ø Close the front cover and the side cover. Xerox WorkCentre M15/M15i User Guide Page 10-11 - Xerox M15I | WorkCentre M15/M15i User Guide - Page 146
counter is not reset, 'Drum Warning' may appear before the new drum reaches its maximum life. WorkCentre M15 NEW DRUM? 1: YES 2:NO WorkCentre M15 MAINTENANCE [SYSTEM...] WorkCentre M15 MAINTENANCE [NEW DRUM] WorkCentre M15 NEW DRUM UNIT? 1: YES 2:NO Page 10-12 Xerox WorkCentre M15/M15i User Guide - Xerox M15I | WorkCentre M15/M15i User Guide - Page 147
11 Troubleshooting Ø General 11-2 Ø Fault Clearance 11-3 Ø Calling the Welcome Center 11-12 Ø LCD Error Messages 11-13 Ø Resetting the Machine 11-21 Xerox WorkCentre M15/M15i User Guide Page 11-1 - Xerox M15I | WorkCentre M15/M15i User Guide - Page 148
routine maintenance schedules for cleaning areas such as the Document Glass and Control Panel. Ø Always set the guides in the paper trays to the size of the media in the tray. Ø Ensure paper clips and paper debris do not contaminate the machine. Page 11-2 Xerox WorkCentre M15/M15i User Guide - Xerox M15I | WorkCentre M15/M15i User Guide - Page 149
for clearing the three types of document misfeeds are given below. Input Misfeed 1 Ø Open the ADF top cover. 2 Ø Pull the document gently to the right and out of the ADF. Ø Close the ADF top cover. Ø Feed the documents back into the ADF. Xerox WorkCentre M15/M15i User Guide Page 11-3 - Xerox M15I | WorkCentre M15/M15i User Guide - Page 150
cover and turn the roller knob to remove the misfeed document from the ADF or the exit area. If the document is difficult to remove, gently remove it from under the feeding roller. Ø Close the document cover. Ø Feed the documents back into the ADF. Page 11-4 Xerox WorkCentre M15/M15i User Guide - Xerox M15I | WorkCentre M15/M15i User Guide - Page 151
front part of the cassette slightly up to release the cassette from the machine. Ø Remove the jammed paper by gently pulling it straight out. If there is any resistance, and the paper does not move immediately when pulled, stop pulling and go to the next step. Xerox WorkCentre M15/M15i User Guide - Xerox M15I | WorkCentre M15/M15i User Guide - Page 152
will result in poor copy quality Ø Carefully remove the misfeed paper in the direction shown. Ø Insert the paper cassette. Lower the rear part of the cassette to align the rear edge to the corresponding slot of the machine, then insert it completely. Page 11-6 Xerox WorkCentre M15/M15i User Guide - Xerox M15I | WorkCentre M15/M15i User Guide - Page 153
on the paper. Ø If paper is not seen in this area, skip to the Exit Area. CAUTION: Do not pull paper up through the fusing unit. Unfused toner may adhere in the area, resulting in smudged copies. Ø Remove the jammed paper, in the direction shown. Xerox WorkCentre M15/M15i User Guide Page 11 - Xerox M15I | WorkCentre M15/M15i User Guide - Page 154
Troubleshooting Ø Push up on the fuser lever, then close the side cover. Page 11-8 Xerox WorkCentre M15/M15i User Guide - Xerox M15I | WorkCentre M15/M15i User Guide - Page 155
Troubleshooting Paper Exit Area If jammed in the paper exit area, 'PAPER JAM 2' appears in the display. Ø Press the release latch to open the side cover. Ø Open the front cover. Ø Pull down on the fuser lever. This will release pressure on the paper. Xerox WorkCentre M15/M15i User Guide Page 11-9 - Xerox M15I | WorkCentre M15/M15i User Guide - Page 156
Troubleshooting Ø Turn the jam remove lever in the direction of the arrow to move the paper to the exit area, then gently pull the paper out through the exit area. Ø Push up on the fuser lever. Ø Turn the jam remove lever back to the original position. Page 11-10 Xerox WorkCentre M15/M15i User - Xerox M15I | WorkCentre M15/M15i User Guide - Page 157
when using the bypass tray. 'BYPASS JAM' also may occur when the paper is not properly fed into the machine through the bypass tray. Ø If 'BYPASS JAM' displays and paper is loaded in the Bypass Tray, pull the paper out of the machine and re-load. Xerox WorkCentre M15/M15i User Guide Page 11-11 - Xerox M15I | WorkCentre M15/M15i User Guide - Page 158
with any relevant error codes l For information on locating the serial number, please refer to "Customer Support" on page 1-5. Customer Support Telephone Number The Xerox Welcome Center or local representative telephone number is provided when the WorkCentre M15/M15i is installed. For convenience - Xerox M15I | WorkCentre M15/M15i User Guide - Page 159
for service. No Developer Cartridge The toner cartridge is not installed. Install the toner cartridge. Refer to "Toner Cartridge" on page 10-5. No Paper The recording paper in the paper cassette has run out. Load the recording paper in the paper cassette. Xerox WorkCentre M15/M15i User Guide - Xerox M15I | WorkCentre M15/M15i User Guide - Page 160
becomes available. The transmission can also be split into more than one operation if it is a large job. The remote machine was not Try resending the fax. Ensure the answered after all the redial attempts. remote machine is functioning correctly. Page 11-14 Xerox WorkCentre M15/M15i User Guide - Xerox M15I | WorkCentre M15/M15i User Guide - Page 161
cover. If the problem still persists, clean the Drum Cartridge. Refer to "Cleaning the Drum" on page 10-9. Copy image is skewed Ensure that original is positioned correctly on the Document Glass. Check that copy paper is loaded correctly. Xerox WorkCentre M15/M15i User Guide Page 11-15 - Xerox M15I | WorkCentre M15/M15i User Guide - Page 162
on the left side of the cartridge. Originals contain pictures, solids, or heavy lines. Originals are forms, newsletters, books etc. The product is being powered on and off frequently. The document cover is being left open while copies are being made. Page 11-16 Xerox WorkCentre M15/M15i User Guide - Xerox M15I | WorkCentre M15/M15i User Guide - Page 163
to ensure that the print job is being sent to the correct port. (For Example: LPT1.) The toner and drum cartridges are not installed properly. Check that the toner and drum cartridges are installed properly. The printer driver may not be installed properly. Reinstall the software. The parallel - Xerox M15I | WorkCentre M15/M15i User Guide - Page 164
have overlapping seams on the reverse side. Missing characters The paper may be too damp. Try printing with a different batch of paper. Do not open packages of paper until necessary so that the paper does not absorb too much moisture from the air. Page 11-18 Xerox WorkCentre M15/M15i User Guide - Xerox M15I | WorkCentre M15/M15i User Guide - Page 165
the power plug has not been unplugged from the power outlet. Check with the party trying to send the original that there are no problems with the remote fax. Paper is not collated Ensure the machine has paper loaded. Check if a paper jam has occurred. Xerox WorkCentre M15/M15i User Guide Page - Xerox M15I | WorkCentre M15/M15i User Guide - Page 166
, clean the drum using the instructions "Cleaning the Drum" on page 10-9. Paper is collated but not printed. Ensure there enough toner. Check with the party sending the fax that the original was placed correctly when scanned at the remote FAX. Page 11-20 Xerox WorkCentre M15/M15i User Guide - Xerox M15I | WorkCentre M15/M15i User Guide - Page 167
or the machine locks up a reset may be required. Use the following instructions to reset and reboot the machine: Ø Press the [Clear/Clear All] key. Ø Press the navigation key. Ø Press the [Clear/Clear All] key again. Ø Press the navigation key. Xerox WorkCentre M15/M15i User Guide Page 11-21 - Xerox M15I | WorkCentre M15/M15i User Guide - Page 168
Troubleshooting Page 11-22 Xerox WorkCentre M15/M15i User Guide - Xerox M15I | WorkCentre M15/M15i User Guide - Page 169
12 Specifications Ø Introduction 12-2 Ø Printer Specifications 12-3 Ø Fax Specifications 12-4 Ø Scanner and Copier Specifications 12-5 Ø General Specifications 12-6 Ø Media Specifications 12-7 Xerox WorkCentre M15/M15i User Guide Page 12-1 - Xerox M15I | WorkCentre M15/M15i User Guide - Page 170
Specifications Introduction The WorkCentre M15/M15i adheres to strict specifications, approvals and certifications. These specifications are the machine. l If further specification information is required please contact the Xerox Representative. Page 12-2 Xerox WorkCentre M15/M15i User Guide - Xerox M15I | WorkCentre M15/M15i User Guide - Page 171
speed Effective printing width First print out time DESCRIPTION PCL6 True 600 x 600 dpi, 1200 dpi class 15 ppm for A4 / 16 ppm for Letter 208 mm (8.2 inches) for letter / legal (216 x 356 mm / 8.5 x 14 inch) 202 mm (8 inches) for A4 13 seconds (warm up) Xerox WorkCentre M15/M15i User Guide Page - Xerox M15I | WorkCentre M15/M15i User Guide - Page 172
Fax Specifications ITEM Applicable line Compatibility Resolution Data coding Maximum modem speed Transmission speed Memory Printing speed Effective scanning width Effective printing width Document width and weight Input paper (20 lb) Platen: 1 page Page 12-4 Xerox WorkCentre M15/M15i User Guide - Xerox M15I | WorkCentre M15/M15i User Guide - Page 173
Scanner and Copier Specifications ITEM Scanning method Copy speed Scan speed Scan resolution Scan mode Copy mode Effective scanning width Maximum document width Multi copy range Reduction & Enlargement Maximum print Bottom, Each side 4 mm (0.16 inch) Xerox WorkCentre M15/M15i User Guide Page 12-5 - Xerox M15I | WorkCentre M15/M15i User Guide - Page 174
g/m2 (20 lb) AC220 ~ 240V (Europe), 50/60 Hz AC100 ~ 127V (US, Canada), 50/60 Hz 19 W in Power save mode 85 W in Standby mode 350 W during operation 22. 85 kg / 50.37 lb (Drum and Toner Cartridges included) 560 x 429 x 456 mm (22 x 17 x 18 inches) Page 12-6 Xerox WorkCentre M15/M15i User Guide - Xerox M15I | WorkCentre M15/M15i User Guide - Page 175
) 8.5 x 11 8.5 X 14 7.17 x 10.12 8.27 x 11.69 7.25 x 10.5 5.85 x 8.27 4.13 x 5.85 4 x 6 3.94 x 5.83 3.88 x 7.5 4.12 x 9.5 4.33 x 8.66 6.38 x 9.02 3.86 x 5.83 ~ 8.5 x 14 Xerox WorkCentre M15/M15i User Guide Page 12-7 - Xerox M15I | WorkCentre M15/M15i User Guide - Page 176
, (16lb ~ 43lb) B5, A6, Monarch (7 Label, Cardstock 3/4), COM10, #9, C5, DL, Custom Duplex Plain Paper A4, Letter, Folio, Legal 80 ~ 90 g/m2 (20lb ~ 24lb) i B5 means JIS and ISO Transparency film thickness: 150 µm Paper Label thickness: 140 µm Page 12-8 Xerox WorkCentre M15/M15i User Guide - Xerox M15I | WorkCentre M15/M15i User Guide - Page 177
4-7 Original Type 4-6 Paper Supply 4-6 Reduce/Enlarge 4-7 start 4-5 Copy Features 4-6 Copy quantity 4-4 Copying Procedure 4-2 Counters Information 9-25 Customer Replaceable Units 10-5 Drum Cartridge 10-9 Toner Cartridge 10-5 Customer support 1-5 Xerox WorkCentre M15/M15i User Guide Page Index-1 - Xerox M15I | WorkCentre M15/M15i User Guide - Page 178
Tab 9-25 Inserting a Pause 3-12 Installing ControlCentre 5.0 9-20 Installing Drum and Toner Cartridges 2-6 Installing Software 2-16 Introduction 1-2 K Keypad Character Assignment 3-12 Keypad Dialing 6-14 L Laser Safety 1-10 LCD Error Messages 11-13 Page Index-2 Xerox WorkCentre M15/M15i User Guide - Xerox M15I | WorkCentre M15/M15i User Guide - Page 179
7-2 Printing Reports 9-18, 9-19 Priority Send 6-9 Problem Solving 11-15 Problems Fault Clearance 11-3 General 11-2 Properties Tabs 7-6 Q Quantity 4-4 R Rebooting the Machine 11-21 Receive Modes 6-19 Reception Journal 9-18 Redial 6-18 Reduce/Enlarge Xerox WorkCentre M15/M15i User Guide Page - Xerox M15I | WorkCentre M15/M15i User Guide - Page 180
Machine Troubleshooting ControlCentre 5.0 9-20 Copier Problems Solution Chart 11-15 Installing ControlCentre 5.0 9-20 Fault Clearance 11-3 System Data Options 9-3 Faxing Problems Solution Chart 11-19 Settings Tab 9-22 General Problems 11-2 Page Index-4 Xerox WorkCentre M15/M15i User Guide - Xerox M15I | WorkCentre M15/M15i User Guide - Page 181
Index LCD Error Messages 11-13 Printing Problems Solution Chart 11-17 Resetting the machine 11-21 Solving Problems 11-15 TX Poll 6-9 TX-RX JOURNAL 9- 1-5 US 1-5 Windows 2000/XP 7-5 Windows 95/98/Me 7-5 Windows NT 4.0 7-5 X Xerox Welcome Center 1-5 Xerox WorkCentre M15/M15i User Guide Page Index-5
-
 1
1 -
 2
2 -
 3
3 -
 4
4 -
 5
5 -
 6
6 -
 7
7 -
8
-
9
-
10
-
11
-
12
-
13
-
14
-
15
-
16
-
17
-
18
-
19
-
20
-
21
-
22
-
23
-
24
-
25
-
26
-
27
-
28
-
29
-
30
-
31
-
32
-
33
-
34
-
35
-
36
-
37
-
38
-
39
-
40
-
41
-
42
-
43
-
44
-
45
-
46
-
47
-
48
-
49
-
50
-
51
-
52
-
53
-
54
-
55
-
56
-
57
-
58
-
59
-
60
-
61
-
62
-
63
-
64
-
65
-
66
-
67
-
68
-
69
-
70
-
71
-
72
-
73
-
74
-
75
-
76
-
77
-
78
-
79
-
80
-
81
-
82
-
83
-
84
-
85
-
86
-
87
-
88
-
89
-
90
-
91
-
92
-
93
-
94
-
95
-
96
-
97
-
98
-
99
-
100
-
101
-
102
-
103
-
104
-
105
-
106
-
107
-
108
-
109
-
110
-
111
-
112
-
113
-
114
-
115
-
116
-
117
-
118
-
119
-
120
-
121
-
122
-
123
-
124
-
125
-
126
-
127
-
128
-
129
-
130
-
131
-
132
-
133
-
134
-
135
-
136
-
137
-
138
-
139
-
140
-
141
-
142
-
143
-
144
-
145
-
146
-
147
-
148
-
149
-
150
-
151
-
152
-
153
-
154
-
155
-
156
-
157
-
158
-
159
-
160
-
161
-
162
-
163
-
164
-
165
-
166
-
167
-
168
-
169
-
170
-
171
-
172
-
173
-
174
-
175
-
176
-
177
-
178
-
179
-
180
-
181
 |
 |
WorkCentre M15/M15i
User Guide
604P13220