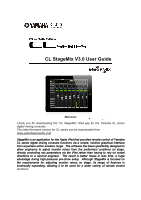
Yamaha CL3 Cl Stagemix V3.0 User Guide - Page 6
StageMix Setup - console
 |
View all Yamaha CL3 manuals
Add to My Manuals
Save this manual to your list of manuals |
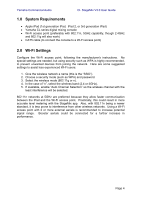
Page 6 highlights
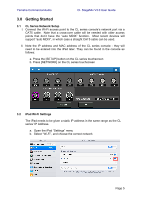
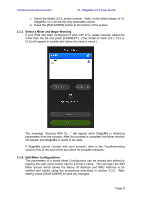
Yamaha Commercial Audio CL StageMix V3.0 User Guide c. Press the blue circle with the white arrow to the right of the selected network to edit the IP address. d. Select [Static]. e. IP Address: enter an IP Address similar to the one for the CL series console, but with just the last number different. (For example, if CL series console is 192.168.0.128, give an address to the iPad such as 192.168.0.127). f. Subnet Mask: enter "255.255.255.0" g. Router: enter the IP Address of your Wi-Fi Access Point (usually printed on the bottom of the device). h. Press the iPad's Home button to exit the Settings menu. 3.3 StageMix Setup Launch the "CL StageMix" App The "Select Mixer" screen will appear. From this screen, you can do any of the following things: Page 6
-
 1
1 -
 2
2 -
 3
3 -
 4
4 -
 5
5 -
 6
6 -
 7
7 -
 8
8 -
 9
9 -
 10
10 -
 11
11 -
 12
12 -
13
-
14
-
15
-
16
-
17
-
18
-
19
-
20
-
21
-
22
-
23
-
24
-
25
-
26
-
27
-
28
-
29
-
30
-
31
-
32
-
33
-
34
-
35
-
36
-
37
 |
 |
