Yamaha DGX-640 Owner's Manual - Page 38
Select a Song For a Lesson - keyboard demo
 |
View all Yamaha DGX-640 manuals
Add to My Manuals
Save this manual to your list of manuals |
Page 38 highlights
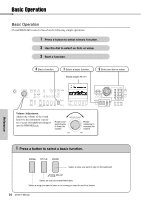
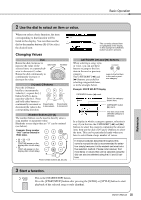
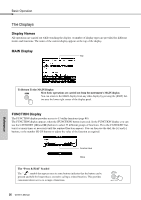
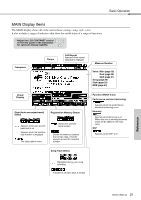
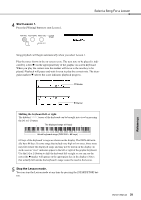
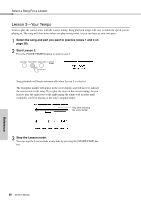
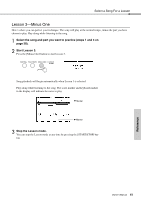
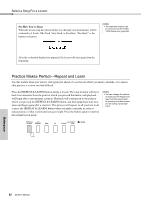
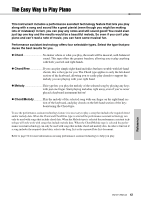
Select a Song For a Lesson Yamaha Education Suite You can select song you like and use it for a left-hand, right-hand, or both-hands lesson. During the lesson you can play as slowly as you like, and you can even play wrong notes. Song playback will slow down to a speed you can handle. It's never too late to start learning! The practice methods: Lesson 1-Waiting Lesson 2-Your Tempo Lesson 3-Minus One Learn to play the correct notes. Learn to play the correct notes with the correct timing. Learn to play the correct notes at the correct timing along with the song. Lesson 1-Waiting In this lesson, try playing the correct notes. Play the note shown in the display. The song will wait until you play the right note. 1 Select a song for your lesson. Select a song from the Piano Solo, Piano Ensemble category! For this example try selecting the "012 For Elise". 2 Press [EXIT] button to return to the MAIN display. 3 Turn off playback of the part you wish to practice. The preset songs have separate left- and right-hand parts. You can turn the leftand right-hand parts on or off as required in order to practice the corresponding part (the part that is turned off) on the keyboard. The right-hand part is played by the [R/1] button and the left-hand part is played by the [L/2] button. NOTE • Song numbers 10 and 11 are function demos for performance assistant. The lesson function cannot be used with them. • You can also use songs (only SMF format 0) transferred from the computer and saved to flash memory. (page 100) • You can also use songs (only SMF format 0) on a USB flash memory. (page 30) NOTE • You can turn parts on or off, even during playback. Right-hand lesson Left-hand lesson Both-hands lesson (R part is off) (L part is off) (R and L parts are off) Pressing the part buttons [R/1] and [L/2] toggles part playback on and off. Turn off playback of the part you wish to practice. When you first select a song, both "1" and "2" indicators with borders light up, indicating that both parts are on. When you press one of the buttons to turn off playback, the border around the corresponding part indicator disappears and the corresponding part playback is muted. 38 Owner's Manual Reference
-
 1
1 -
2
-
3
-
4
-
5
-
6
-
7
-
8
-
9
-
10
-
11
-
12
-
13
-
14
-
15
-
16
-
17
-
18
-
19
-
20
-
21
-
22
-
23
-
24
-
25
-
26
-
27
-
28
-
29
-
30
-
31
-
32
-
 33
33 -
 34
34 -
 35
35 -
 36
36 -
 37
37 -
 38
38 -
 39
39 -
 40
40 -
 41
41 -
 42
42 -
 43
43 -
44
-
45
-
46
-
47
-
48
-
49
-
50
-
51
-
52
-
53
-
54
-
55
-
56
-
57
-
58
-
59
-
60
-
61
-
62
-
63
-
64
-
65
-
66
-
67
-
68
-
69
-
70
-
71
-
72
-
73
-
74
-
75
-
76
-
77
-
78
-
79
-
80
-
81
-
82
-
83
-
84
-
85
-
86
-
87
-
88
-
89
-
90
-
91
-
92
-
93
-
94
-
95
-
96
-
97
-
98
-
99
-
100
-
101
-
102
-
103
-
104
-
105
-
106
-
107
-
108
-
109
-
110
-
111
-
112
-
113
-
114
-
115
-
116
-
117
-
118
-
119
-
120
 |
 |
