Yamaha RX-V363 Owner's Manual - Page 34
Additional operations, Using the Zone B feature - audio video amplifier
 |
UPC - 027108929781
View all Yamaha RX-V363 manuals
Add to My Manuals
Save this manual to your list of manuals |
Page 34 highlights
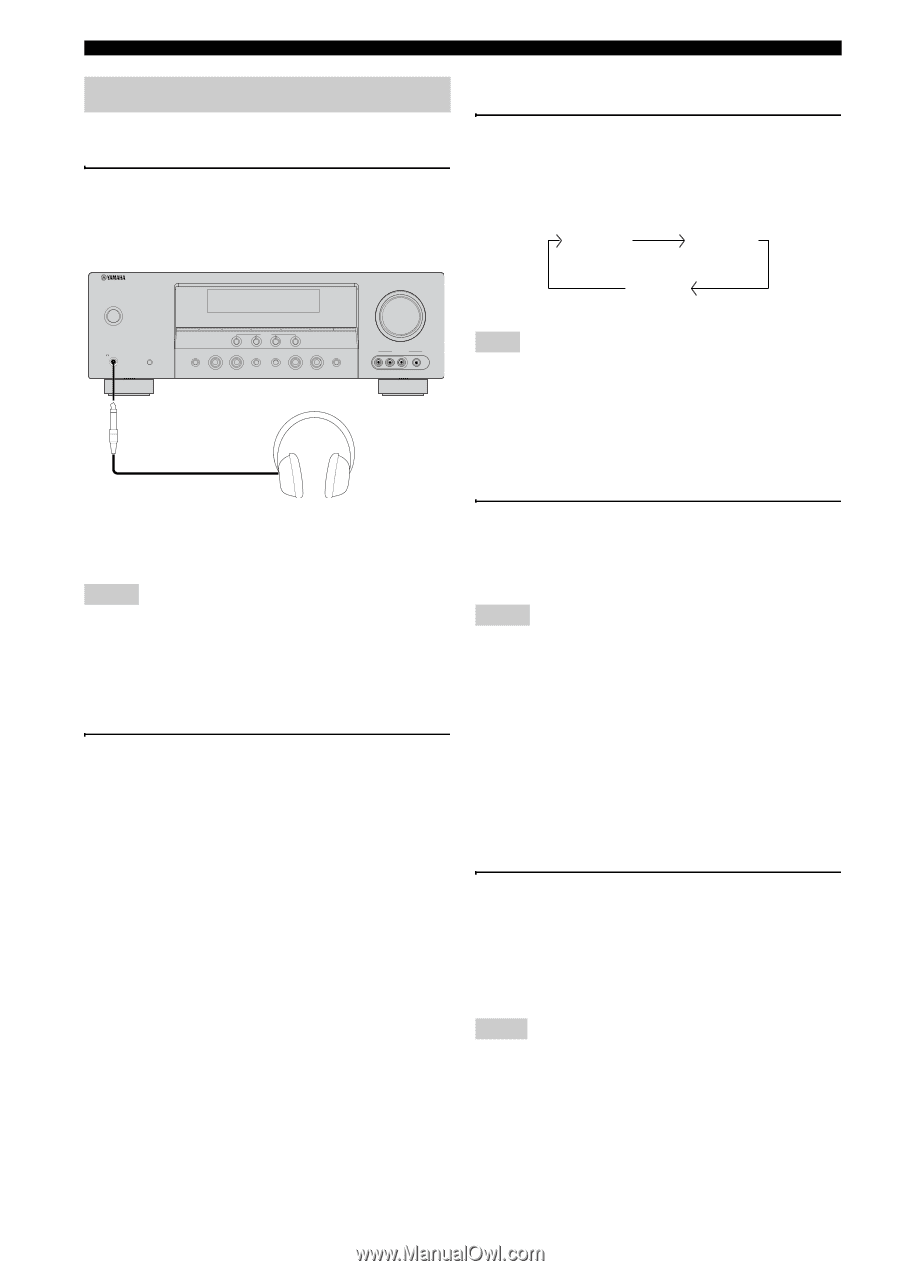
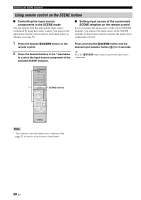
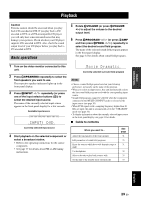
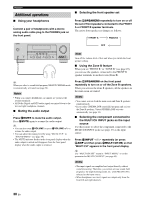
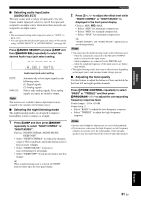
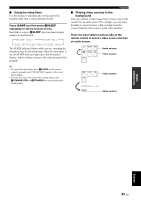
Playback Additional operations ■ Using your headphones Connect a pair of headphones with a stereo analog audio cable plug to the PHONES jack on the front panel. ■ Selecting the front speaker set Press ISPEAKERS repeatedly to turn on or off the set of front speakers connected to the FRONT A or FRONT B speaker terminals. The active front speaker set changes as follows: FRONT A FRONT B VOLUME STANDBY /ON PHONES SILENT CINEMA SPEAKERS A/B/OFF EDIT PRESET/TUNING BAND A/B/C/D/E 1 l PRESET/TUNING h SCENE 2 3 4 MEMORY TUNING AUTO/MAN'L TONE CONTROL l PROGRAM h STRAIGHT NIGHT l INPUT h AUDIO SELECT EFFECT VIDEO VIDEO AUX L AUDIO R PORTABLE OFF Note Turn off the volume level of this unit when you switch the front speaker setting. ■ Using the Zone B feature When you set "FRONT B" to "ZONE B" (see page 45), you can use the speakers connected to the FRONT B speaker terminals in another room (Zone B). y When you select a sound field program, SILENT CINEMA mode is automatically activated (see page 36). Notes • When you connect headphones, no signals are output at the speaker terminals. • All Dolby Digital and DTS audio signals are mixed down to the left and right headphone channels. ■ Muting the audio output Press FMUTE to mute the audio output. Press FMUTE again to resume the audio output. y • You can also rotate HVOLUME (or press IVOLUME +/-) to resume the audio output. • You can adjust the muting level by using "MUTE TYP." in "SOUND MENU" (see page 48). • The MUTE indicator flashes in the front panel display when the audio output is muted and disappears from the front panel display when the audio output is resumed. Press ISPEAKERS on the front panel repeatedly to turn on or off the Zone B speakers. When you activate the Zone B speakers, all the speakers in the main room are muted. Notes • You cannot activate both the main room and Zone B speakers simultaneously. • If you select CINEMA DSP sound field program and activate the Zone B speakers, Virtual CINEMA DSP activates automatically (see page 36). ■ Selecting the component connected to the MULTI CH INPUT jacks as the input source Use this feature to select the component connected to the MULTI CH INPUT jacks (see page 17) as the input source. Press NINPUT l / h repeatedly (or press 4AMP and then press BMULTI CH IN) so that "MULTI CH" appears in the front panel display. y Use "MULTI CH SET" menu in "INPUT MENU" to set the parameter for MULTI CH INPUT (see page 49). Notes • The input signals are amplified and output directly without sound processing. Therefore, you cannot activate sound field programs, the night listening mode, etc. while MULTI CH is selected as the input source. • When headphones are used, signals are output only from the front left and right channels. 30 En
-
 1
1 -
2
-
3
-
4
-
5
-
6
-
7
-
8
-
9
-
10
-
11
-
12
-
13
-
14
-
15
-
16
-
17
-
18
-
19
-
20
-
21
-
22
-
23
-
24
-
25
-
26
-
27
-
28
-
 29
29 -
 30
30 -
 31
31 -
 32
32 -
 33
33 -
 34
34 -
 35
35 -
 36
36 -
 37
37 -
 38
38 -
 39
39 -
40
-
41
-
42
-
43
-
44
-
45
-
46
-
47
-
48
-
49
-
50
-
51
-
52
-
53
-
54
-
55
-
56
-
57
-
58
-
59
-
60
-
61
-
62
-
63
-
64
-
65
-
66
-
67
-
68
-
69
-
70
-
71
-
72
-
73
-
74
-
75
-
76
-
77
-
78
 |
 |