Yamaha RX-V373BL User Manual - Page 53
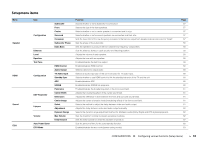
Lipsync Lipsync, Signal Info Signal Info, Audio In Audio In, Video Out Video Out
 |
View all Yamaha RX-V373BL manuals
Add to My Manuals
Save this manual to your list of manuals |
Page 53 highlights
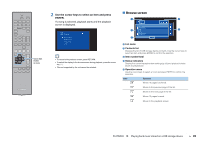
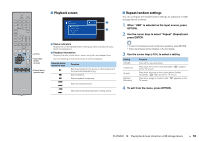
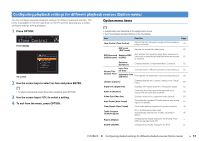
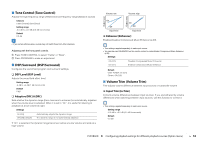
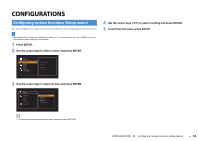
❑ Subwoofer Trim (SW.Trim) Fine-adjusts the subwoofer volume during playback. Setting range -6.0 dB to +6.0 dB (0.5 dB increments) Default 0.0 dB ■ Lipsync (Lipsync) Enables/disables the adjustment configured in "Lipsync" (p.61) in the "Setup" menu. • This setting is applied separately to each input source. Settings Off (Off) On (On) (default) Disables the "Lipsync" adjustment. Enables the "Lipsync" adjustment. ■ Signal Info (Signal Info) Displays information about the video/audio signal. Choices Format (FORMAT) Channel (CHAN) Sampling (SAMPL) Bitrate (B RATE) Input (V IN) Output (V OUT) Audio format of the input signal The number of source channels in the input signal (front/surround/ LFE) For example, "3/2/0.1" means 3 front channels, 2 surround channels, and LFE. The number of samples per second of the input digital signal The amount of data per second of the input bitstream signal Type and resolution of input signal Type and resolution of output signal ■ Audio In (Audio In) Combines the video jack of the selected input source (HDMI 1-4 or AV 1-2) with an audio jack of others. For example, use this function in the following cases. • Connecting a playback device that supports HDMI video output, but not HDMI audio output • Connecting a playback device that has component video jacks and analog stereo jacks (such as game consoles) Input sources HDMI 1-4, AV 1-2 ■ Setup procedure (To input audio through a digital optical jack) Select "AV 1" or "AV 4" and connect the device to the unit's corresponding audio jacks with a digital optical cable. (To input audio through a digital coaxial jack) Select "AV 2" or "AV 3" and connect the device to the unit's corresponding audio jacks with a digital coaxial cable. (To input audio through analog audio jacks) Select "AV 5", "AUDIO 1", or "AUDIO 2", and connect the device to the unit's corresponding audio jacks with a stereo pin cable. ■ Video Out (Video Out) Selects a video to be output with radio sounds. Settings Off (Off) (default) HDMI 1-4, AV 1-5, V-AUX Does not output video. Outputs video input through the corresponding video input jacks. • To switch the information on the front display, press the cursor keys (q/w) repeatedly. PLAYBACK ➤ Configuring playback settings for different playback sources (Option menu) En 53
-
 1
1 -
2
-
3
-
4
-
5
-
6
-
7
-
8
-
9
-
10
-
11
-
12
-
13
-
14
-
15
-
16
-
17
-
18
-
19
-
20
-
21
-
22
-
23
-
24
-
25
-
26
-
27
-
28
-
29
-
30
-
31
-
32
-
33
-
34
-
35
-
36
-
37
-
38
-
39
-
40
-
41
-
42
-
43
-
44
-
45
-
46
-
47
-
 48
48 -
 49
49 -
 50
50 -
 51
51 -
 52
52 -
 53
53 -
 54
54 -
 55
55 -
 56
56 -
 57
57 -
 58
58 -
59
-
60
-
61
-
62
-
63
-
64
-
65
-
66
-
67
-
68
-
69
-
70
-
71
-
72
-
73
-
74
-
75
-
76
-
77
-
78
-
79
-
80
-
81
-
82
-
83
 |
 |