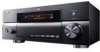
Yamaha RX-V4600 MCXSP10 Manual
Yamaha RX-V4600 - AV Receiver Manual
 |
UPC - 027108922683
View all Yamaha RX-V4600 manuals
Add to My Manuals
Save this manual to your list of manuals |
Yamaha RX-V4600 manual content summary:
- Yamaha RX-V4600 | MCXSP10 Manual - Page 1
U RX-V4600 AV Receiver OWNER'S MANUAL - Yamaha RX-V4600 | MCXSP10 Manual - Page 2
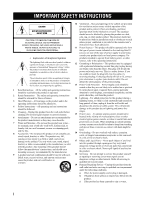
IMPORTANT SAFETY INSTRUCTIONS IMPORTANT SAFETY INSTRUCTIONS CAUTION RISK OF ELECTRIC SHOCK DO NOT OPEN CAUTION: TO REDUCE THE RISK OF ELECTRIC SHOCK, DO NOT REMOVE COVER (OR BACK). NO USER-SERVICEABLE PARTS INSIDE. REFER SERVICING TO QUALIFIED SERVICE PERSONNEL. • Explanation of Graphical Symbols - Yamaha RX-V4600 | MCXSP10 Manual - Page 3
a residential environment will not result in harmful interference with other electronic devices. This equipment generates/uses radio frequencies and, if not installed and used according to the instructions found in the users manual, may cause interference harmful to the operation of other electronic - Yamaha RX-V4600 | MCXSP10 Manual - Page 4
components, the user and YAMAHA service personnel when any service is needed. The cabinet should never be opened for any reasons. 15 When not planning to use this unit for long periods of time (i.e. vacation), disconnect the AC power plug from the wall outlet. 16 Be sure to read the "TROUBLESHOOTING - Yamaha RX-V4600 | MCXSP10 Manual - Page 5
panel 5 Remote control 7 Zone 2/Zone 3 remote control 9 Using the remote controls 9 Front panel display 10 Rear panel 12 PREPARATION SPEAKER SETUP 13 Speaker placement 13 Speaker connections 15 CONNECTIONS 18 Before connecting components 18 Connecting video components 19 Connecting audio - Yamaha RX-V4600 | MCXSP10 Manual - Page 6
(preset editing) ◆ HD Radio™ digital broadcast reception capability high-definition video as well as multi-channel digital audio ◆ Optical and coaxial digital audio signal jacks ◆ Sleep timer ◆ Cinema and music night listening mode ◆ Remote control with preset remote control codes and learning - Yamaha RX-V4600 | MCXSP10 Manual - Page 7
STARTED Supplied accessories Please check that you received all of the following parts. Remote control POWER TV POWER AV STANDBY SYSTEM POWER A B AUDIO SELECT SLEEP PHONO TUNER CD MULTI CH IN V-AUX CBL/SAT MD/TAPE CD-R DTV VCR 1 DVR/VCR2 DVD SELECT ++ TV VOL CH -- + VOL - AMP - Yamaha RX-V4600 | MCXSP10 Manual - Page 8
waste; dispose of them correctly in accordance with your local regulations. ■ Remote control ■ Zone 2/Zone 3 remote control 2 1 3 2 1 3 1 Press the part and slide the battery compartment cover off. 1 Press the part and slide the battery compartment cover off. 2 Insert two supplied batteries - Yamaha RX-V4600 | MCXSP10 Manual - Page 9
unit can reproduce sound. Notes • In the standby mode, this unit consumes a small amount of power in order to receive infrared-signals from the remote control. • You can turn on the main unit, Zone 2 and Zone 3 or set them to the standby mode simultaneously using the remote control. For details - Yamaha RX-V4600 | MCXSP10 Manual - Page 10
output directly from their respective speakers without effect processing. C Remote control sensor Receives signals from the remote controls. D TONE CONTROL Use to adjust the bass/treble balance for the front left/right and center channels (see page 35). E PURE DIRECT Turns on or off the PURE DIRECT - Yamaha RX-V4600 | MCXSP10 Manual - Page 11
describes the function of each control on the remote control used to control this unit. To operate other components, see "REMOTE CONTROL FEATURES" on page 70. Set AMP/SOURCE/TV to AMP to operate this unit. 1 2 3 POWER TV POWER AV STANDBY SYSTEM POWER A B AUDIO SELECT SLEEP PHONO TUNER CD - Yamaha RX-V4600 | MCXSP10 Manual - Page 12
television. To set the remote control codes for components, see page 71. K MUTE Mutes the sound. Press again to restore the audio output to the previous volume level. L PURE DIRECT Turns on or off PURE DIRECT mode (see page 38). M EXIT, PRG SELECT Use to exit the graphical user interface (GUI) mode - Yamaha RX-V4600 | MCXSP10 Manual - Page 13
this window at the component you want to operate. 2 POWER Turns on the power of this unit. 3 STANDBY Sets this unit in the standby mode. Using the remote controls The remote controls transmit a directional infrared ray. Be sure to aim the remote controls directly at the remote control sensor on the - Yamaha RX-V4600 | MCXSP10 Manual - Page 14
the auto setup speaker settings are used without any modifications. 9 AUTO indicator Lights up when this unit is in the automatic tuning mode. 0 STEREO indicator Lights up when this unit is receiving a stereo signal for an FM stereo broadcast while the AUTO indicator is lit. A HD Radio indicator - Yamaha RX-V4600 | MCXSP10 Manual - Page 15
you select a HiFi DSP sound field program. O MEMORY components of current digital input signal. U Presence and surround back speaker indicators Indicate the connection of presence and/or surround back speakers when using the Auto Setup setting (page 27) or Speaker Level setting (page 65). CONTROLS - Yamaha RX-V4600 | MCXSP10 Manual - Page 16
information. 5 Audio component jacks See page 22 for connection information. 6 Speaker terminal wrench hook Use to store the speaker terminal wrench when not in use. 7 RS-232C terminal This is a control expansion terminal for factory use only. Consult you dealer for details. 8 REMOTE 1/2 IN/OUT - Yamaha RX-V4600 | MCXSP10 Manual - Page 17
PREPARATION SPEAKER SETUP + SPEAKER SETUP Speaker placement The speaker layout below shows the standard ITU-R* speaker setting. You can use it to enjoy CINEMA DSP, multi-channel audio sources and THX. * ITU-R is the radio communication sector of the ITU (International Telecommunication Union). - Yamaha RX-V4600 | MCXSP10 Manual - Page 18
SPEAKER SETUP ■ Di-pole speaker layout Either di-pole or direct radiating speaker types can be used for THX surround. If you choose di-pole speakers, please place the surround and surround back speakers according to the speaker layout below. FL C FR SL SR 30˚ 30˚ SBL SBR : Di-pole speaker : - Yamaha RX-V4600 | MCXSP10 Manual - Page 19
). If you will use 8 ohm speakers, use this unit's initial setting for speaker impedance. • Before connecting the speakers, make sure that this unit is disconnected from the power source. • Do not let the bare speaker wires touch each other or do not let them touch any metal part of this unit. This - Yamaha RX-V4600 | MCXSP10 Manual - Page 20
included in Dolby Digital EX and DTS-ES software and only operate when the Dolby Digital EX, DTS-ES or Dolby Pro Logic x decoder is turned on. • The presence speakers output ambient effects created by the DSP sound fields. They do not output sound when other sound fields are selected. 16 - Yamaha RX-V4600 | MCXSP10 Manual - Page 21
back speakers to these terminals. If you only connect one surround back speaker, connect it to the left (L) terminals. ■ PRESENCE terminals Connect presence speakers to these terminals. Note You can also use these terminals to connect Zone 2 speakers (see page 83). SPEAKER SETUP 17 PREPARATION - Yamaha RX-V4600 | MCXSP10 Manual - Page 22
components by connecting audio pin cables to the analog jacks on this unit. Connect red plugs to the right jacks and white plugs to the left jacks. ■ Digital jacks This unit has digital jacks for direct transmission of digital signals through either coaxial or fiber optic cables. You can use the - Yamaha RX-V4600 | MCXSP10 Manual - Page 23
PREPARATION Connecting video components ■ Connections for DVD playback CONNECTIONS Coaxial out Optical out DVD player Audio out Video out C O RL DIGITAL OUTPUT OPTICAL VIDEO S VIDEO VIDEO DVD AUDIO R L DVD DVD COMPONENT VIDEO Y PB PR Video monitor Video in DVD COAXIAL DIGITAL - Yamaha RX-V4600 | MCXSP10 Manual - Page 24
automatically turns off the digital sound field processor, and you cannot select sound field programs. • This unit does not redirect signals input at the MULTI CH INPUT jacks to accommodate for missing speakers. We recommend that you connect at least a 5.1-channel speaker system before using this - Yamaha RX-V4600 | MCXSP10 Manual - Page 25
VIDEO VIDEO AUDIO R L PREPARATION CBL/SAT COMPONENT VIDEO Y PB PR DTV CBL/ SAT DVR/VCR 2 COAXIAL DIGITAL INPUT CBL/ SAT IN VCR 1 OUT (U.S.A. model) C RL RL Video in Video out Coaxial out DVD recorder or VCR Audio in Audio out ■ VIDEO AUX jacks (on the front panel) Use these jacks - Yamaha RX-V4600 | MCXSP10 Manual - Page 26
CONNECTIONS Connecting audio components ■ Connections for audio components Optical in CD recorder Audio in Audio out O RL RL DIGITAL OUTPUT OPTICAL MD/TAPE CD-R CD CD O Optical in MD recorder or tape deck Audio out RL Audio in RL (PLAY) IN AUDIO R L MD/TAPE OUT (REC) (PLAY) IN CD-R - Yamaha RX-V4600 | MCXSP10 Manual - Page 27
PRE OUT jack depending on the Speaker Set settings (see page 62). CONNECTIONS ■ Connecting i.LINK components If you have a component with an i.LINK connector, you can enjoy digital audio from CD, DVD, Super Audio CD and DVD-A discs. For details on i.LINK, see "USING i.LINK" on page 91. i.LINK - Yamaha RX-V4600 | MCXSP10 Manual - Page 28
reception than an indoor one. If you experience poor reception quality, an outdoor antenna may improve the quality. Consult the nearest authorized YAMAHA dealer or service center about outdoor antennas. ■ 75-ohm/300-ohm antenna adapter (U.K. model only) 1 Open the cover of the included 75-ohm/300 - Yamaha RX-V4600 | MCXSP10 Manual - Page 29
Use these outlets to connect the power cables from your other components to this unit. Power to the AC OUTLET(S) is controlled by this unit's STANDBY/ON (or SYSTEM POWER and STANDBY). These outlets will supply power to any connected component whenever this unit is turned on. The maximum power - Yamaha RX-V4600 | MCXSP10 Manual - Page 30
. Turning on the power When all connections are complete, turn on the power of this unit. 1 STANDBY /ON INPUT AUDIO MULTI CH SELECT INPUT A/B/C/D/E PRESET/ TUNING PRESET/ TUNING TUNING FM/AM MEMORY MODE SOURCE/ DVD REMOTE MD/TAPE DTV CD-R CBL/SAT TUNER VCR 1 CD DVR/ VCR 2 SPEAKERS - Yamaha RX-V4600 | MCXSP10 Manual - Page 31
and adjusts the sound level (volume) of each speaker. Optimizer microphone setup 1 Connect the supplied optimizer microphone to the OPTIMIZER MIC jack on the front panel. AUDIO MULTI CH SELECT INPUT A/B/C/D/E PRESET/ TUNING PRESET/ TUNING TUNING FM/AM MEMORY MODE SOURCE/ DVD REMOTE MD/TAPE - Yamaha RX-V4600 | MCXSP10 Manual - Page 32
. y When using THX speakers, select "Skip" for Size and make sure that "Small" or "Small x2" is selected in Speaker Set (page 62) and that "80Hz" is selected in Bass Cross Over (page 63). Input Select Manual Setup Auto Setup System Memory Audio Info. Information Setup Menu Setup Type Start 28 - Yamaha RX-V4600 | MCXSP10 Manual - Page 33
speaker in accordance with the sound of your front speakers. Recommended if your front speakers are of much higher quality than your other speakers procedure, l to cancel auto setup. • If an error message appears during testing, refer to "Troubleshooting for the auto setup procedure" on page 31, - Yamaha RX-V4600 | MCXSP10 Manual - Page 34
using the Manual Setup menu. If you want to return to the Auto Setup settings after making settings in the Manual Setup menu, navigate to the Information screen in the Auto Setup menu, press k / n repeatedly to select the parameter you want to adjust, then press ENTER. Notes • If you change speakers - Yamaha RX-V4600 | MCXSP10 Manual - Page 35
AMP, then pressing SPEAKERS A or B on the remote control). • Check the front L/R speaker connections. Only one surround channel signal is detected. • Check the surround speaker connections. Only one presence channel signal is detected. • Check the presence speaker connections. Only the surround - Yamaha RX-V4600 | MCXSP10 Manual - Page 36
complete to inform you of possible problems. We recommend that you check the contents of each message, then select Retry to try the auto setup procedure again. Warning message W1:Out of Phase W2:Over Distance W3:Level Error W4:SP Mismatch Cause Remedy Speaker polarity is incorrect. This message - Yamaha RX-V4600 | MCXSP10 Manual - Page 37
(or press SPEAKERS A or B on the remote control). Each press turns the respective speakers on or off. SPEAKERS A B A SPEAKERS B or +10 ENT. Front panel Remote control When bi-wiring, select both A and B. 1 1 4 4 3 POWER TV POWER AV STANDBY SYSTEM POWER A B AUDIO SELECT SLEEP - Yamaha RX-V4600 | MCXSP10 Manual - Page 38
DialNorm;;+4dB Selecting sound field programs ■ Front panel operation STANDBY /ON INPUT AUDIO MULTI CH SELECT INPUT A/B/C/D/E PRESET/ TUNING PRESET/ TUNING TUNING FM/AM MEMORY MODE SOURCE/ DVD REMOTE MD/TAPE DTV CD-R CBL/SAT TUNER VCR 1 CD DVR/ VCR 2 SPEAKERS A B SILENT CINEMA - Yamaha RX-V4600 | MCXSP10 Manual - Page 39
2 9 0 A SPEAKERS B +10 ENT. V-AUX DVR/VCR2 VCR 1 CBL/SAT SP A Hall DTV DVD MD/TAPE CD-R CD the last sound field program used with that source. • Sound field programs sound Press MUTE on the remote control. The MUTE indicator flashes on the MUTE front panel display. To resume the audio - Yamaha RX-V4600 | MCXSP10 Manual - Page 40
CINEMA DSP or HiFi DSP sound field programs. When activated, remote control), press MULTI CH INPUT to turn off "MULTI CH INPUT" from the front panel display and the video monitor. ■ Enjoying multi-channel software in 6.1/7.1 channel surround If you connected one or two surround back speakers, use - Yamaha RX-V4600 | MCXSP10 Manual - Page 41
When 2ch Stereo, 7ch Stereo or PURE DIRECT is selected. • When the power of this unit is turned off, the input mode will be reset to AUTO. • The Pro Logic THX on the remote control to select the MOVIE THEATER or THX programs. MOVIE 4 THX or 5 Press SELECT on the remote control to select the - Yamaha RX-V4600 | MCXSP10 Manual - Page 42
in the front panel display lights up. NIGHT AUDIO Front panel Remote control Remote control y The front panel display switches on momentarily when to music sources to preserve ease-of-listening for all sounds. • Select NIGHT:OFF if you do not want to use this function. Press l / h to adjust the - Yamaha RX-V4600 | MCXSP10 Manual - Page 43
2ch Stereo. PROGRAM or STEREO 1 MUSIC 2 ENTERTAIN 3 MOVIE 4 THX 5 STANDARD SELECT EXTD SUR. 6 7 8 1 MEMORY 2 9 0 A SPEAKERS B +10 ENT. Front panel Remote control 2ch Stereo Note You can use a subwoofer with this program when SWFR or BOTH is selected in LFE/BASS OUT. ■ Listening - Yamaha RX-V4600 | MCXSP10 Manual - Page 44
of input signal you want to use as follows. Press AUDIO SELECT to select an input mode. In most cases, use AUTO. AUDIO SELECT or POWER TV POWER AV STANDBY SYSTEM POWER A B AUDIO SELECT SLEEP PHONO TUNER CD MULTI CH IN Front panel Remote control ■ Displaying information about the input - Yamaha RX-V4600 | MCXSP10 Manual - Page 45
FM/AM MEMORY MODE SOURCE/ DVD REMOTE MD/TAPE DTV CD-R CBL/SAT TUNER VCR 1 CD DVR/ VCR 2 SPEAKERS A B SILENT CINEMA S VIDEO REC OUT/ZONE 2 OPTIMIZER MIC PHONES EDIT MAN'L/AUTO FM AUTO/MAN'L ZONE ON/OFF ZONE CONTROL MAIN VIDEO ZONE 2 ZONE 3 L AUDIO R OPTICAL VIDEO/AUX TONE - Yamaha RX-V4600 | MCXSP10 Manual - Page 46
FM/AM MEMORY MODE SOURCE/ DVD REMOTE MD/TAPE DTV CD-R CBL/SAT TUNER VCR 1 CD DVR/ VCR 2 SPEAKERS A B SILENT CINEMA S VIDEO REC OUT/ZONE 2 OPTIMIZER MIC PHONES EDIT MAN'L/AUTO FM AUTO/MAN'L ZONE ON/OFF ZONE CONTROL MAIN VIDEO ZONE 2 ZONE 3 L AUDIO R OPTICAL VIDEO/AUX TONE - Yamaha RX-V4600 | MCXSP10 Manual - Page 47
manually. STANDBY /ON INPUT AUDIO MULTI CH SELECT INPUT A/B/C/D/E PRESET/ TUNING PRESET/ TUNING TUNING FM/AM MEMORY MODE SOURCE/ DVD REMOTE MD/TAPE DTV CD-R CBL/SAT TUNER VCR 1 CD DVR/ VCR 2 SPEAKERS for tuning instructions. V-AUX DVR/VCR2 VCR 1 CBL/SAT DTV SP A A :AM DVD MD/TAPE - Yamaha RX-V4600 | MCXSP10 Manual - Page 48
FM/AM MEMORY MODE SOURCE/ DVD REMOTE MD/TAPE DTV CD-R CBL/SAT TUNER VCR 1 CD DVR/ VCR 2 SPEAKERS A B SILENT CINEMA S VIDEO REC OUT/ZONE 2 OPTIMIZER MIC PHONES EDIT MAN'L/AUTO FM AUTO/MAN'L ZONE ON/OFF ZONE CONTROL MAIN VIDEO ZONE 2 ZONE 3 L AUDIO R OPTICAL VIDEO/AUX TONE - Yamaha RX-V4600 | MCXSP10 Manual - Page 49
, this unit can receive both audio and data (such as song titles, artist names, album names, and genres) from supplemental program services (HD1 to HD8). HD Radio™ tuning Just as for tuning into an analog FM or AM station, 2 tuning methods are available: automatic and manual. CAUTION This unit - Yamaha RX-V4600 | MCXSP10 Manual - Page 50
TUNING Selecting HD Radio™ audio programs Use this feature to select one of the 8 HD Radio audio programs (HD1 to HD8) when the unit is in the tuner mode. Each audio program contains data programs. Press PRG SELECT on the remote control repeatedly to toggle between HD Radio audio programs. Press - Yamaha RX-V4600 | MCXSP10 Manual - Page 51
Refer to the operation instructions for those components. STANDBY /ON INPUT AUDIO MULTI CH SELECT INPUT A/B/C/D/E PRESET/ TUNING PRESET/ TUNING TUNING FM/AM MEMORY MODE SOURCE/ DVD REMOTE MD/TAPE DTV CD-R CBL/SAT TUNER VCR 1 CD DVR/ VCR 2 SPEAKERS A B SILENT CINEMA S VIDEO REC - Yamaha RX-V4600 | MCXSP10 Manual - Page 52
, see "Selecting sound field programs" on pages 34 and 35. Sources Remote control button Program STEREO 1 2ch Stereo ENTERTAINMENT TV Sports MULTI 2-CH 3 ENTERTAINMENT Mono Movie ENTERTAINMENT Game MOVIE THEATER Spectacle MOVIE THEATER Sci-Fi 4 MOVIE THEATER Adventure MOVIE THEATER General - Yamaha RX-V4600 | MCXSP10 Manual - Page 53
SOUND FIELD PROGRAM DESCRIPTIONS Sources MULTI 2-CH MULTI 2-CH Remote control button Program THX THX Cinema THX THX Game 5 THX THX Select2 Cinema THX THX Surr. EX for movie software. (U.S.A. model only) CINEMA DSP enhanced processing for the selected decoder. SOUND FIELD PROGRAMS 49 - Yamaha RX-V4600 | MCXSP10 Manual - Page 54
sound field program types. For details on how to select sound field programs, see "Selecting sound field programs" on pages 34 and 35. Sources Remote control HiFi DSP processing. Use to increase the output stereo sources (in stereo) from all speakers. This provides a larger sound field and is ideal - Yamaha RX-V4600 | MCXSP10 Manual - Page 55
timer is useful when you are going to sleep while this unit is playing or recording a source. The sleep timer also automatically turns off any external components connected to the AC OUTLET(S). ■ Setting the sleep timer POWER TV POWER AV STANDBY SYSTEM POWER A B AUDIO SELECT SLEEP PHONO - Yamaha RX-V4600 | MCXSP10 Manual - Page 56
overall audio settings for this unit. Page 58 58 59 60 60 Basic (Basic menu) Use to quickly setup basic system parameters. Item Features Test Tone Speaker Set Speaker Distance Speaker Level THX Set Turns the test tone output on or off for Speaker Set, Speaker Distance and Speaker Level - Yamaha RX-V4600 | MCXSP10 Manual - Page 57
of sound field programs. Audio Select Selects the initial input mode of the source. Decoder Mode Selects the decoder used by this unit. Memory Guard Locks the menu parameter settings. SYSTEM OPTIONS Page 66 67 67 68 68 68 ■ Auto Setup (Auto setup menu) Use to specify which speaker parameters - Yamaha RX-V4600 | MCXSP10 Manual - Page 58
SYSTEM OPTIONS Changing parameter settings Use the remote control to access and adjust each parameter. (Speaker set is used in the following example to change parameter settings.) Manual Setup > Basic > Speaker Set > 1 ++ TV VOL CH -- + VOL - AMP SOURCE TV TV MUTE TV INPUT MUTE TOP TITLE - Yamaha RX-V4600 | MCXSP10 Manual - Page 59
a station name is received as data in 4 alphabetical codes. Station Music Hold:ENTER [1] 2 y HD Radio information is also available in the front panel display menu (see page 46). ■ I/O Assignment (Input/output assignment) You can assign the digital audio input/output and component video jacks to - Yamaha RX-V4600 | MCXSP10 Manual - Page 60
at each jack. This is useful if you want to balance the level of each input source to avoid sudden changes in volume when switching between input sources. Manual Setup > Input Select > input source (DVD, etc.) > Volume Trim > Control range: -6.0 dB to +6.0 dB Audio Select Decoder Mode Volume Trim - Yamaha RX-V4600 | MCXSP10 Manual - Page 61
DVD is used as the source component in the following example.) Input Select > input source (DVD display window on the remote control, see page 75. sound is output from the surround back speakers even if you select "8ch". In this case, select "6ch" and set the output setting of the external component - Yamaha RX-V4600 | MCXSP10 Manual - Page 62
Setup (Sound) Use this menu to adjust the sound parameters. 1 Set AMP/SOURCE/TV to AMP, then press TOP on the remote control. AMP SOURCE TV TOP TITLE 2 Select Manual Setup, then press h. 3 Select Sound, then press h. Sound Basic Option LFE Level Dynamic Range Parametric EQ Tone Control Audio - Yamaha RX-V4600 | MCXSP10 Manual - Page 63
) Use this feature to adjust the parametric equalizer for any speaker. Manual Setup > Sound > Parametric EQ > LFE Level Dynamic Range Parametric EQ Tone Control Audio Option Test Tone Front L Front R 1 Press k / n to select Test Tone or the speaker you want to adjust. • Test Tone turns on - Yamaha RX-V4600 | MCXSP10 Manual - Page 64
Treble Speaker Freq : 3.5kHz Gain : 0.0dB +6 +0 -6 Note Tone Control is not effective when: - THX (pages 49 to to 50) or PURE DIRECT (page 38) is selected. - MULTI CH INPUT is selected. ■ Audio Option (Audio options) Use to customize this unit's overall audio settings. Manual Setup > Sound > Audio - Yamaha RX-V4600 | MCXSP10 Manual - Page 65
signals using CINEMA DSP sound field programs. Choices: Presence, Surround Back Muting Type Audio Delay PR/SB Select Presence Surround Back SYSTEM OPTIONS Manual Setup (Basic) Use this menu to set up basic system parameters. 1 Set AMP/SOURCE/TV to AMP, then press TOP on the remote control. AMP - Yamaha RX-V4600 | MCXSP10 Manual - Page 66
listening room. ■ Speaker Set (Speaker set) Use to manually adjust any speaker setting. Manual Setup > Basic > Speaker Set > Choices: Front, Center, Surround, Surround Back, Presence, Bass Out, Bass Cross Over, SWFR Phase y If you are not satisfied with the bass sounds from your speakers, you can - Yamaha RX-V4600 | MCXSP10 Manual - Page 67
-frequency signals can be directed to both front left and right speakers, and to the subwoofer (which can be used for both stereo reproduction and sound field programs). Choices: Both, SWFR, Front THX recommendation: SWFR Surround Back Presence Bass Out Bass Cross Over SWFR Phase Both SWFR Front - Yamaha RX-V4600 | MCXSP10 Manual - Page 68
. However, this is not possible in most home situations. Thus, a certain amount of delay must be applied to the sound from each speaker so that all sound will arrive at the listening position at the same time. Manual Setup > Basic > Speaker Distance > Speaker distances Choices: 0.30 to 24.00 - Yamaha RX-V4600 | MCXSP10 Manual - Page 69
■ Speaker Level (Speaker level) Use these settings to manually balance the speaker levels between the front left speakers and each speaker selected in Speaker Set (see page 62). Manual Setup > Basic > Speaker Level Speaker Set Speaker Distance Speaker Level THX Set Presence R Subwoofer Front L - Yamaha RX-V4600 | MCXSP10 Manual - Page 70
remote control. AMP SOURCE TV TOP TITLE 2 Select Manual Setup, then press h. 3 Select Option then press h. Sound Basic Option Display Multi Zone Sur.Initialize Audio signals to S-video and component signals, and to convert S-video signals to component signals. y When using the THX system, we - Yamaha RX-V4600 | MCXSP10 Manual - Page 71
the Zone 2 and Zone B settings. Manual Setup > Option > Multi Zone > Choices: Speaker B, Zone2 Amplifier, Zone2 Volume, Zone3 Volume Display Multi Zone Sur.Initialize Audio Select Speaker B Zone2 Amplifier Zone2 Volume Zone3 Volume Speaker B (Speaker B) Use this feature to select the location of - Yamaha RX-V4600 | MCXSP10 Manual - Page 72
SYSTEM OPTIONS ■ Audio Select (Audio selection) Use this feature to designate the default input mode this unit selects when the power is turned on and the input source (such as a DVD player) is connected to the DIGITAL INPUT jacks on this unit. Manual Setup > Option > Audio Select Choices: Auto, - Yamaha RX-V4600 | MCXSP10 Manual - Page 73
settings such as the following: • Sound field program parameters • Speaker settings • Speaker channel settings • LFE level • Dynamic range settings • Parametric equalizer settings ■ To save settings 1 Set AMP/SOURCE/TV to AMP, then press TOP on the remote control. AMP SOURCE TV TOP TITLE ■ To - Yamaha RX-V4600 | MCXSP10 Manual - Page 74
control up to 14 different components by setting appropriate remote control codes (see page 81). POWER TV POWER AV STANDBY SYSTEM POWER A B AUDIO SELECT SLEEP PHONO TUNER POWER TVCD POWER MUALVTI CH IN V-AUX CBL/SAT MD/TAPE CD-R DTV VCR 1 DVR/VCR2 DVD SELECT k / n switches control - Yamaha RX-V4600 | MCXSP10 Manual - Page 75
another YAMAHA remote control code. 1 Set AMP/SOURCE/TV to SOURCE. AMP SOURCE TV 2 Press an input selector button to select the source component you want to set up. A B AUDIO SELECT SLEEP PHONO TUNER CD MULTI CH IN V-AUX CBL/SAT MD/TAPE CD-R DTV VCR 1 DVR/VCR2 DVD ADVANCED OPERATION - Yamaha RX-V4600 | MCXSP10 Manual - Page 76
. ID2 2003 To operate Zone 2 or Zone 3 features of other YAMAHA receivers/amplifiers (see page 82). Setting remote control tuner codes Select one of the following codes to set the remote control tuner code for the component you want to use. Set AMP/SOURCE/TV to SOURCE and the unit to the tuner - Yamaha RX-V4600 | MCXSP10 Manual - Page 77
FEATURES 7 Press LEARN again to exit from the setup mode. LEARN 8 Press one of the buttons shaded below to see if you can control your component. If you can, the remote control code is correct. POWER TV POWER AV STANDBY SYSTEM POWER A B AUDIO SELECT SLEEP PHONO TUNER CD MULTI CH IN - Yamaha RX-V4600 | MCXSP10 Manual - Page 78
angle. - When the remote control is exposed to direct sunlight. - When the function to be programmed is continuous or uncommon. POWER TV PHONO TUNER POWER AV B V-AUX CBL/SAT MD/TAPE ++ TV VOL -- TV MUTE TV INPUT STANDBY AUDIO SELECT SLEEP CD VCR 1 DVR/VCR2 DVD CH PRESET ENTER EXIT - Yamaha RX-V4600 | MCXSP10 Manual - Page 79
You can change the name that appears in the display window on the remote control if you want to use a different name than the factory preset. This is useful when you have set the input selector to control a different component. 5 Press l / h to move the cursor to the next position. PRESET ENTER - Yamaha RX-V4600 | MCXSP10 Manual - Page 80
. For details, refer to the operating instructions for the connected component.) *2 When the remote control code for your TV is set up for either DTV or PHONO (see page 71), you can turn on the power of your TV without selecting an input source. The remote control code set up for DTV takes priority - Yamaha RX-V4600 | MCXSP10 Manual - Page 81
POWER TV POWER AV STANDBY SYSTEM POWER A B AUDIO SELECT SLEEP PHONO TUNER CD MULTI CH IN V-AUX CBL/SAT MD/TAPE CD-R DTV VCR 1 DVR/VCR2 DVD use the macro feature to transmit several remote control commands in sequence at the press of a button. Be sure to set up remote control codes - Yamaha RX-V4600 | MCXSP10 Manual - Page 82
names and setup remote control codes. 1 Set AMP/SOURCE/TV to AMP or SOURCE. POWER TV A POWER STANDBY SYSTEM POWER AV 2 B AUDIO SELECT SLEEP PHONO TUNER 3 CD MULTI CH IN MCR 2: AV POWER MCR 3: AUDIO SELECT V-AUX CBL/SAT MD/TAPE CD-R DTV VCR 1 DVR/VCR2 DVD 1 MCR 1: DVD Indicates the - Yamaha RX-V4600 | MCXSP10 Manual - Page 83
Press LEARN using a ballpoint pen or similar object. "LEARN" and the selected component name (ex. "DVD") appear alternately in the display window. LEARN Notes • Do not press and hold LEARN. If you hold it down for more than 3 seconds, the remote control enters the remote control code setting mode - Yamaha RX-V4600 | MCXSP10 Manual - Page 84
to clear another function for another component, press SELECT k / n to select the component, then repeat step 4. • Once you clear a learned function, the button reverts to the factory setting (or to the manufacturer setting if you have set remote control codes). 5 Press CLEAR to exit the clearing - Yamaha RX-V4600 | MCXSP10 Manual - Page 85
component. Use the input selector buttons to select the component you want to operate. The remote control automatically switches to the appropriate control mode for that component. 1 AV POWER 2 TV POWER 3 TV VOL + DVD player/ DVD recorder VCR Cable TV/ Satellite tuner TV Power *1 Power - Yamaha RX-V4600 | MCXSP10 Manual - Page 86
component) MAIN SYSTEM ZONE 2 VIDEO IN ZONE 3 AUDIO IN Infrared emitter Amplifier Remote control Infrared signal receiver Amplifier Remote control Infrared signal receiver Main room Second room Third room REMOTE OUT REMOTE 1 IN REMOTE 2 IN Notes • When not using the main room, turn - Yamaha RX-V4600 | MCXSP10 Manual - Page 87
volume level for Zone 2 and Zone 3 components using ZONE CONTROL on the front panel. 3 Press ZONE CONTROL on the front panel repeatedly to choose the zone you selected in step 2. ZONE CONTROL 1 Set REC OUT/ZONE 2 on the front panel to SOURCE/REMOTE. SOURCE/ DVD REMOTE MD/TAPE DTV CD-R CBL/SAT - Yamaha RX-V4600 | MCXSP10 Manual - Page 88
mode on the remote control You will be able to switch the remote control mode from one room to another, and use the input selector, STANDBY, SYSTEM POWER, MUTE and VOLUME +/- to control the selected room. 1 Set REC OUT/ZONE 2 on the front panel to SOURCE/REMOTE. SOURCE/ DVD REMOTE MD/TAPE DTV - Yamaha RX-V4600 | MCXSP10 Manual - Page 89
library (L;AMP) code, pressing SYSTEM POWER turns on the speakers). Thus, the following considerations and adjustments need to be made when playing DTS encoded discs. For DVDs encoded with DTS Only 2 channel analog audio signals may be sent to the second/third room. Use the disc menu to set the DVD - Yamaha RX-V4600 | MCXSP10 Manual - Page 90
mode. y The new setting is activated next time you turn on the power of this unit. Note The remote controls and VOLUME control on the front panel of this unit are ineffective while you are using the advanced setup menu. ■ SP IMP. (Speaker impedance) Use to set the impedance of this unit so that it - Yamaha RX-V4600 | MCXSP10 Manual - Page 91
the previously selected menu item. 2 Press DISPLAY on the remote control to enter the menu. ■ AUTO SETUP Item SETUP AUTO Sub-items EQ START [ENTER] NATURAL FRONT FLAT Features • Use to specify the speaker parameters auto setup adjusts. • Corresponds to Setup Type in the GUI menu (see page 29 - Yamaha RX-V4600 | MCXSP10 Manual - Page 92
FRONT PANEL DISPLAY MENUS ■ MANUAL SETUP 1 BASIC MENU Item A)SPEAKER SET B)SP DISTANCE C)SP LEVEL D)TEST TONE Sub-items FRONT;;;;SMALL CENTER;;;;;SML SURR LR;;;;SML SURR B;;;SMLx2 PRESENCE;;NONE BASS OUT;;SWFR CrossOver;80Hz SWFR PHASE;NRM UNIT;;;;meters FRONT L;;3.00m FRONT R;;3.00m CENTER;;;3. - Yamaha RX-V4600 | MCXSP10 Manual - Page 93
(see page 58). • Adjusts the tonal balance of the speakers and headphones. • Corresponds to Tone Control in the GUI menu (see page 60). • "BASS SP audio settings for this unit. • Corresponds to Audio Option in the GUI menu (see page 60). Features • Assigns jacks according to the component to be used - Yamaha RX-V4600 | MCXSP10 Manual - Page 94
HDMI audio signal playback source. • Corresponds to Support Audio in the GUI menu (see page 98). Features • Selects the input assignment for registered i.LINK components page 68). • Initializes the parameters of all or a group of sound field programs. • Corresponds to Sur.Initialize in the GUI menu ( - Yamaha RX-V4600 | MCXSP10 Manual - Page 95
). • This unit supports i.LINK (AUDIO) components only. Because this unit does not support i.LINK (VIDEO), video signals, such as MPEG2-TS (BS digital, etc.) or DV (DV camera, DVD recorder, etc.), are not compatible with this unit. • If this unit is in the standby mode or turned off, signals cannot - Yamaha RX-V4600 | MCXSP10 Manual - Page 96
be used when this unit is connected to an i.LINK component. 1 Switch on this unit and video monitor. 2 Set AMP/SOURCE/TV to AMP, then press TOP on the remote control. The top display appears. AMP SOURCE TV TOP TITLE Stereo/Surround Input Select Manual Setup Auto Setup System Memory Sound Basic - Yamaha RX-V4600 | MCXSP10 Manual - Page 97
component is connected. - Audio (for audio signals) or Non Audio (for nonaudio signals): Displays depending on whether your i.LINK component supports audio Auto Play (Auto Play) Use this feature to turn on/off automatic playback when an i.LINK component is selected using the INPUT selector or to - Yamaha RX-V4600 | MCXSP10 Manual - Page 98
the i.LINK component connection is being checked.* * Playback may stop while this message is displayed. ■ Error messages The components so that this unit and the i.LINK (AUDIO) component are directly connected may resolve this problem. Check that all i.LINK components are connected properly using - Yamaha RX-V4600 | MCXSP10 Manual - Page 99
is set to the standby mode or the power is turned off. • When connecting other HDMI components to this unit, refer to the instruction manuals for those components. • When HDMI audio signals are output from components like a DVD player, the audio signal format (such as sampling frequencies) may be - Yamaha RX-V4600 | MCXSP10 Manual - Page 100
of an error, an error message appears on the GUI or the front panel display. Device Over: more than 5 HDMI components (including this unit) are connected. Reduce the number of the connected HDMI components HDCP Error: HDCP testing failed. Check whether the connected HDMI components support HDCP copy - Yamaha RX-V4600 | MCXSP10 Manual - Page 101
VCR 1 CBL/SAT DTV DVD MD/TAPE CD-R SP A A.SEL:HDMI CD TUNER PHONO dB VOLUME LR 3 Start playback on the connected HDMI component. Display Select Input Assign Support Audio Speaker B IN 1 IN 2 Zone 3 Volume Note When the HDMI component connected to the selected HDMI IN jack is not transmitting - Yamaha RX-V4600 | MCXSP10 Manual - Page 102
Speaker B DVD DTV CBL/SAT ■ Support Audio (Support audio) Use this feature to select whether to play back HDMI audio signals on this unit or on another HDMI component connected to the HDMI OUT jack of this unit. HDMI > Support Audio > Choices: RX-V4600, Other • Select RX-V4600 to play back HDMI - Yamaha RX-V4600 | MCXSP10 Manual - Page 103
1 Set AMP/SOURCE/TV to AMP, then press TOP on the remote control. AMP SOURCE TV TOP TITLE 2 Select Stereo/Surround, then press h. STEREO MUSIC ENTERTAINMENT MOVIE THEATER Munich Vienna Freiburg 3 Select the desired sound field program, then press h to access and adjust. Munich Vienna Freiburg - Yamaha RX-V4600 | MCXSP10 Manual - Page 104
repeatedly reflected around a room, the larger the hall is, the longer the time between the original reflected sound and the subsequent reflections. By controlling the time between the reflected sounds, you can change the apparent size of the virtual venue. Changing this parameter from one to two - Yamaha RX-V4600 | MCXSP10 Manual - Page 105
when at least two front channels and two surround channels are used. Control range: 1 to 49 ms ■ Sur.Room Size (Surround room size) Function: Adjusts the apparent size of the surround sound field. Control range: 0.1 to 2.0 ■ Sur.Liveness (Surround liveness) Function: Adjusts the apparent - Yamaha RX-V4600 | MCXSP10 Manual - Page 106
. Description: The larger the value, the later the reverberation sound begins. A later reverberation sound makes you feel like you are in a larger acoustic environment. Control range: 0 to 250 ms Source sound Level (dB) Reverberation 60 dB Time Reverberation Reverberation time delay ■ Rev - Yamaha RX-V4600 | MCXSP10 Manual - Page 107
elements to the presence speakers. Description: The larger the parameter, the higher the position of the front and center channel sound. Choices: 0, 1, 2, 3, 4, 5 For 7ch Stereo Function: Adjusts the volume level for each channel in 7-channel stereo mode. Control range: 0 - 100% Center - Yamaha RX-V4600 | MCXSP10 Manual - Page 108
appears when the surround back speakers are not available. ■ Initialize (Initialize) Function: Initializes the parameters for each sound field subprogram. Choices: NO, YES Note If you want to initialize all of the parameters within a sound field program group, use Sur.Initialize (see page 67 - Yamaha RX-V4600 | MCXSP10 Manual - Page 109
not listed below or if the instruction below does not help, set this unit to the standby mode, disconnect the power cable, and contact the nearest authorized YAMAHA dealer or service center. ■ General Problem This unit fails to turn on when STANDBY/ ON (or SYSTEM POWER) is pressed, or enters in the - Yamaha RX-V4600 | MCXSP10 Manual - Page 110
speaker wires are not touching each other and then turn this unit back on. - The sleep timer has turned the unit off. Turn on the power, and play the source again. - The sound is muted. Press MUTE to cancel a mute. 35 Incorrect cable connections. Connect the cables properly. If the problem - Yamaha RX-V4600 | MCXSP10 Manual - Page 111
TROUBLESHOOTING Problem Cause Remedy Refer to page Dolby Digital or DTS The connected component is not set to Make an appropriate setting following the operations sources cannot be output Dolby Digital or DTS digital instructions for your component. - played. (Dolby Digital signals. or - Yamaha RX-V4600 | MCXSP10 Manual - Page 112
TROUBLESHOOTING ■ Tuner Problem FM stereo reception is noisy. There is distortion, and AM loop antenna connections and orient it for the best reception. Use the manual tuning method. Use an outdoor antenna and a ground wire. This will help somewhat, but it is difficult to eliminate all noise. Move - Yamaha RX-V4600 | MCXSP10 Manual - Page 113
, set it to the TV position. The remote control code was not correctly Set the remote control code correctly using set. "LIST OF REMOTE CONTROL CODES" at the end 71 of this manual. Try setting another code of the same manufacturer using "LIST OF REMOTE CONTROL CODES" at 71 the end of this - Yamaha RX-V4600 | MCXSP10 Manual - Page 114
that offered by the PCM format used for normal audio CDs. ■ DTS 96/24 DTS 96/24 offers an unprecedented level of audio quality for multi-channel sound on DVD-Video, and is fully backward-compatible with all DTS decoders. "96" refers to a 96 kHz sampling rate (compared to the typical 48 kHz sampling - Yamaha RX-V4600 | MCXSP10 Manual - Page 115
not include a center speaker. GLOSSARY Audio information ■ ASA (Advanced Speaker Array) ASA is a proprietary THX technology which processes the sound fed to 2 side and 2 back surround speakers to provide the optimal surround sound experience. When you set up your home theater system using all eight - Yamaha RX-V4600 | MCXSP10 Manual - Page 116
Dolby Digital and DVD-Audio to provide a wide stable rear soundstage. ■ THX Select2 Before any home theatre component can be THX Select2 certified, it must incorporate all the features described in THX Cinema processing and also pass a rigorous series of quality and performance tests. Only then can - Yamaha RX-V4600 | MCXSP10 Manual - Page 117
home consumer market may exhibit wording to that effect on the packaging. A list of movies created using this technology can be found on the Dolby web site at www.dolby.com. A list of available DVD software titles encoded with this technology can be found at www.thx.com. Only receiver and controller - Yamaha RX-V4600 | MCXSP10 Manual - Page 118
INFORMATION This unit employs YAMAHA Parametric Room Acoustic Optimizer (YPAO) technology, together with the Parametric EQ settings (see page 59), to optimize the frequency characteristics of its parametric equalizer to match your listening environment. YPAO uses a combination of the following - Yamaha RX-V4600 | MCXSP10 Manual - Page 119
AUDIO SECTION • Minimum RMS Output Power for Front, Center, Surround, Surround back 20 Hz to 20 kHz, 0.04% THD, 8 130 W • Maximum Power (EIAJ) [Asia, General, China and Korea models] 1 kHz, 10% THD, 8 180 W • Dynamic Power S-video 5 Hz to 10 MHz, -3 dB Component 5 Hz to 60 MHz, -3 dB FM SECTION - Yamaha RX-V4600 | MCXSP10 Manual - Page 120
Signal to Noise Ratio (IHF) HD [U.S.A. model only 80 dB • Harmonic Distortion (1 kHz) HD [U.S.A. model only 0.03% • Stereo Separation (1 kHz) HD [U.S.A. model only 70 dB • Frequency Response (20 Hz to 12.5 kHz) HD [U.S.A. model only 0.5/-3 dB GENERAL • Power Supply [U.S.A. and Canada models AC - Yamaha RX-V4600 | MCXSP10 Manual - Page 121
REMOTE CONTROL CODES PHILIPS 0184 PIONEER 0059, 0332 POLK AUDIO 0184 PROTON 0184 QED 0184 QUAD 0184 YAMAHA 2300, 2301 CD RECORDER KENWOOD MARANTZ PHILIPS YAMAHA 0653 0653 0653 2400 DVD YAMAHA 2200 MD RECORDER KENWOOD ONKYO SHARP SONY YAMAHA 0708 0895 0888 0517 2500, 2501, 2502 RECEIVER - Yamaha RX-V4600 | MCXSP10 Manual - Page 122
0847, 1141, 1280 SAMSUNG 1044, 1136, 1303, 1319 SAT CONTROL 1327 SATSTATION 1110 SCHWAIGER 1138 SEEMANN 0423 SIEMENS 0200 SONY 0666, PHILIPS 0056 PIONEER 0054 POLK AUDIO 0056 RCA 0054 REVOX 0056 SANSUI 0056 SONY 0270 THORENS 0056 WARDS 0054 YAMAHA 2700,2701 TV AGB 0543 - Yamaha RX-V4600 | MCXSP10 Manual - Page 123
CONTEC 0036, 0207 CRAIG 0207 CROSLEY 0081 CROWN 0036, 0064, 0207, 0397, 0445 CURTIS MATHES 0057, 0074, 0081, 0087, 0120, 0172, 0181, 0193, 0478, 0729, 1174, 1374 DAEWOO 0036, 0057, 0064, 0119, 0135, 0181, 0197, 0205, 0207, 0401, 0478, 0650, 0661, 1688 DANSAI 0064 DAYTON 0036 DE - Yamaha RX-V4600 | MCXSP10 Manual - Page 124
VISION 0347 VOXSON 0190 WALTHAM 0383 WARDS 0057, 0081, 0205, 0893 WATSON 0064, 0347 WAYCON 0183 WHITE WESTINGHOUSE 0064, 0347, 0490, 0650 YAMAHA 0057, 0796, 0860, 2900 (projector), 2901 (projector), 2902 YAPSHE 0277 YOKO 0064, 0291 ZENITH 0044, 0119, 0205, 0490 VCR ASA 0064 - Yamaha RX-V4600 | MCXSP10 Manual - Page 125
PIONEER 0069, 0094, 0108 POLK AUDIO 0108 PROFITRONIC 0267 PROLINE 0027 PROSCAN 0087, 1087 PROTEC 0099 PULSAR 0066 PYE 0075, 0087, 0099, 0108, 0267 WHITE WESTINGHOUSE 0099 XR-1000 0027, 0062, 0099 YAMAHA 0068 YAMISHI 0099 YOKAN 0099 YOKO 0267 ZENITH 0027, 0060, 0066, 1506 v - Yamaha RX-V4600 | MCXSP10 Manual - Page 126
ELECTRONIQUE FRANCE S.A. RUE AMBROISE CROIZAT BP70 CROISSY-BEAUBOURG 77312 MARNE-LA-VALLEE CEDEX02, FRANCE YAMAHA ELECTRONICS (UK) LTD. YAMAHA HOUSE, 200 RICKMANSWORTH ROAD WATFORD, HERTS WD18 7GQ, ENGLAND YAMAHA SCANDINAVIA A.B. J A WETTERGRENS GATA 1, BOX 30053, 400 43 VÄSTRA FRÖLUNDA, SWEDEN
-
 1
1 -
 2
2 -
 3
3 -
 4
4 -
 5
5 -
 6
6 -
 7
7 -
8
-
9
-
10
-
11
-
12
-
13
-
14
-
15
-
16
-
17
-
18
-
19
-
20
-
21
-
22
-
23
-
24
-
25
-
26
-
27
-
28
-
29
-
30
-
31
-
32
-
33
-
34
-
35
-
36
-
37
-
38
-
39
-
40
-
41
-
42
-
43
-
44
-
45
-
46
-
47
-
48
-
49
-
50
-
51
-
52
-
53
-
54
-
55
-
56
-
57
-
58
-
59
-
60
-
61
-
62
-
63
-
64
-
65
-
66
-
67
-
68
-
69
-
70
-
71
-
72
-
73
-
74
-
75
-
76
-
77
-
78
-
79
-
80
-
81
-
82
-
83
-
84
-
85
-
86
-
87
-
88
-
89
-
90
-
91
-
92
-
93
-
94
-
95
-
96
-
97
-
98
-
99
-
100
-
101
-
102
-
103
-
104
-
105
-
106
-
107
-
108
-
109
-
110
-
111
-
112
-
113
-
114
-
115
-
116
-
117
-
118
-
119
-
120
-
121
-
122
-
123
-
124
-
125
-
126
 |
 |

RX-V4600
AV Receiver
OWNER’S MANUAL
U