eMachines M6809 eMachines M-Series Notebook User's Guide - Page 72
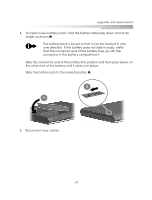
Perform a system restore to load your notebook's original shipping, reconnect your cables.
 |
View all eMachines M6809 manuals
Add to My Manuals
Save this manual to your list of manuals |
Page 72 highlights
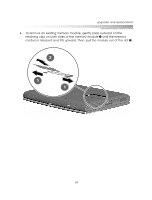
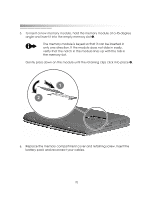
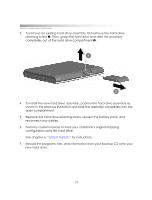
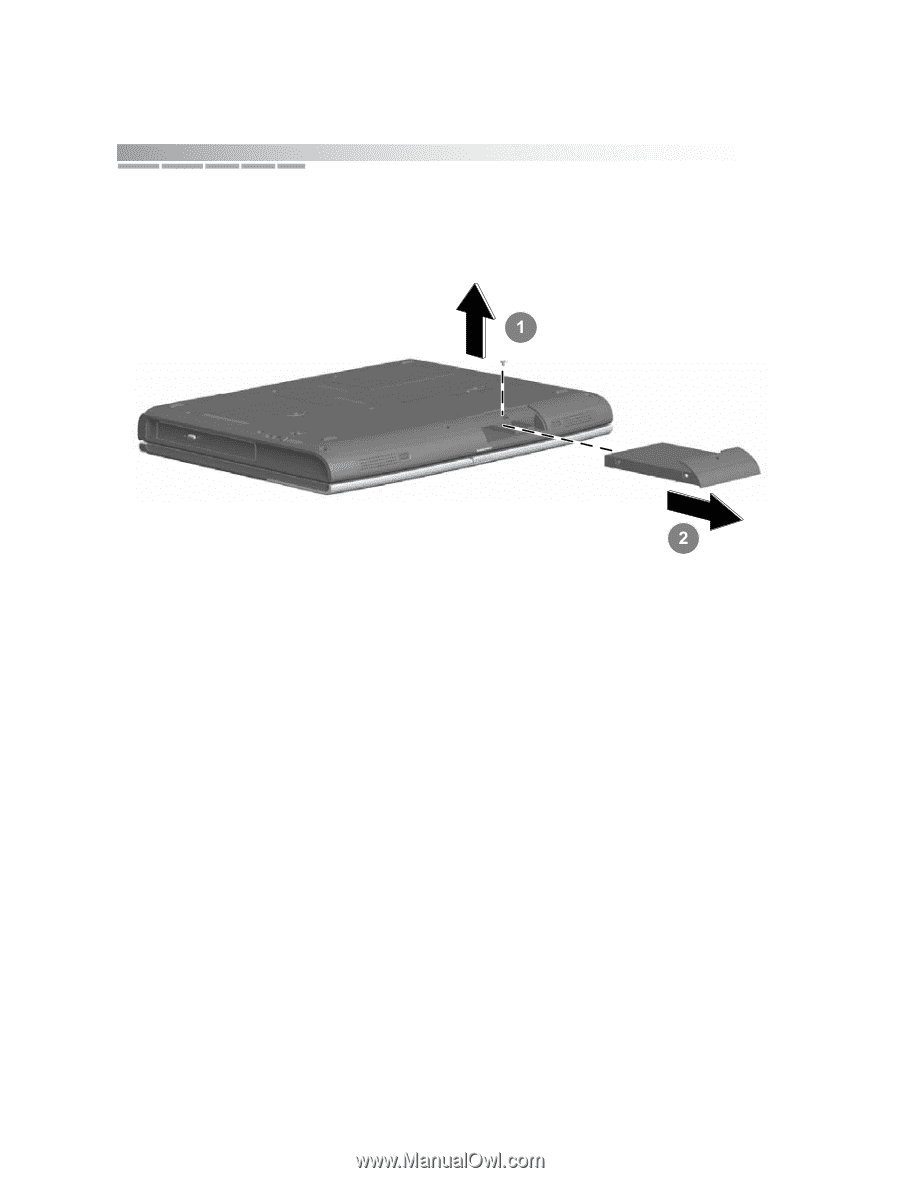
getting started 3. To remove an existing hard drive assembly, first remove the hard drive retaining screw 1. Then, grasp the hard drive and slide the assembly completely out of the hard drive compartment 2. 4. To install the new hard drive assembly, position the hard drive assembly as shown in the previous illustration and slide the assembly completely into the open compartment. 5. Replace the hard drive retaining screw, reinsert the battery pack, and reconnect your cables. 6. Perform a system restore to load your notebook's original shipping configuration onto this hard drive. See chapter 6, "system restore," for instructions. 7. Reload the programs, files, and information from your backup CD onto your new hard drive. 72
-
 1
1 -
2
-
3
-
4
-
5
-
6
-
7
-
8
-
9
-
10
-
11
-
12
-
13
-
14
-
15
-
16
-
17
-
18
-
19
-
20
-
21
-
22
-
23
-
24
-
25
-
26
-
27
-
28
-
29
-
30
-
31
-
32
-
33
-
34
-
35
-
36
-
37
-
38
-
39
-
40
-
41
-
42
-
43
-
44
-
45
-
46
-
47
-
48
-
49
-
50
-
51
-
52
-
53
-
54
-
55
-
56
-
57
-
58
-
59
-
60
-
61
-
62
-
63
-
64
-
65
-
66
-
 67
67 -
 68
68 -
 69
69 -
 70
70 -
 71
71 -
 72
72 -
 73
73 -
 74
74 -
 75
75 -
 76
76 -
 77
77 -
78
-
79
-
80
-
81
-
82
-
83
-
84
-
85
-
86
-
87
-
88
-
89
-
90
 |
 |
getting started
72
3.
To remove an existing hard drive assembly,
first remove the hard drive
retaining screw
1
. Then, grasp the hard drive and slide the assembly
completely out of the hard drive compartment
2
.
4.
To install the new hard drive assembly
, position the hard drive assembly as
shown in the previous illustration and slide the assembly completely into the
open compartment.
5.
Replace the hard drive retaining screw, reinsert the battery pack, and
reconnect your cables.
6.
Perform a system restore to load your notebook’s original shipping
configuration onto this hard drive.
See chapter 6, “
system restore
,” for instructions.
7.
Reload the programs, files, and information from your backup CD onto your
new hard drive.