eMachines T3656 8512161 - eMachines Desktop Hardware Reference Guide - Page 57
bead of thermal grease about the size of a pea to
 |
View all eMachines T3656 manuals
Add to My Manuals
Save this manual to your list of manuals |
Page 57 highlights
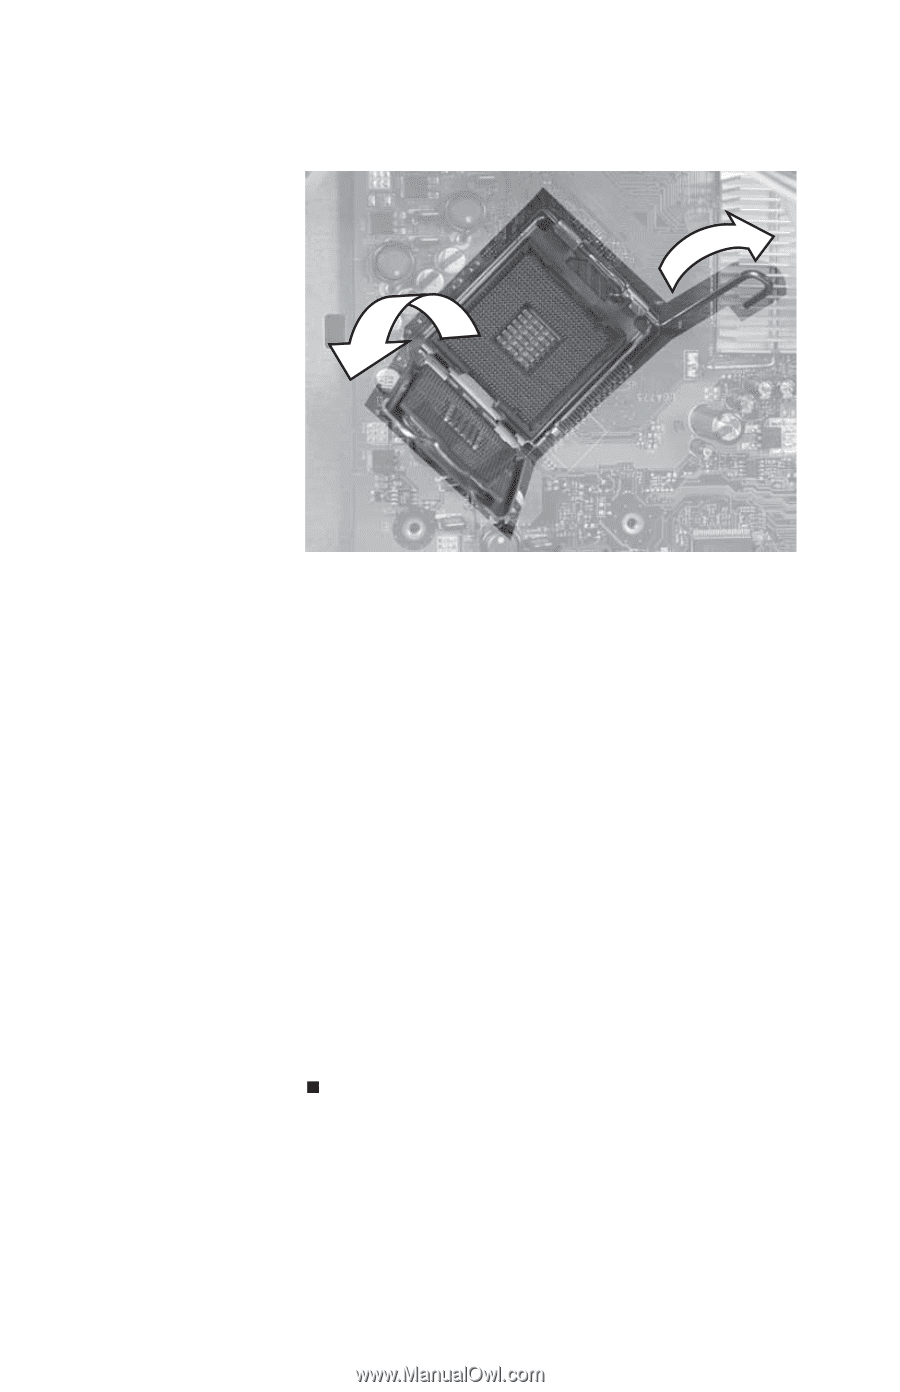
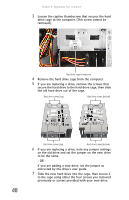
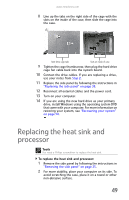
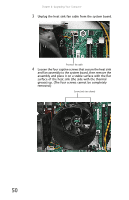
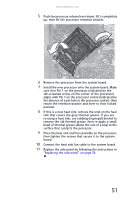
www.emachines.com 5 Push the processor release lever down, lift it completely up, then lift the processor retention bracket. 6 Remove the processor from the system board. 7 Install the new processor onto the system board. Make sure that Pin 1 on the processor (indicated by the silk-screened arrow on the corner of the processor) aligns with Pin 1 on the processor socket (indicated by the absence of a pin hole in the processor socket), then return the retention bracket and lever to their locked position. 8 If this is a new heat sink, remove the strip on the heat sink that covers the gray thermal grease. If you are re-using a heat sink, use rubbing (isopropyl) alcohol to remove the old thermal grease, then re-apply a small bead of thermal grease (about the size of a pea) to the surface that contacts the processor. 9 Place the heat sink and fan assembly on the processor, then tighten the screws that secure it to the system board. 10 Connect the heat sink fan cable to the system board. 11 Replace the side panel by following the instructions in "Replacing the side panel" on page 38. 51
-
 1
1 -
2
-
3
-
4
-
5
-
6
-
7
-
8
-
9
-
10
-
11
-
12
-
13
-
14
-
15
-
16
-
17
-
18
-
19
-
20
-
21
-
22
-
23
-
24
-
25
-
26
-
27
-
28
-
29
-
30
-
31
-
32
-
33
-
34
-
35
-
36
-
37
-
38
-
39
-
40
-
41
-
42
-
43
-
44
-
45
-
46
-
47
-
48
-
49
-
50
-
51
-
 52
52 -
 53
53 -
 54
54 -
 55
55 -
 56
56 -
 57
57 -
 58
58 -
 59
59 -
 60
60 -
 61
61 -
 62
62 -
63
-
64
-
65
-
66
-
67
-
68
-
69
-
70
-
71
-
72
-
73
-
74
-
75
-
76
-
77
-
78
-
79
-
80
-
81
-
82
-
83
-
84
-
85
-
86
-
87
-
88
-
89
-
90
-
91
-
92
-
93
-
94
-
95
-
96
-
97
-
98
-
99
-
100
-
101
-
102
-
103
-
104
-
105
-
106
-
107
-
108
-
109
-
110
-
111
-
112
-
113
-
114
-
115
-
116
-
117
-
118
-
119
-
120
-
121
-
122
-
123
-
124
-
125
-
126
-
127
-
128
-
129
-
130
-
131
-
132
-
133
-
134
 |
 |