2012 Dodge Journey User Guide - Page 61
2012 Dodge Journey Manual

Page 61 highlights
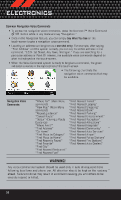
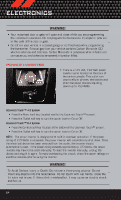
ELECTRONICS VIDEO ENTERTAINMENT SYSTEM (VES)™ System Operation • The screen is located on the headliner behind the front seat. To lower the screen, press the release button located in the rear of the overhead console. • The system may be controlled by the front seat occupants using the touch-screen radio, or by the rear seat occupants using the remote control. • The video screen displays information in a split-screen format. The left side of the screen is referred to as Channel 1 and the right side of the screen is referred to as Channel 2. All modes except video modes are displayed in a split-screen format. • To use the headphones, press the power button located on the right ear cup. Select the channel on the headphones (1 or 2) that corresponds to the channel selected on the VES™ screen. Operation Of The Remote • The remote control operates similarly to any DVD remote you have used before and allows the rear seat passengers to change stations, tracks, discs and audio/video modes. • The remote control is designed to control either channel by using the selector switch located on the right side of the remote. • Pressing the power button will turn the VES™ system ON/OFF. • Pressing the MODE button causes the Mode Selection menu to appear on the VES™ screen. Use the remote control arrow buttons to scroll through the available modes, then press ENTER to select the desired mode. Auxiliary Audio/Video Input Jacks • The Aux jacks are located on the rear of the center console. • Connect the video game or other external media devices to the AUX jacks following the color coding for VES™ jacks. • Using either the touch-screen radio or remote control, select AUX from the Rear VES™ Control or Mode Selection screen. • Refer to your vehicle's Owners Manual on the DVD for further details. 59
-
 1
1 -
2
-
3
-
4
-
5
-
6
-
7
-
8
-
9
-
10
-
11
-
12
-
13
-
14
-
15
-
16
-
17
-
18
-
19
-
20
-
21
-
22
-
23
-
24
-
25
-
26
-
27
-
28
-
29
-
30
-
31
-
32
-
33
-
34
-
35
-
36
-
37
-
38
-
39
-
40
-
41
-
42
-
43
-
44
-
45
-
46
-
47
-
48
-
49
-
50
-
51
-
52
-
53
-
54
-
55
-
 56
56 -
 57
57 -
 58
58 -
 59
59 -
 60
60 -
 61
61 -
 62
62 -
 63
63 -
 64
64 -
 65
65 -
 66
66 -
67
-
68
-
69
-
70
-
71
-
72
-
73
-
74
-
75
-
76
-
77
-
78
-
79
-
80
-
81
-
82
-
83
-
84
-
85
-
86
-
87
-
88
-
89
-
90
-
91
-
92
-
93
-
94
-
95
-
96
-
97
-
98
-
99
-
100
-
101
-
102
-
103
-
104
-
105
-
106
-
107
-
108
 |
 |
