2000 Honda CR-V Owner's Manual - Page 213
2000 Honda CR-V Manual

Page 213 highlights
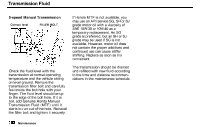
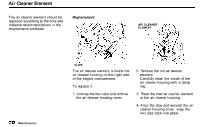
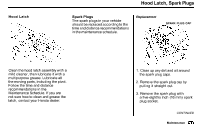
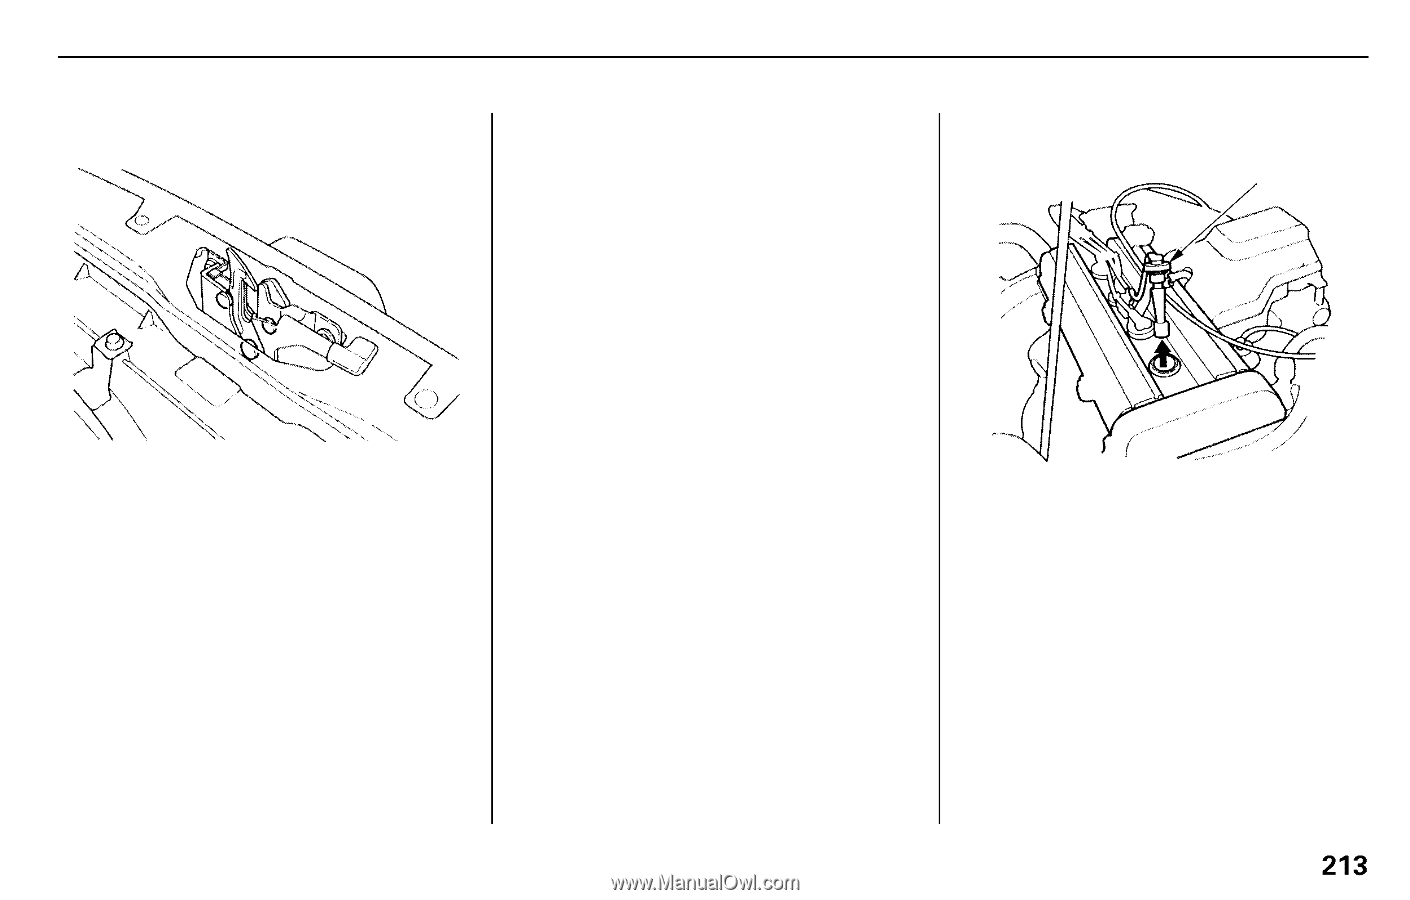
Hood Latch, Spark Plugs Hood Latch Spark Plugs The spark plugs in your vehicle should be replaced according to the time and distance recommendations in the maintenance schedule. Replacement SPARK PLUG CAP Clean the hood latch assembly with a mild cleaner, then lubricate it with a multipurpose grease. Lubricate all the moving parts, including the pivot. Follow the time and distance recommendations in the Maintenance Schedule. If you are not sure how to clean and grease the latch, contact your Honda dealer. 1. Clean up any dirt and oil around the spark plug caps. 2. Remove the spark plug cap by pulling it straight out. 3. Remove the spark plug with a five-eighths inch (16 mm) spark plug socket. CONTINUED Maintenance
-
 1
1 -
2
-
3
-
4
-
5
-
6
-
7
-
8
-
9
-
10
-
11
-
12
-
13
-
14
-
15
-
16
-
17
-
18
-
19
-
20
-
21
-
22
-
23
-
24
-
25
-
26
-
27
-
28
-
29
-
30
-
31
-
32
-
33
-
34
-
35
-
36
-
37
-
38
-
39
-
40
-
41
-
42
-
43
-
44
-
45
-
46
-
47
-
48
-
49
-
50
-
51
-
52
-
53
-
54
-
55
-
56
-
57
-
58
-
59
-
60
-
61
-
62
-
63
-
64
-
65
-
66
-
67
-
68
-
69
-
70
-
71
-
72
-
73
-
74
-
75
-
76
-
77
-
78
-
79
-
80
-
81
-
82
-
83
-
84
-
85
-
86
-
87
-
88
-
89
-
90
-
91
-
92
-
93
-
94
-
95
-
96
-
97
-
98
-
99
-
100
-
101
-
102
-
103
-
104
-
105
-
106
-
107
-
108
-
109
-
110
-
111
-
112
-
113
-
114
-
115
-
116
-
117
-
118
-
119
-
120
-
121
-
122
-
123
-
124
-
125
-
126
-
127
-
128
-
129
-
130
-
131
-
132
-
133
-
134
-
135
-
136
-
137
-
138
-
139
-
140
-
141
-
142
-
143
-
144
-
145
-
146
-
147
-
148
-
149
-
150
-
151
-
152
-
153
-
154
-
155
-
156
-
157
-
158
-
159
-
160
-
161
-
162
-
163
-
164
-
165
-
166
-
167
-
168
-
169
-
170
-
171
-
172
-
173
-
174
-
175
-
176
-
177
-
178
-
179
-
180
-
181
-
182
-
183
-
184
-
185
-
186
-
187
-
188
-
189
-
190
-
191
-
192
-
193
-
194
-
195
-
196
-
197
-
198
-
199
-
200
-
201
-
202
-
203
-
204
-
205
-
206
-
207
-
 208
208 -
 209
209 -
 210
210 -
 211
211 -
 212
212 -
 213
213 -
 214
214 -
 215
215 -
 216
216 -
 217
217 -
 218
218 -
219
-
220
-
221
-
222
-
223
-
224
-
225
-
226
-
227
-
228
-
229
-
230
-
231
-
232
-
233
-
234
-
235
-
236
-
237
-
238
-
239
-
240
-
241
-
242
-
243
-
244
-
245
-
246
-
247
-
248
-
249
-
250
-
251
-
252
-
253
-
254
-
255
-
256
-
257
-
258
-
259
-
260
-
261
-
262
-
263
-
264
-
265
-
266
-
267
-
268
-
269
-
270
-
271
-
272
-
273
-
274
-
275
-
276
-
277
-
278
-
279
-
280
-
281
-
282
-
283
-
284
-
285
-
286
-
287
-
288
-
289
-
290
-
291
-
292
-
293
-
294
-
295
-
296
-
297
-
298
-
299
-
300
-
301
-
302
-
303
 |
 |
Hood Latch, Spark Plugs
Hood Latch
Clean the hood latch assembly with a
mild cleaner, then lubricate it with a
multipurpose grease. Lubricate all
the moving parts, including the pivot.
Follow the time and distance
recommendations in the
Maintenance Schedule. If you are
not sure how to clean and grease the
latch, contact your Honda dealer.
Spark Plugs
The spark plugs in your vehicle
should be replaced according to the
time and distance recommendations
in the maintenance schedule.
Replacement
SPARK PLUG CAP
1. Clean up any dirt and oil around
the spark plug caps.
2. Remove the spark plug cap by
pulling it straight out.
3. Remove the spark plug with
a five-eighths inch (16 mm) spark
plug socket.
CONTINUED
Maintenance