2000 Honda CR-V Owner's Manual - Page 235
2000 Honda CR-V Manual
Page 235 highlights
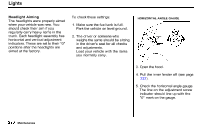
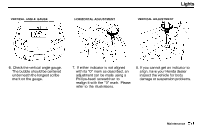
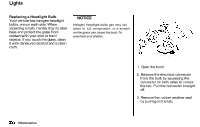
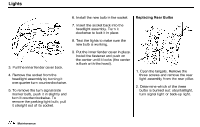
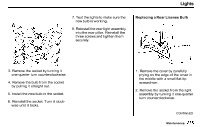
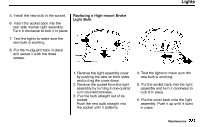
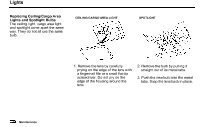
Lights 7. Test the lights to make sure the new bulb is working. 8. Reinstall the rear light assembly into the rear pillar. Reinstall the three screws and tighten them securely. Replacing a Rear License Bulb 3. Remove the socket by turning it one-quarter turn counterclockwise. 4. Remove the bulb from the socket by pulling it straight out. 5. Install the new bulb in the socket. 6. Reinstall the socket. Turn it clockwise until it locks. 1. Remove the cover by carefully prying on the edge of the cover in the middle with a small flat-tip screwdriver. 2. Remove the socket from the light assembly by turning it one-quarter turn counterclockwise. CONTINUED Maintenance
-
 1
1 -
2
-
3
-
4
-
5
-
6
-
7
-
8
-
9
-
10
-
11
-
12
-
13
-
14
-
15
-
16
-
17
-
18
-
19
-
20
-
21
-
22
-
23
-
24
-
25
-
26
-
27
-
28
-
29
-
30
-
31
-
32
-
33
-
34
-
35
-
36
-
37
-
38
-
39
-
40
-
41
-
42
-
43
-
44
-
45
-
46
-
47
-
48
-
49
-
50
-
51
-
52
-
53
-
54
-
55
-
56
-
57
-
58
-
59
-
60
-
61
-
62
-
63
-
64
-
65
-
66
-
67
-
68
-
69
-
70
-
71
-
72
-
73
-
74
-
75
-
76
-
77
-
78
-
79
-
80
-
81
-
82
-
83
-
84
-
85
-
86
-
87
-
88
-
89
-
90
-
91
-
92
-
93
-
94
-
95
-
96
-
97
-
98
-
99
-
100
-
101
-
102
-
103
-
104
-
105
-
106
-
107
-
108
-
109
-
110
-
111
-
112
-
113
-
114
-
115
-
116
-
117
-
118
-
119
-
120
-
121
-
122
-
123
-
124
-
125
-
126
-
127
-
128
-
129
-
130
-
131
-
132
-
133
-
134
-
135
-
136
-
137
-
138
-
139
-
140
-
141
-
142
-
143
-
144
-
145
-
146
-
147
-
148
-
149
-
150
-
151
-
152
-
153
-
154
-
155
-
156
-
157
-
158
-
159
-
160
-
161
-
162
-
163
-
164
-
165
-
166
-
167
-
168
-
169
-
170
-
171
-
172
-
173
-
174
-
175
-
176
-
177
-
178
-
179
-
180
-
181
-
182
-
183
-
184
-
185
-
186
-
187
-
188
-
189
-
190
-
191
-
192
-
193
-
194
-
195
-
196
-
197
-
198
-
199
-
200
-
201
-
202
-
203
-
204
-
205
-
206
-
207
-
208
-
209
-
210
-
211
-
212
-
213
-
214
-
215
-
216
-
217
-
218
-
219
-
220
-
221
-
222
-
223
-
224
-
225
-
226
-
227
-
228
-
229
-
 230
230 -
 231
231 -
 232
232 -
 233
233 -
 234
234 -
 235
235 -
 236
236 -
 237
237 -
 238
238 -
 239
239 -
 240
240 -
241
-
242
-
243
-
244
-
245
-
246
-
247
-
248
-
249
-
250
-
251
-
252
-
253
-
254
-
255
-
256
-
257
-
258
-
259
-
260
-
261
-
262
-
263
-
264
-
265
-
266
-
267
-
268
-
269
-
270
-
271
-
272
-
273
-
274
-
275
-
276
-
277
-
278
-
279
-
280
-
281
-
282
-
283
-
284
-
285
-
286
-
287
-
288
-
289
-
290
-
291
-
292
-
293
-
294
-
295
-
296
-
297
-
298
-
299
-
300
-
301
-
302
-
303
 |
 |
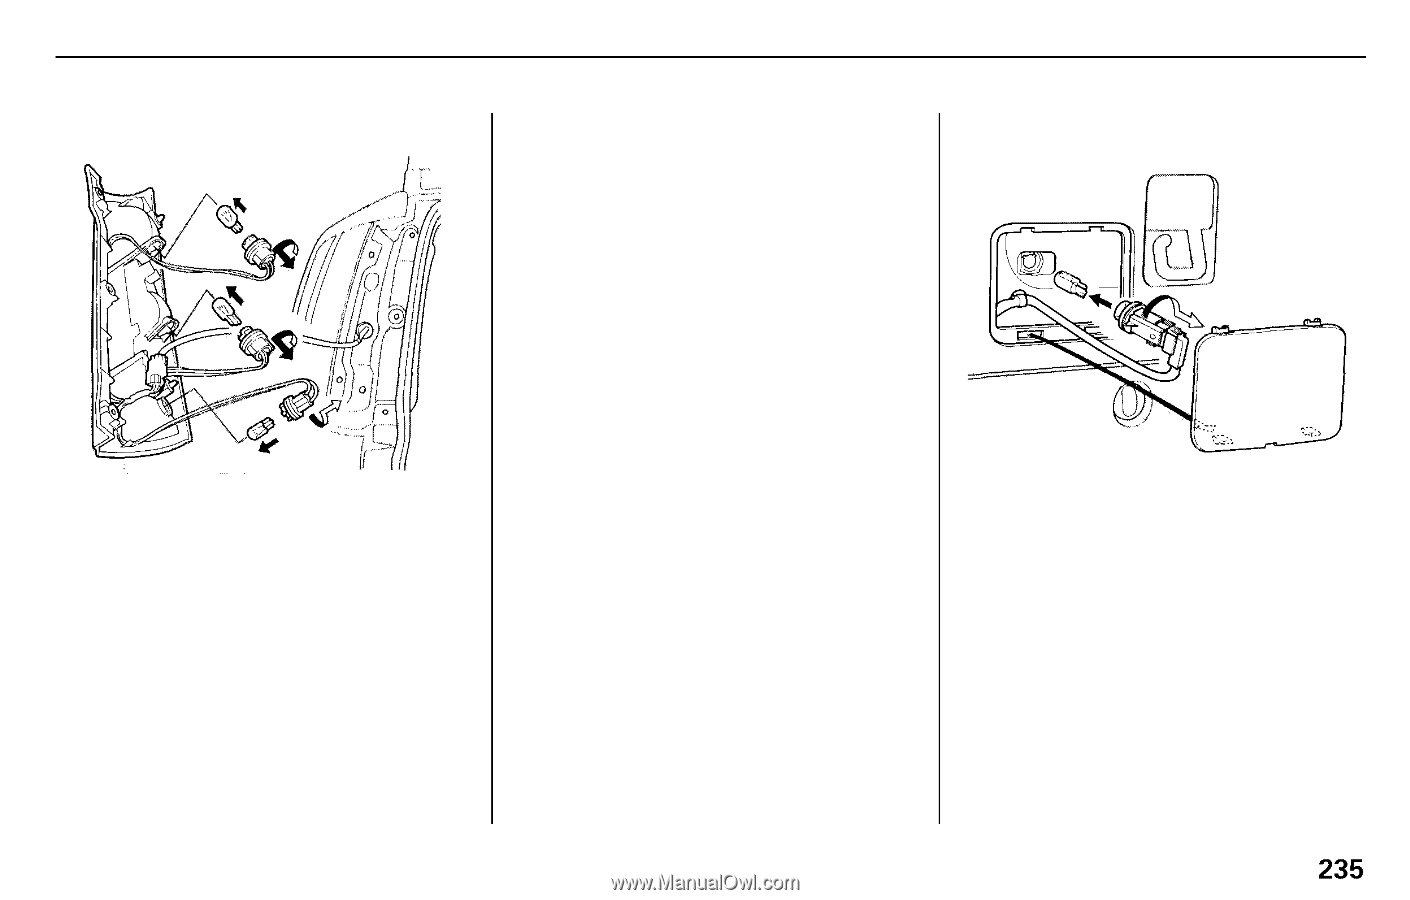
Lights
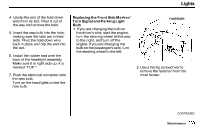
3. Remove the socket by turning it
one-quarter turn counterclockwise.
4. Remove the bulb from the socket
by pulling it straight out.
5. Install the new bulb in the socket.
6. Reinstall the socket. Turn it clock-
wise until it locks.
7. Test the lights to make sure the
new bulb is working.
8. Reinstall the rear light assembly
into the rear pillar. Reinstall the
three screws and tighten them
securely.
Replacing a Rear License Bulb
1. Remove the cover by carefully
prying on the edge of the cover in
the middle with a small flat-tip
screwdriver.
2. Remove the socket from the light
assembly by turning it one-quarter
turn counterclockwise.
CONTINUED
Maintenance