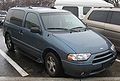
2001 Nissan Quest Owner's Manual
2001 Nissan Quest Manual
2001 Nissan Quest manual content summary:
- 2001 Nissan Quest | Owner's Manual - Page 1
law. Your NISSAN dealership knows your vehicle best. When you require any service or have any for conditions. ● ALWAYS use your seat belts and appropriate child restraint systems. Pre problems resulting from modifications may not be covered under NISSAN warranties. WHEN READING THE MANUAL This manual - 2001 Nissan Quest | Owner's Manual - Page 2
manual contain a minimum of 50% recycled fibers, including 10% post-consumer fibers. CALIFORNIA PROPOSITION 65 WARNING WARNING Engine .'' © 2001 NISSAN NORTH AMERICA, INC. GARDENA, CALIFORNIA All rights reserved. No part of this Owner's Manual may be reproduced or stored in a retrieval system, or - 2001 Nissan Quest | Owner's Manual - Page 3
and the staffs of NISSAN dealers all across Canada. In addition, many Canadians work for companies that supply NISSAN and NISSAN dealers with materials and services ranging from the operation of port facilities and transportation services, to the supply of lubricants, parts and accessories. - 2001 Nissan Quest | Owner's Manual - Page 4
to assist you with all your automobile sales and service needs. However, if there is something that your NISSAN dealer cannot assist you with or you would like to provide NISSAN directly with comments or questions, please contact our (NISSAN's) Consumer Affairs Department using our toll-free number - 2001 Nissan Quest | Owner's Manual - Page 5
- 2001 Nissan Quest | Owner's Manual - Page 6
, restraints and supplemental air bag systems Instruments and controls Pre-driving checks and adjustments Heater, air conditioner and audio systems Starting and driving In case of emergency Appearance and care Do-it-yourself Maintenance Technical and consumer information Index 1 2 3 4 5 6 7 8 9 10 - 2001 Nissan Quest | Owner's Manual - Page 7
supplemental air bag systems Seats ...1-2 Front manual seat adjustment...1-3 Front power seat system...1-31 Precautions on supplemental restraint system ...1-31 Supplemental air bag warning labels ...1-37 Supplemental air bag warning light...1-37 Seat belts ...1-39 Precautions on seat belt - 2001 Nissan Quest | Owner's Manual - Page 8
Installation on second row bench or bucket seat ...1-69 Installation on three-passenger bench seat in second row ...1-72 Installation on three-passenger bench seat in third row...1-72 Integrated child safety seats (if so equipped)...1-73 - 2001 Nissan Quest | Owner's Manual - Page 9
serious internal injuries. ● For most effective protection when the vehicle is in motion, the seat should be upright. Always sit well back in the seat and adjust the seat properly. See ''Precautions on Seat Belt Usage'' later in this section. 1-2 Seats, restraints and supplemental air bag systems - 2001 Nissan Quest | Owner's Manual - Page 10
FRONT MANUAL SEAT ADJUSTMENT WARNING ● Do not adjust the driver's seat while back. To bring the seatback forward again, pull the lever up and move your body forward. The seatback moves forward. Release the lever to lock the seatback in position. Seats, restraints and supplemental air bag systems - 2001 Nissan Quest | Owner's Manual - Page 11
power support seat for a long period of time when the engine is off. This discharges the battery. Operating tips ● The motor has an auto-reset overload protection circuit. If the motor stops during operation, wait 30 seconds, then reactivate the switch. 1-4 Seats, restraints and supplemental air - 2001 Nissan Quest | Owner's Manual - Page 12
stop the movement of the seat. Reclining To recline the seat back, push the power recliner switch backward. To return to a more upright position, push the power recliner switch forward. Release the switch to stop the movement of the seatback. Seats, restraints and supplemental air bag systems 1-5 - 2001 Nissan Quest | Owner's Manual - Page 13
height switch down and release it when the desired position is reached. Lumbar support (if so equipped for driver's seat) The lumbar support provides lower back support to the driver. Move the lever up or down to adjust the seat lumbar area. 1-6 Seats, restraints and supplemental air bag systems - 2001 Nissan Quest | Owner's Manual - Page 14
shoulder belt will not be against your body. back in the seat and adjust the seat belt properly. See ''Precautions on seat belt usage'' later in this section. ● After adjustment, gently rock in the seat to make sure it is securely locked. APD0852 Seats, restraints and supplemental air bag systems - 2001 Nissan Quest | Owner's Manual - Page 15
a storage position. This prevents a passenger from using a seat or seat belt that is out of a seating position. APD0853 Sliding Before sliding the seat, fasten the center belt tongue to the center buckle and remove the appropriate floor mats. 1-8 Seats, restraints and supplemental air bag systems - 2001 Nissan Quest | Owner's Manual - Page 16
, if it must be removed, have a qualified person remove it. That person should refer to the instructions in the service manual. When seat is reinstalled, the attaching bolts must be tightened to the appropriate torque specifications. Failure Seats, restraints and supplemental air bag systems 1-9 - 2001 Nissan Quest | Owner's Manual - Page 17
injury in an accident. Do not remove them. Check the adjustment after someone else uses the seat. Some seat arrangements may require removal of the head restraints when the seat is in a storage position and not to be used by passengers. 1-10 Seats, restraints and supplemental air bag systems - 2001 Nissan Quest | Owner's Manual - Page 18
ARS1137 WRS0049 ARMRESTS To use the armrests on any seat, pull them down to the resting position. UNDERSEAT STORAGE TRAY Some front passenger seats have an underseat storage tray. Pull the tray out to access. Seats, restraints and supplemental air bag systems 1-11 - 2001 Nissan Quest | Owner's Manual - Page 19
seats. Lifting the seats by any of the seat belts could damage them. Damaged seat belts should be replaced at an authorized NISSAN dealer. Failure to follow these instructions could increase the chance and/or severity of injury in an accident. 1-12 Seats, restraints and supplemental air bag systems - 2001 Nissan Quest | Owner's Manual - Page 20
3. Lift up the recliner lever and raise the seatback. 4. Rock the seat back and forth to be sure all four seat legs are securely latched. 5. Insert the single window seat belt tongue into the auxiliary buckle mounted to the side of the seat. Seats, restraints and supplemental air bag systems 1-13 - 2001 Nissan Quest | Owner's Manual - Page 21
body. In an accident you could be thrown into it and receive neck or other serious injuries. You could also slide under the lap belt and receive serious internal injuries. For most effective protection when the vehicle is in motion, the seat should be upright. Always sit well back air bag systems - 2001 Nissan Quest | Owner's Manual - Page 22
ARS1141 1. Lift the recliner lever. 2. Fold the seatback fully forward. Seats, restraints and supplemental air bag systems 1-15 - 2001 Nissan Quest | Owner's Manual - Page 23
ARS1143 3. Unlock the seat legs at the two rear floor latch levers by pulling up on the two straps. 4. Lift the back of the seat and slide it rearward off the front anchor positions. 1-16 Seats, restraints and supplemental air bag systems - 2001 Nissan Quest | Owner's Manual - Page 24
the seatback. 4. Rock the seat back and forth to be sure it is location. Second row passenger side bucket seat The bucket seat near the passenger side sliding door can be moved forward to allow easier entry and exit for third seat passengers. Seats, restraints and supplemental air bag systems - 2001 Nissan Quest | Owner's Manual - Page 25
properly seated with your seat belt on. ARS1138 TABLETOP SEATS The second and third row seats convert into tabletops with built-in cupholders. To use the tabletop seats, lift up on the seatback release lever and fold the seatback forward. 1-18 Seats, restraints and supplemental air bag systems - 2001 Nissan Quest | Owner's Manual - Page 26
warnings in this section, including the information on the removable floor mats. Also observe any labels that are in the vehicle. Seats, restraints and supplemental air bag systems 1-19 - 2001 Nissan Quest | Owner's Manual - Page 27
your body. In an accident, you could be thrown into it and receive neck or other serious injuries. You could also slide under the lap belt and receive serious internal injuries. ● For the most effective protection when the vehicle is in motion, the seat should be upright. Always sit well back in - 2001 Nissan Quest | Owner's Manual - Page 28
. The fold-down tabletop seats in the second and third rows provide a surface for eating or playing games on long trips. Seats, restraints and supplemental air bag systems 1-21 - 2001 Nissan Quest | Owner's Manual - Page 29
row bench seat can be folded down to serve as a tabletop for passengers sitting in the three-passenger bench seat. 1-22 Seats, restraints and supplemental air bag systems - 2001 Nissan Quest | Owner's Manual - Page 30
-passenger sliding seat can be moved up to the second row position. The third seat can be folded down into a tabletop. Seats, restraints and supplemental air bag systems 1-23 - 2001 Nissan Quest | Owner's Manual - Page 31
not be allowed to ride in areas meant for cargo. Passengers should always be properly restrained in seat belts. The second row seat can be folded down and the third row seat can be moved just behind passengers sitting in the third row. 1-24 Seats, restraints and supplemental air bag systems - 2001 Nissan Quest | Owner's Manual - Page 32
ARS1195 When one passenger in the threepassenger bench seat would like more leg room, one of the second row bucket seats can be removed. Seats, restraints and supplemental air bag systems 1-25 - 2001 Nissan Quest | Owner's Manual - Page 33
bucket seats can be removed. Passengers should not be allowed to ride in areas meant for cargo. Passengers should always be properly restrained by seat belts. 1-26 Seats, restraints and supplemental air bag systems - 2001 Nissan Quest | Owner's Manual - Page 34
so you will know the proper way to place the floor mats with the various seating arrangements available in your vehicle. Seats, restraints and supplemental air bag systems 1-27 - 2001 Nissan Quest | Owner's Manual - Page 35
ARS1218 ARS1219 Five Passenger Seating 1-28 Seats, restraints and supplemental air bag systems - 2001 Nissan Quest | Owner's Manual - Page 36
ARS1220 ARS1221 Five Passenger Seating with cargo room The step mats are not used in this seating configuration. Three-passenger bench seat in fully forward position The step mats are not used in this seating configuration. Seats, restraints and supplemental air bag systems 1-29 - 2001 Nissan Quest | Owner's Manual - Page 37
the seat belts will not protect the occupants. Be sure to use the proper seat belts for each seat location. Improper seat belt usage will seat belts. ● Be sure everyone in your vehicle is in a seat and is using a seat belt properly. ● Failure to follow proper seating instructions in air bag systems - 2001 Nissan Quest | Owner's Manual - Page 38
injuries from the supplemental front air bag if you are up against it when it inflates. Always sit back against the seatback and as far away as practical from the steering wheel or instrument panel. Always use the seat belts. ● Keep hands on the outside of the steering wheel. Placing them inside the - 2001 Nissan Quest | Owner's Manual - Page 39
ARS1133 ARS1041 ARS1042 1-32 Seats, restraints and supplemental air bag systems - 2001 Nissan Quest | Owner's Manual - Page 40
● Children may be severly injured or killed when the supplemental front air bag inflates if they are not properly restrained. ● Never install a rear -facing child restraint in the front seat. An inflating supplemental front air bag could seriously injure or kill your child. See ''Child restraints'' - 2001 Nissan Quest | Owner's Manual - Page 41
facial abrasions or other injuries. Front air bags do not provide restraint to the lower body. WRS0075 Supplemental front air bag system The driver supplemental air bag is located in the center of the steering wheel. The front passenger supplemental air bag is mounted in the dashboard above the - 2001 Nissan Quest | Owner's Manual - Page 42
assembly by placing material over the steering wheel pad and above the instrument panel or by installing additional trim material around the air bag system. ● Work around and on the supplemental front air bag system should be done by an authorized NISSAN dealer. Installation of electrical equipment - 2001 Nissan Quest | Owner's Manual - Page 43
history of a breathing condition should get fresh air promptly. If any abnormality occurs in the pretensioner system, the air bag warning light will flash intermittently after the ignition key is turned to the ON or START position. In this case, the pre-tensioner seat belt will not function properly - 2001 Nissan Quest | Owner's Manual - Page 44
in the instrument panel, monitors the circuits of the supplemental air bag and pretensioner systems. The circuits monitored by the air bag warning light include the diagnosis sensor unit, supplemental air bag modules, pre-tensioner seat belt system and all related wiring. When the ignition key is in - 2001 Nissan Quest | Owner's Manual - Page 45
following conditions occur, the supplemental air bag and pre-tensioner seat belt systems need servicing and should be taken to your nearest authorized NISSAN dealer. ● The supplemental air bag warning light remains on after approximately 7 seconds. ● The supplemental air bag warning light flashes - 2001 Nissan Quest | Owner's Manual - Page 46
be away from your face and neck, but not falling off your shoulder. ● Position the lap belt as low and snug as possible AROUND THE HIPS, NOT THE WAIST. A lap belt worn too high could increase the risk of internal injuries in an accident. Seats, restraints and supplemental air bag systems 1-39 - 2001 Nissan Quest | Owner's Manual - Page 47
belts. ● If the seat belt warning light glows continuously while the ignition is turned ON with all doors closed and all seat belts fastened, it may indicate a malfunction in the system. Have the system checked by an authorized NISSAN dealer. ● All seat belt and supplemental air bag systems - 2001 Nissan Quest | Owner's Manual - Page 48
system (Air bag system) for the front passenger (For precautions, see ''Supplemental restraint system'' earlier in this section). Infants and small children NISSAN and always follow the manufacturer's instructions for installation and use. portion of the shoulder and the lap belt is low on the hips - 2001 Nissan Quest | Owner's Manual - Page 49
serious internal injuries. ● For most effective protection when the vehicle is in motion, the seat should be upright. Always sit well back in the seat and adjust the seat properly. See "Precautions on seat belt usage" earlier in this section. 1-42 Seats, restraints and supplemental air bag systems - 2001 Nissan Quest | Owner's Manual - Page 50
restraint installation. It is referred to as the automatic locking mode. When the automatic locking mode is activated, the seat belt cannot be withdrawn again until the seat belt tongue is detached from the buckle and fully retracted. Refer to Seats, restraints and supplemental air bag systems 1-43 - 2001 Nissan Quest | Owner's Manual - Page 51
. Checking seat belt operation Seat belt retractors are designed to lock seat belt movement: 1) when the seat belt is pulled quickly from the retractor, and 2) when the vehicle slows down rapidly. To increase your confidence in the seat 1-44 Seats, restraints and supplemental air bag systems - 2001 Nissan Quest | Owner's Manual - Page 52
FOR SECOND ROW BUCKET SEATS WARNING ● Every person who drives or rides in this vehicle should use a seat belt at all times. ● Do not ride in a moving vehicle when the seatback is reclined. This can be dangerous. The shoulder belt will Seats, restraints and supplemental air bag systems 1-45 - 2001 Nissan Quest | Owner's Manual - Page 53
extra slack. ARS1127 The two-passenger bench seat in the second row has a seat belt system made up of two buckles and two tongues. There are two body attaching points (one upper and one lower) that attach each end of the seat belt webbing. 1-46 Seats, restraints and supplemental air bag systems - 2001 Nissan Quest | Owner's Manual - Page 54
to enter or exit, the tongues must be reattached. Seats, restraints and supplemental air bag systems 1-47 One of the seat belt tongues has two ''windows'' (or holes) and the other has only one ''window''. The seat belt tongue with one window attaches to the auxiliary buckle mounted to the side of - 2001 Nissan Quest | Owner's Manual - Page 55
sliding door needs to check or if you have any questions about seat belt operation, see an authorized NISSAN dealer. Unfastening the seat belts To unfasten the seat belt, press the button on the buckle. The seat belt automatically retracts. 1-48 Seats, restraints and supplemental air bag systems - 2001 Nissan Quest | Owner's Manual - Page 56
side sliding door, the single window seat belt tongue and the belt out of the retractor and insert the tongue into the buckle until you hear and feel the latch engage. 3. Position the passenger side shoulder belt in the shoulder belt retainer. Seats, restraints and supplemental air bag systems - 2001 Nissan Quest | Owner's Manual - Page 57
adjust the seat belt properly. Third row passenger shoulder belts are located slightly behind the third row seating position. Never try to use the seat belts for the second row passengers which are in front of the threepassenger bench seat. 1-50 Seats, restraints and supplemental air bag systems - 2001 Nissan Quest | Owner's Manual - Page 58
seat belt tongues must be fastened into the seat belt buckles as illustrated above. WARNING Any rear seat belt tongue will connect to any seat belt buckle; therefore, it is important to follow the illustration above. Failure to do so could increase Seats, restraints and supplemental air bag systems - 2001 Nissan Quest | Owner's Manual - Page 59
severity of injury in an accident. ARS1055 ARS1238 Fastening the seat belts 1. Insert the tongue into the buckle until you hear and feel the latch engage. 2. Tighten the seat belt by pulling the free end of the belt away from the tongue. 1-52 Seats, restraints and supplemental air bag systems - 2001 Nissan Quest | Owner's Manual - Page 60
lap belts and fasten them, an extender is available which is compatible with the installed seat belts. The extender adds approximately 8 inches (200 mm) of length and may be used for either the driver or front passenger seating position. See an authoSeats, restraints and supplemental air bag systems - 2001 Nissan Quest | Owner's Manual - Page 61
. Do not allow the seat belts to retract until they are completely dry. ● If dirt builds up in the shoulder belt guide of the seat belt anchors, the seat belts may retract slowly. Wipe the shoulder belt guide with a clean, dry cloth. ● ● 1-54 Seats, restraints and supplemental air bag systems - 2001 Nissan Quest | Owner's Manual - Page 62
the child restraint manufacturer's instructions for installation and use. check to see if the belt holds the restraint in place. If the restraint is not secure, tighten the belt as necessary, or put the restraint in another seat and test it again. Seats, restraints and supplemental air bag systems - 2001 Nissan Quest | Owner's Manual - Page 63
the child restraint manufacturer's instructions for belt routing. CAUTION Remember that a child restraint left in a closed vehicle can become very hot. Check the seating surface and buckles before placing your child in the child restraint. 1-56 Seats, restraints and supplemental air bag systems - 2001 Nissan Quest | Owner's Manual - Page 64
to tighten the seat belt again, or put the restraint in another seat. 6. Check to make sure the center seat, follow these steps: 1. Position the child restraint on the seat as illustrated. Always follow the restraint manufacturer's instructions. Seats, restraints and supplemental air bag systems - 2001 Nissan Quest | Owner's Manual - Page 65
side, and tug it forward to make sure it is securely in place. 5. If it is not secure, try to tighten the seat belt again, or put the restraint in another seat. 6. Check to make sure the child restraint is properly secured prior to each use. 1-58 Seats, restraints and supplemental air bag systems - 2001 Nissan Quest | Owner's Manual - Page 66
the chance and/or severity of injury in an accident. WARNING ● The three-point belt in your vehicle is equipped with locking mode retractor which must be used when installing a seat. Always follow the restraint manufacturer's instructions. Seats, restraints and supplemental air bag systems 1-59 - 2001 Nissan Quest | Owner's Manual - Page 67
is in the automatic locking mode (child restraint mode). It reverts back to emergency locking mode when the seat belt is fully retracted. 4. Allow the seat belt to retract. Pull up on the shoulder belt to remove any slack in the belt. 1-60 Seats, restraints and supplemental air bag systems - 2001 Nissan Quest | Owner's Manual - Page 68
, if it is placed in the seating position next to the passenger side sliding door, be sure both the auxiliary buckle and main buckle are properly fastened. Failure to do so could increase the chance and/or severity of injury in an accident. Seats, restraints and supplemental air bag systems 1-61 - 2001 Nissan Quest | Owner's Manual - Page 69
Pull on the shoulder belt until all of the belt is fully extended. At this time, the seat belt retractor is in the automatic locking mode (child restraint mode). It reverts back to emergency locking mode when the seat belt is fully retracted. 1-62 Seats, restraints and supplemental air bag systems - 2001 Nissan Quest | Owner's Manual - Page 70
cannot pull any more belt webbing out of the retractor, the seat belt is in the automatic locking mode. 7. Check to make sure the child restraint is properly secured prior to each use. If the belt is not locked, repeat steps three through six. Seats, restraints and supplemental air bag systems 1-63 - 2001 Nissan Quest | Owner's Manual - Page 71
Supplemental front air bags inflate with great force. A rear-facing child restraint could be struck by the air bag in a crash and could seriously injure or kill your child. ● NISSAN recommends that not be used in the front passenger seat. 1-64 Seats, restraints and supplemental air bag systems - 2001 Nissan Quest | Owner's Manual - Page 72
's instructions. belt until all of the belt is fully extended. At this time, the seat belt retractor is in the automatic locking mode (child restraint mode). It reverts back to emergency locking mode when the seat belt is fully retracted. Seats, restraints and supplemental air bag systems - 2001 Nissan Quest | Owner's Manual - Page 73
pull any more belt webbing out of the retractor, the seat belt is in the automatic locking mode. 7. Check to make sure the child restraint is properly secured prior to each use. If the lap belt is not locked, repeat steps three through six. 1-66 Seats, restraints and supplemental air bag systems - 2001 Nissan Quest | Owner's Manual - Page 74
is not secured properly, your child could be seriously injured or killed in an accident. ● Do not secure a child restraint in the center rear seating position using the LATCH system anchors. The child restraint will not be secured properly. Seats, restraints and supplemental air bag systems 1-67 - 2001 Nissan Quest | Owner's Manual - Page 75
make sure there are no obstructions over the LATCH system anchors, such as seat belt webbing or seat cushion material. The child restraint will not be secured and the section of this manual that contains the instructions for tethering. 1-68 Seats, restraints and supplemental air bag systems - 2001 Nissan Quest | Owner's Manual - Page 76
back of the three pasoutboard seating posi- senger bench seat tion or center seating position Third row; passenger/driver side outboard or center seating position Anchor bracket on back of the three passenger bench seat. Three-passenger bench seat Seats, restraints and supplemental air bag systems - 2001 Nissan Quest | Owner's Manual - Page 77
under the center of the head restraint through to the back side of the supports. 2. Hook the tether strap into the slot in the anchor bracket on the second row seat (located on the lower back of the seat, in line with the head restraint). 1-70 Seats, restraints and supplemental air bag systems - 2001 Nissan Quest | Owner's Manual - Page 78
force to tilt the child restraint from side to side, and tug it forward to make sure it is securely held in place. 5. Check to make sure the child restraint is properly secured prior to each use. If not secure, repeat steps two through four. Seats, restraints and supplemental air bag systems 1-71 - 2001 Nissan Quest | Owner's Manual - Page 79
at the passenger side outboard and center positions on the three-passenger bench seat when the seat is in the second row location. Once the child restraint is supports. For the center seating position, route the tether strap over the seatback. 1-72 Seats, restraints and supplemental air bag systems - 2001 Nissan Quest | Owner's Manual - Page 80
the instructions for slot in the anchor bracket that is located on the lower back of the seat. 3. Tighten the tether Check to make sure the child restraint is properly secured prior to each use. If it is not secure, repeat steps two through four. Seats, restraints and supplemental air bag systems - 2001 Nissan Quest | Owner's Manual - Page 81
restrain a child in an integrated child safety seat. Use only the shoulder harness and belt buckle which is part of the integrated child safety seat. Never use the integrated childsafety seat as a booster cushion with the vehicle seat belts. 1-74 Seats, restraints and supplemental air bag systems - 2001 Nissan Quest | Owner's Manual - Page 82
belts are properly positioned on your child. The child should sit straight up and back against the bench seat. The shoulder harnesses should be centered it back and forth. Also, check that the seatback release lever is in the full down position. Seats, restraints and supplemental air bag systems 1- - 2001 Nissan Quest | Owner's Manual - Page 83
APD0814 5. If connected, separate the two halves of the shoulder harness from the belt buckle. Also if connected, disconnect the chest clip and lay the shoulder harness halves integrated child safety seats, are not adjustable or removable. 1-76 Seats, restraints and supplemental air bag systems - 2001 Nissan Quest | Owner's Manual - Page 84
right shoulder. Insert the right shoulder harness tongue into the right side of the belt buckle. Confirm that the right shoulder harness tongue indicator is green. The shoulder harness tongues only fit into the proper sides of the belt buckle. Seats, restraints and supplemental air bag systems 1-77 - 2001 Nissan Quest | Owner's Manual - Page 85
do not use the integrated child safety seat and have it inspected by an authorized NISSAN dealer. To cancel the automatic locking mode, unbuckle the chest clip and both With the child sitting properly (straight up and back) in the integrated 1-78 Seats, restraints and supplemental air bag systems - 2001 Nissan Quest | Owner's Manual - Page 86
Failure to follow the washing instructions provided on the cloth removable belt buckle prior to storing the integrated child safety seat. 2. While holding onto, but not pulling, the cushion release strap, rotate the cushion upward until it fits flush with the second row seat back air bag systems 1-79 - 2001 Nissan Quest | Owner's Manual - Page 87
involved in an accident, before using the integrated child safety seats, all related components should be inspected for damage by an authorized NISSAN dealer. Damage to the integrated child safety seat or related components must be repaired. 1-80 Seats, restraints and supplemental air bag systems - 2001 Nissan Quest | Owner's Manual - Page 88
MEMO Seats, restraints and supplemental air bag systems 1-81 - 2001 Nissan Quest | Owner's Manual - Page 89
Fuel gauge ...2-5 Message center (if so equipped) ...2-6 Warning/indicator lights and chimes ...2-7 Checking bulbs ...2-7 Warning lights...2-7 Indicator lights ...2-9 Audible reminders...2-11 Vehicle security system (if so equipped) ...2-11 Windshield wiper and washer switch ...2-14 Rear window - 2001 Nissan Quest | Owner's Manual - Page 90
34 Programming HomeLink ...2-35 Programming HomeLink for Canadian customers ...2-36 Operating the integrated HomeLink universal transceiver...2-36 Programming trouble diagnosis...2-36 Clearing the programmed information...2-37 Rolling code programming ...2-37 If your vehicle is ever stolen ...2-38 - 2001 Nissan Quest | Owner's Manual - Page 91
WIC0076 2-2 Instruments and controls - 2001 Nissan Quest | Owner's Manual - Page 92
METERS AND GAUGES WIC0077 Instruments and controls 2-3 - 2001 Nissan Quest | Owner's Manual - Page 93
trip odometer to zero. TACHOMETER The tachometer indicates engine speed in revolutions per minute (RPM). CAUTION When engine speed approaches the red zone, shift to a higher gear. Operating the engine in the red zone may cause serious engine damage. Odometer/Twin trip odometer The odometer/twin - 2001 Nissan Quest | Owner's Manual - Page 94
COOLANT TEMPERATURE GAUGE This gauge indicates the engine coolant temperature. The engine coolant temperature varies with the outside air temperature and driving conditions. CAUTION If the gauge indicates engine coolant temperature above the normal range, stop the vehicle as soon as safely possible - 2001 Nissan Quest | Owner's Manual - Page 95
economy ● Distance to empty You can select the different features by pushing the message center button. The outside air temperature sensor is located in front of the radiator. The sensor may be affected by road or engine Distance to empty This will display how many kilometers or miles you can drive - 2001 Nissan Quest | Owner's Manual - Page 96
fuel warning light Low washer fluid warning light CRUISE main switch indicator light Cruise SET indicator light Overdrive off indicator light (automatic transmission only) Malfunction indicator lamp (MIL) Anti-lock brake warning light Supplemental air bag warning light Door open warning light (if so - 2001 Nissan Quest | Owner's Manual - Page 97
conditions, the air bag supplemental restraint system and/or pre-tensioner seat belts may not function properly. For Low washer fluid warning light This light comes on when the washer fluid is at a low level. Add washer fluid as necessary. See the ''Do-it-yourself'' section of this manual. Door - 2001 Nissan Quest | Owner's Manual - Page 98
'' section of this manual before visiting an authorized NISSAN dealer. Anti-lock brake warning light If the light comes on while the engine is running, it may indicate the anti-lock portion of the brake system is not functioning properly. Have the system checked by an authorized NISSAN dealer. If - 2001 Nissan Quest | Owner's Manual - Page 99
the turn signal lever is activated. Both lights flash when the hazard switch is turned on. functioning properly. Have the system checked by your NISSAN dealer. Malfunction indicator lamp (MIL) If this indicator lamp comes on steady or blinks while the engine is running, it may indicate a potential - 2001 Nissan Quest | Owner's Manual - Page 100
. Have the brakes checked as soon as possible if the warning sound is heard. AUDIBLE REMINDERS Key reminder chime The chime sounds if the driver's door is opened while the key is left in the ignition switch. Remove the key and take it with you when leaving the vehicle. IC0005 Light reminder chime - 2001 Nissan Quest | Owner's Manual - Page 101
are in the vehicle, the system will activate with all doors, hood and rear door closed with the ignition key in the OFF position. LIC0004 Security indicator light This light will illuminate for the vehicle security system. This light blinks whenever the ignition switch is in the LOCK, OFF - 2001 Nissan Quest | Owner's Manual - Page 102
feature does not silence the horn if the alarm is triggered. If the system does not operate as described above, have it checked by an authorized NISSAN dealer. How to stop the alarm The alarm stops only by unlocking a door with the key or by pressing the button on the multi-remote controller. The - 2001 Nissan Quest | Owner's Manual - Page 103
WINDSHIELD WIPER AND WASHER SWITCH and obscure your vision which may lead to an accident. Warm , select LO or HI. To operate the washer, press on the end of the wiper knob. For more washer fluid, push and hold the end of the wiper knob. The wipers cycle a few times when the washer is activated. - 2001 Nissan Quest | Owner's Manual - Page 104
empty. To defog the rear window glass, start the engine and push the switch on. The indicator light on the switch comes on. Push the switch again to turn the defogger off. The rear window defogger switch is also used to defrost, defog, or de-ice the power outside heated mirrors (if so equipped). It - 2001 Nissan Quest | Owner's Manual - Page 105
operates or when the light switch is in the position, or when the autolamp system is operating. Pressing the side of the switch brightens the instrument panel lights; pressing the side of the switch dims the instrument panel lights. If the parking brake is applied before the engine is started, the - 2001 Nissan Quest | Owner's Manual - Page 106
when it is light, and keep the headlights on for up to three minutes after you turn the key to OFF. To set the autolamp system: 1. Make sure the headlight switch is in the AUTO1 or AUTO2 position. Be sure you do not put anything on top of the photo sensor located in the top - 2001 Nissan Quest | Owner's Manual - Page 107
side comes on when a turn is signaled with the headlights on. Push the (hazard) switch to warn other drivers when you must stop or park under emergency conditions. All turn signal lights flash. Press the switch again to turn the hazard warning flashers off. WARNING ● If stopping for an emergency - 2001 Nissan Quest | Owner's Manual - Page 108
) WRS0088 To sound the horn, push the center pad area of the steering wheel. The front seats are warmed by built-in heaters. The switches are located on the seats and can be operated independently of each other. The indicator light in the switch will illuminate when turned on. The heater is - 2001 Nissan Quest | Owner's Manual - Page 109
thinner, or any similar materials. ● If any abnormalities are found or the heated seat does not operate, turn the switch off and have the system checked by your NISSAN dealer. ● The battery could run down if the seat heater is operated while the engine is not running. 2-20 Instruments and controls - 2001 Nissan Quest | Owner's Manual - Page 110
's side trim panel of the second row seat behind the side door. Open the cover to gain access to the power socket. There are two power sockets located on the Family Entertainment System (FES) (if so equipped). Use the power socket to plug in electrical equipment such as a cellular telephone, CB - 2001 Nissan Quest | Owner's Manual - Page 111
use of the cigarette lighter socket as a power source for any other accessory is not recommended. AIC1074 AIC1075 WARNING The accessory. A genuine NISSAN cigarette lighter or equivalent can be purchased from an authorized NISSAN dealer. The cigarette lighter operates when the ignition switch - 2001 Nissan Quest | Owner's Manual - Page 112
STORAGE AIC1078 ARS1249 LIC0020 MAP POCKETS A map pocket is located on the right hand side of the instrument panel and on the back of the passenger seat. The map pocket can be used to store maps. CONVERSATION MIRROR Some vehicles are equipped with a conversation mirror. Push to open - 2001 Nissan Quest | Owner's Manual - Page 113
the cup holder, pull out. To store the cup holder, push it back in. The cup holder can be adjusted to fit smaller cups by pushing cup holder to adjust to a larger cup position. CAUTION ● Avoid abrupt starting and braking when the cup holder is being used to prevent spilling the drink. If the - 2001 Nissan Quest | Owner's Manual - Page 114
WIC0022 APD0601 Vehicles equipped with a second row bench seat have a cup holder attached to the front center of the seat. Pull the cup holder out from the seat to use. The cup holder can be adjusted to fit smaller cups by pushing - 2001 Nissan Quest | Owner's Manual - Page 115
APD1067 CARGO NET The cargo net keeps packages in the cargo area from moving around while the vehicle is in motion. To install the cargo net, attach the four loops to the four retainers. To remove the cargo net, detach the four loops from the cargo net retainers. WARNING ● Properly secure all - 2001 Nissan Quest | Owner's Manual - Page 116
or shifting. Do not place packages higher than the threepassenger bench seat back. In a sudden stop or collision, unsecured packages could cause personal Be sure to secure all three parcel shelf net loops onto the retainers located on the bottom side of the parcel shelf. The packages placed on the - 2001 Nissan Quest | Owner's Manual - Page 117
to keep packages on the parcel shelf from moving around while the vehicle is in motion. The parcel shelf net is permanently attached to the back side of the parcel shelf. Pull the parcel shelf net over the packages and attach the three loops to the three retainers on the bottom - 2001 Nissan Quest | Owner's Manual - Page 118
Rating (GVWR) or its Gross Axle Weight Rating (GAWR front and rear). The GVWR and GAWR are located on the Safety Compliance Certification Label (located on the driver's door pillar). For more information regarding GVWR and GAWR, refer to ''Technical and Consumer Information''. The front and rear - 2001 Nissan Quest | Owner's Manual - Page 119
the ignition key is turned to the OFF position. If the driver's or passenger's door is opened during this 15 minute period, power to the windows is cancelled. Automatic operation To fully open the driver side window, press down firmly on the switch and release it; you do not need to hold the - 2001 Nissan Quest | Owner's Manual - Page 120
the switch up. The power vent windows operate when the ignition key is in the ON position, or for 15 minutes after the ignition key is turned to the OFF position. If the driver's or passenger's door is opened during this 15 minute period, power to the vent windows is cancelled. MANUAL VENT WINDOWS - 2001 Nissan Quest | Owner's Manual - Page 121
15 minutes after the ignition key is turned to the OFF position. If the driver's or passenger's door is opened during this 15 minute period, power to the sunroof is cancelled. NOTE: If the battery is discharged or is disconnected, the sunroof may not operate correctly, and must be reset. To reset - 2001 Nissan Quest | Owner's Manual - Page 122
LIGHTS ● When the switch is in the ON position, the interior light illuminates, whether any door is open or closed. CAUTION Do not use for extended periods of time with the engine stopped. This could result in a discharged battery. PERSONAL READING LIGHT LUGGAGE AIC0053 When the back door - 2001 Nissan Quest | Owner's Manual - Page 123
are opened turn off after approximately 30 minutes. Lights that illuminate when the back door is opened turn off after approximately 60 minutes. Vanity mirror lights are not part of the battery saver system. If the personal reading lights are left on after the key is removed from the ignition, they - 2001 Nissan Quest | Owner's Manual - Page 124
HomeLink Universal Transceiver may not work with older garage door openers that do not meet current Federal Consumer Safety Standards. 1. Test the Integrated HomeLink Universal Transceiver by pressing any button. The red indicator light should come on. If you have previously programmed a button - 2001 Nissan Quest | Owner's Manual - Page 125
again. For best results, place the end opposite the battery compartment against the Integrated HomeLink Universal Transceiver when programming. the Integrated HomeLink Universal Transceiver button. The indicator light on the Integrated PROGRAMMING TROUBLE DIAGNOSIS Be sure to keep your original hand - 2001 Nissan Quest | Owner's Manual - Page 126
difficulty locating the training button, reference your garage door opener manual. If you have difficulty programming your garage door opener equipped with a rolling code system to recognize the Integrated HomeLink Universal Transceiver with the Rolling Code feature, call NISSAN Consumer Affairs - 2001 Nissan Quest | Owner's Manual - Page 127
your original hand held transmitter to open your garage door. HomeLink Universal Transceiver with your new transmitter information. FFC Notice: This device complies with FCC rules part 15. Operation is subject to the following two conditions: (1) This device may not cause harmful interference and - 2001 Nissan Quest | Owner's Manual - Page 128
with power door lock switch...3-4 Child safety sliding door locks...3-5 Multi-remote control system ...3-6 How to use multi-remote control system...3-6 Battery replacement ...3-8 Hood ...3-9 Rear door ...3-10 Fuel filler lid ...3-10 Opener operation ...3-10 Fuel filler cap ...3-10 Steering wheel - 2001 Nissan Quest | Owner's Manual - Page 129
perform the same functions. DOORS WARNING ● Always have the doors locked while driving. Along with the use of seat belts, this provides greater safety in door, always look for and avoid oncoming traffic. ● Do not leave children unattended inside the vehicle. They could unknowingly activate switches - 2001 Nissan Quest | Owner's Manual - Page 130
To lock all doors from inside the vehicle, push the door lock knob in, then close the door. When locking the doors this way, be certain not to leave the key inside the vehicle. All doors automatically unlock if the key is in the ignition and a door is open. Pre-driving checks and adjustments 3-3 - 2001 Nissan Quest | Owner's Manual - Page 131
opened when the fuel door is open. LOCKING WITH POWER DOOR LOCK SWITCH Operating the lock-unlock switch locks or unlocks all doors. If the power door lock switch is pressed when a sliding door is open, the sliding door automatically locks when it is closed. 3-4 Pre-driving checks and adjustments - 2001 Nissan Quest | Owner's Manual - Page 132
APD1056 CHILD SAFETY SLIDING DOOR LOCKS Child safety locking helps prevent doors from being opened accidentally, especially when small children are in the vehicle. When the lever is in the LOCK position, the sliding doors can be opened only from the outside. Pre-driving checks and adjustments 3-5 - 2001 Nissan Quest | Owner's Manual - Page 133
The passenger door, sliding doors, and the rear door unlock. The interior lights can be turned off without waiting 30 seconds by either turning the ignition to ON or locking the doors with the multi-remote controller. HOW TO USE MULTI-REMOTE CONTROL SYSTEM Locking doors 1. Close all doors. 2. Push - 2001 Nissan Quest | Owner's Manual - Page 134
the horn beep feature can be deactivated using the multi-remote controller. The instructions are on the back of the multi-remote controller. To deactivate: Press and hold the and buttons for at least two seconds. The hazard lights will flash three times to confirm that the horn beep feature has been - 2001 Nissan Quest | Owner's Manual - Page 135
for compliance could void the user's authority to operate the equipment. This device complies with part 15 of the FCC Rules and RSS-210 of Industry Canada. Operation is subject to the following two conditions: (1) This device may not cause harmful interference, and (2) this device must accept any - 2001 Nissan Quest | Owner's Manual - Page 136
smoke coming from the engine compartment, to avoid injury do not open the hood. WPD0053 1. Pull the hood lock release handle 1 located below the instrument panel 3. Insert the support rod 3 into the slot on the underside of the hood. 4. When closing the hood, reset the support rod to its original - 2001 Nissan Quest | Owner's Manual - Page 137
''Exhaust gas'' in the ''Starting and driving'' section of this manual. To lock the rear door with the key, turn the key clockwise as shown in the side sliding door cannot be fully opened when the fuel door is open. Make sure the driver side sliding door is 3-10 Pre-driving checks and adjustments - 2001 Nissan Quest | Owner's Manual - Page 138
STEERING WHEEL completely closed before opening the fuel door. WARNING ● Gasoline is extremely flammable and highly explosive under certain conditions. You could be burned or seriously injured if it is misused or mishandled. Always stop the engine and do not smoke or allow open flames or sparks near - 2001 Nissan Quest | Owner's Manual - Page 139
the memory driver seat and mirrors. Multi-remote controller system entry Pressing the button on the multiremote controller unlocks the driver's door, and recalls the memory settings for both outside mirrors for memory driver's seat and mirror position 2. 3-12 Pre-driving checks and adjustments - 2001 Nissan Quest | Owner's Manual - Page 140
located on the driver door programmed the indicator light will flash to from the memory seat system press and hold manual controls. 2. Push and hold the memory seat and mirror position 1 or position 2 button for at least 3 seconds. ● The indicator light button indicator light will flash to - 2001 Nissan Quest | Owner's Manual - Page 141
. Move the switch to select the right or left side mirror, then adjust using the control lever. WARNING Objects viewed in the outside mirror on the passenger side are closer than they appear. Be careful when moving to the right. Using only this mirror could 3-14 Pre-driving checks and adjustments - 2001 Nissan Quest | Owner's Manual - Page 142
M008 Foldable outside mirrors Push the outside mirrors backward to fold them. Pre-driving checks and adjustments 3-15 - 2001 Nissan Quest | Owner's Manual - Page 143
MEMO 3-16 Pre-driving checks and adjustments - 2001 Nissan Quest | Owner's Manual - Page 144
seat air conditioner (if so equipped) ...4-14 Controls ...4-14 Servicing air conditioning ...4-15 Audio system...4-16 Audio system...4-16 Radio ...4-16 Fm radio reception ...4-16 Am radio reception ...4-16 Audio operation precautions ...4-17 FM-AM radio with cassette player...4-19 FM-AM radio with - 2001 Nissan Quest | Owner's Manual - Page 145
of ventilators. SIDE VENTILATORS Open, close and adjust the air flow direction of ventilators. : This symbol indicates a vent is closed when the vent switch is moved down. : This symbol indicates a vent is open when the vent switch is moved up. 4-2 Heater, air conditioner and audio systems - 2001 Nissan Quest | Owner's Manual - Page 146
Air flow control dial This dial allows you to select the air flow outlets. Air flows mainly from center and side ventilators. Air flows from center and side ventilators and the front and rear foot outlets. Air flows mainly from center and side ventilators. Heater, air conditioner and audio systems - 2001 Nissan Quest | Owner's Manual - Page 147
to fog up. Air conditioning button Start the engine, turn the fan control dial to the desired (one to four) position, select an air control position and push the air conditioner button to turn on the air conditioner. The indicator light comes on when the air conditioner is operating. To stop - 2001 Nissan Quest | Owner's Manual - Page 148
. It is only the system motors and solenoids switching from one outlet to another. Bi-level heating/cooling The bi-level mode directs air to the side and center vents and to the front and rear floor outlets. Bi-level is also a cooling mode when high sun load conditions are present with cool - 2001 Nissan Quest | Owner's Manual - Page 149
the windows. This allows the air conditioner to cool the interior more quickly. ● The air conditioning system should be operated for about ten minutes at least once a month. This helps prevent damage to the system due to lack of lubrication. ● If the engine coolant temperature gauge exceeds the - 2001 Nissan Quest | Owner's Manual - Page 150
AIR FLOW CHARTS The following charts show the button and dial positions for MAXIMUM AND QUICK heating, cooling or defrosting. WHA0009 Heater, air conditioner and audio systems 4-7 - 2001 Nissan Quest | Owner's Manual - Page 151
WHA0010 WHA0011 4-8 Heater, air conditioner and audio systems - 2001 Nissan Quest | Owner's Manual - Page 152
WHA0012 WHA0094 Heater, air conditioner and audio systems 4-9 - 2001 Nissan Quest | Owner's Manual - Page 153
WHA0014 4-10 Heater, air conditioner and audio systems - 2001 Nissan Quest | Owner's Manual - Page 154
. The cabin air filter (if so equipped) requires periodic maintenance. See the ''Do it yourself'' section for additional information. The Electronic Automatic Temperature Control (EATC) is located at the center of the instrument panel, below the radio. The When you select AUTOMATIC, the system - 2001 Nissan Quest | Owner's Manual - Page 155
EATC heats or cools to achieve the set temperature. When in AUTOMATIC and weather conditions require heat, air is sent to the floor. However, a feature is included in the EATC to prevent blowing cold air to the floor if the engine coolant is not warm enough to allow heating. In three or four minutes - 2001 Nissan Quest | Owner's Manual - Page 156
WARNING Do not switch temperature displays while light comes on, and the display window shows the set temperature. The EATC heats the air if the selected temperature is warmer than the outside air coming into the vehicle. However, the air is not cooled re- Heater, air conditioner and audio systems - 2001 Nissan Quest | Owner's Manual - Page 157
air conditioner, the engine must be running. The rear seat air conditioner can be turned on and off from the front controls. If the rear seat fan control lever on the front panel is set to OFF, the rear air conditioner seat air conditioner only works when the front seat air conditioner is operating - 2001 Nissan Quest | Owner's Manual - Page 158
conditioning system. See ''Air conditioning system refrigerant and lubricant recommendations'' in the ''Technical and consumer information'' section of this manual. An authorized NISSAN dealer is able to service your environmentally ''friendly'' air conditioning system. WARNING The air conditioner - 2001 Nissan Quest | Owner's Manual - Page 159
quality. pletely normal in a given reception area, and do not indicate any malfunction in your NISSAN radio system. Reception conditions will constantly change because of vehicle movement. Buildings, terrain, signal distance and interference from other vehicles can work against ideal reception - 2001 Nissan Quest | Owner's Manual - Page 160
power lines, electric signs and even traffic lights. Loose tape may cause jamming and wavering sound quality. ● (CD) Player ● Only use high quality 4.7 inches (12 cm) round discs that have the ''COMPACT disc DIGITAL AUDIO'' logo on the disc or packaging. Heater, air conditioner and audio systems 4- - 2001 Nissan Quest | Owner's Manual - Page 161
cause the CD player to malfunction: ● 8 cm (3.1 in) discs with an adapter ● Recordable compact discs (CD-R) ● Rewritable compact discs (CD-RW) ● CDs that are not round ● CDs with a paper label ● CDs that are warped, scratched, or have abnormal edges 4-18 Heater, air conditioner and audio systems - 2001 Nissan Quest | Owner's Manual - Page 162
-AM RADIO WITH CASSETTE PLAYER NOTE: Audio control features include command buttons for CD players which can be installed as optional equipment to upgrade the audio system. A CD player is not included with this system, but can be purchased as an option at any time. Consult with an authorized NISSAN - 2001 Nissan Quest | Owner's Manual - Page 163
bar moves to the left of the display window. When the indicator bar is in the center position the sound is equally distributed between the front and rear speakers. Following fader adjustment, the window shows a C when the COMP button is pushed. 4-20 Heater, air conditioner and audio systems - 2001 Nissan Quest | Owner's Manual - Page 164
buttons WARNING The radio should not be tuned while driving so full attention may be given to vehicle operation. Use the or buttons for manual tuning. To move for 5 seconds. FM-AM radio operation MUTE button Push the MUTE button to mute out the radio. Heater, air conditioner and audio systems 4-21 - 2001 Nissan Quest | Owner's Manual - Page 165
battery is disconnected, or if the radio fuse opens, the radio memory is canceled. In that case, reset the desired stations. RDS (Radio Data System) RDS stands for Radio Data System, and is a data information service transmitted by some radio AM, 4-22 Heater, air conditioner and audio systems - 2001 Nissan Quest | Owner's Manual - Page 166
tape into the tape door. The cassette tape automatically pulls into the player and begins to play. When a casssette is inserted into the audio system, the word TAPE to switch sides on the tape. The display will change from TAPE 1 PLAY to TAPE 2 PLAY. Heater, air conditioner and audio systems 4-23 - 2001 Nissan Quest | Owner's Manual - Page 167
, the system may not stop in the desired or expected location. Metal or chrome tape usage The cassette player is automatically set to high performance play when playing a metal or chrome tape. TAPE EJECT Push the EJ button. The cassette tape automatically comes out. 4-24 Heater, air conditioner and - 2001 Nissan Quest | Owner's Manual - Page 168
to the left to decrease volume. If the knob is set above a certain volume level and the ignition is turned off, the volume will come back on at a nominal listening level when the ignition is turned back on. Heater, air conditioner and audio systems 4-25 - 2001 Nissan Quest | Owner's Manual - Page 169
indicator bar moves to the left of the display window. When the indicator bar is in the center position the sound is equally distributed between the front and rear speakers. Following fader adjustment, the shows COMP when the COMP button is pushed. 4-26 Heater, air conditioner and audio systems - 2001 Nissan Quest | Owner's Manual - Page 170
change the minutes. The display will return to the previous radio station, tape or CD that was being played previous to setting the clock in radio continues in the SEEK mode at the lowest station. Once the lowest broadcast station is reached, the radio con- Heater, air conditioner and audio systems - 2001 Nissan Quest | Owner's Manual - Page 171
battery is disconnected, or if the radio fuse opens, the radio memory is canceled. In that case, reset the desired stations. RDS (Radio Data System) RDS stands for Radio Data System, and is a data information service transmitted by some radio AM, 4-28 Heater, air conditioner and audio systems - 2001 Nissan Quest | Owner's Manual - Page 172
door. The cassette tape automatically pulls into the player and begins to play. When a casssette is inserted into the audio system, the word TAPE illuminates in the display to inform you that there is a tape in the radio. If the radio is already operating it automatically turns off the CD or radio - 2001 Nissan Quest | Owner's Manual - Page 173
system may not stop in the desired or expected location. Metal or chrome tape usage The cassette player the slot and starts to play. If the radio or cassette tape is already operating, it CD) player operation Turn the ignition key to the ACC or ON 4-30 Heater, air conditioner and audio systems - 2001 Nissan Quest | Owner's Manual - Page 174
is pushed, the CD advances one additional selection system turns off. If the compact disc ejects and is not removed within 10 seconds, it is pulled back into the slot. DISC indicator light DISC illuminates when a compact disc is loaded into the player. Heater, air conditioner and audio systems - 2001 Nissan Quest | Owner's Manual - Page 175
. AHA1064 COMPACT DISC (CD) PLAYER (if so equipped) The compact disc player consists of two main components; the 6 CD magazine and the CD changer. Both components are located on the center instrument panel console, below the ashtray. each CD to be loaded. Carefully slide a CD (label side up) onto - 2001 Nissan Quest | Owner's Manual - Page 176
window shows a C or COMP (dual media radio) when the compression button is pushed. SHUFFLE Press this button to randomly select the play order of the tracks on a CD. When all tracks of one CD have been played, the system changes to the next CD in the magazine and proceeds to play the tracks in - 2001 Nissan Quest | Owner's Manual - Page 177
and rewritable compact discs (CDRW) may not function properly in the CD player. AHA1063 STEERING WHEEL SWITCH FOR AUDIO CONTROLS (if so equipped) The radio controls mounted on the right side of the steering wheel provide convenient access to three commonly used functions: VOL, VOL, and NEXT. Use - 2001 Nissan Quest | Owner's Manual - Page 178
FM, tape, CD, CD changer. ● Speakers ON/OFF For vehicles equipped with the premium FM-AM radio with cassette player, compact disc player and 6 disc CD player, if the the radio while the front passengers can listen to the same thing, a cassette tape, Heater, air conditioner and audio systems 4-35 - 2001 Nissan Quest | Owner's Manual - Page 179
on. For vehicles equipped with the premium FM-AM radio with cassette player, compact disc player and 6 disc CD player, when the rear seat controls are on, push In CD DJ mode the MEM button allows the rear passengers to select other compact discs in the CD changer. 4-36 Heater, air conditioner and - 2001 Nissan Quest | Owner's Manual - Page 180
reinstalling the player, be sure of proper alignment when inserting. Do not force. ● Use a damp, soft cloth when cleaning the Autovision Family Entertainment System components. Do not use solvents or cleaning solutions. ● Do not attempt to use the system in extreme temperature conditions (below 30 - 2001 Nissan Quest | Owner's Manual - Page 181
the vehicle battery, do not operate the system more than 15 minutes without starting the engine. PLAY mode Player (VCP) controls The VCP has the following controls: ● LED display - The display lamp will illuminate when power is supplied to the VCP. ● Power 38 Heater, air conditioner and audio systems - 2001 Nissan Quest | Owner's Manual - Page 182
off to access the batteries, and only use alkaline batteries as replacements. If you will not be using the remote control for long periods of time, remove the batteries. Replacement of the batteries is needed when the remote control only functions at Heater, air conditioner and audio systems 4-39 - 2001 Nissan Quest | Owner's Manual - Page 183
the engine OFF can discharge the vehicle battery. ● Do not leave a videocassette tape in the VCP for extended periods of time. The FES is automatically activated when the vehicle ignition and radio are both ON. Open the floor console and insert the videocassette tape into the Video Cassette Player - 2001 Nissan Quest | Owner's Manual - Page 184
attention may be given to vehicle operation. The RSEM is automatically activated when the vehicle ignition and radio are both turned ON. The headphones symbol illuminates in the front radio display when the rear audio controls are on. Press the three Heater, air conditioner and audio systems 4-41 - 2001 Nissan Quest | Owner's Manual - Page 185
● AM - AM radio frequency band ● FM1, FM2 - FM radio frequency bands ● TAPE - cassette tape ● CD - single CD player ● CD DJ - CD changer ● VCP - video cassette player ● AUX - auxiliary jack such as DVD players, camcorders and portable CD players can 4-42 Heater, air conditioner and audio systems - 2001 Nissan Quest | Owner's Manual - Page 186
follow the instructions included with the cleaning tape. Excessive cleaning can shorten video head life. IN-HOME use Your Autovision Family Entertainment System is UL registered for in-home use. To use the FES system in your home, you will need: Heater, air conditioner and audio systems 4-43 - 2001 Nissan Quest | Owner's Manual - Page 187
roads. vated the DEW/HEAT sensor. No sound through headphone. Poor connection. No sound through vehicle speakers. Speaker control button is in OFF position. Desire radio, but video system sound is heard Media button is set to VCP. through vehicle's speakers. 4-44 Heater, air conditioner and audio - 2001 Nissan Quest | Owner's Manual - Page 188
FCC Rules. NOTE: This equipment may experience radio frequency interference from cellular phone, two-way and CB radio. VCP ● S/N Ratio More Than 70dB A-wt for HiFi, 1kHz More Than 60dB A-wt for Linear, 1kHz 0 3dB, 20Hz ~ 20 kHz ● Frequency Response Heater, air conditioner and audio systems 4-45 - 2001 Nissan Quest | Owner's Manual - Page 189
window. When installing a CB ham radio, a car phone or other transmitters in your NISSAN, be sure to observe the following cautions, otherwise the new equipment may adversely affect the MFI (Multiport Fuel Injection) system and other electronic parts. WARNING AHA1049 ● A cellular telephone should - 2001 Nissan Quest | Owner's Manual - Page 190
fuel economy ...5-12 Parking/parking on hills ...5-13 Power steering ...5-14 Brake system...5-14 Braking precautions...5-14 Anti-lock brake system (ABS) ...5-14 Cold weather driving ...5-16 Freeing a frozen door lock ...5-16 Anti-freeze ...5-16 Battery ...5-16 Draining of coolant water ...5-16 Tire - 2001 Nissan Quest | Owner's Manual - Page 191
through the seal on the back door or body, follow the trailer manufacturer's recommendation to prevent carbon monoxide entry into the vehicle. ● The exhaust system and body should be inspected by a qualified mechanic whenever: a. The vehicle is raised for service. b. You suspect that exhaust fumes - 2001 Nissan Quest | Owner's Manual - Page 192
(including prescription or over-thecounter drugs which may cause drowsiness). Always wear your seat belt as outlined in the "Seats, restraints and supplemental air bag systems" section of this manual, and also instruct your passengers to do so. DRINKING ALCOHOL/DRUGS AND DRIVING WARNING Never drive - 2001 Nissan Quest | Owner's Manual - Page 193
brake pedal is depressed. To lock the steering wheel, turn the key to the LOCK position. Remove the key. To unlock the steering wheel, insert the key and turn it gently while rotating the steering wheel slightly right and left. WARNING WSD0002 The ignition switch includes an anti-theft steering - 2001 Nissan Quest | Owner's Manual - Page 194
time you check engine oil). ● Check that all windows and lights are clean. ● Visually inspect tires for their appearance and condition. Also check tires for proper inflation. ● Lock all doors. ● Position seat and adjust head restraints. ● Adjust inside and outside mirrors. ● Fasten seat belts and - 2001 Nissan Quest | Owner's Manual - Page 195
maximum power and smooth operation. Shown on the following pages are the recommended operating procedures for this transmission. Follow these procedures for maximum vehicle performance and driving enjoyment. Starting the vehicle ● After starting the engine, fully depress the brake pedal before - 2001 Nissan Quest | Owner's Manual - Page 196
gradually start the vehicle in motion. Shifting from P (Park) If the ignition switch is in the ON position and the foot brake pedal is depressed, but the shift lever still cannot be moved out of P (Park), follow these instructions: 1. Shut the engine off and remove the key. 2. Apply the parking - 2001 Nissan Quest | Owner's Manual - Page 197
or for maximum engine braking on steep light back to the ON position. The vehicle should return to its normal operating condition. If it does not return to its normal operating condition, have an authorized NISSAN dealer check the transmission and repair, if necessary. ASD0561 Overdrive switch - 2001 Nissan Quest | Owner's Manual - Page 198
. When driving conditions change, press the overdrive switch to turn the overdrive on. The O/D OFF indicator light goes out. Remember not to drive at high speeds for extended periods of time with the O/D OFF light illuminated. This reduces the fuel economy. WARNING Be sure the parking brake is fully - 2001 Nissan Quest | Owner's Manual - Page 199
CRUISE CONTROL the RES/ACCEL, COAST/SET, or the CANCEL switch (located on the steering wheel). To properly set the cruise control system, perform the steps in the order indicated. WARNING Do not use the cruise control when driving under the following conditions: ● When it is not possible to keep the - 2001 Nissan Quest | Owner's Manual - Page 200
BREAK-IN SCHEDULE ● If you depress the brake pedal while pushing the RES/ACCEL switch, the RES/ ACCEL function is cancelled. In order for the RES/ACCEL switch to operate, the COAST/SET must be used to re-engage the system. ● The cruise control automatically cancels if the vehicle slows down more - 2001 Nissan Quest | Owner's Manual - Page 201
wear but also lower fuel economy. ● Air conditioner operation lowers fuel economy. Use the air conditioner only when necessary. ● When cruising at braking. Maintain a safe distance behind other vehicles. ● Use a proper gear range which suits road conditions. ● Avoid unnecessary engine idling - 2001 Nissan Quest | Owner's Manual - Page 202
unknowingly activate switches or controls the parking brake. 2. Move the selector lever to you. ● Never leave the engine running while the vehicle is from the curb and move the vehicle back until the curb side wheel gently touches the move away from the center of the road if it moves. 4. - 2001 Nissan Quest | Owner's Manual - Page 203
in sharp turns and at low speeds. WARNING If the engine is not running or is turned off while driving, the power assist for the steering will not work. Steering will be much harder to operate. BRAKE SYSTEM The brake system has two separate hydraulic circuits. If one circuit malfunctions, you - 2001 Nissan Quest | Owner's Manual - Page 204
, it switches the anti-lock brake system OFF and turns on the ABS brake warning light in the dashboard. The brake system then operates normally, but without anti-lock assistance. If the light comes on during the self-test, or while driving, take the vehicle to an authorized NISSAN dealer for repair - 2001 Nissan Quest | Owner's Manual - Page 205
below 32°F (0°C), check the anti-freeze (ethylene glycol base) to assure proper winter protection. For details, see ''Engine cooling system'' in the ''Do-it-yourself'' section of this manual. BATTERY If the battery is not fully charged during extremely cold weather conditions, the battery fluid may - 2001 Nissan Quest | Owner's Manual - Page 206
be prohibited according to location. Check the local laws before support. 3. A shovel to dig the vehicle out of snowdrifts. 4. Extra window washer fluid to refill the reservoir tank. ● Whatever the condition brake before reaching it. Try not to brake while on the ice, and avoid any sudden steering - 2001 Nissan Quest | Owner's Manual - Page 207
BLOCK HEATER (if so equipped) An engine block heater to assist extreme cold temperature starting is available through an authorized NISSAN dealer. WARNING Do not use your heater with an ungrounded electrical system or twopronged (cheater) adapters. You can be injured by an electrical shock if you - 2001 Nissan Quest | Owner's Manual - Page 208
Flat tire ...6-2 Changing a flat tire ...6-2 Jump starting...6-8 Push starting ...6-10 If your vehicle overheats ...6-10 After an accident ...6-11 Inertia fuel shut-off switch ...6-11 Towing your vehicle ...6-12 Towing recommended by Nissan...6-13 Vehicle recovery (freeing a stuck vehicle) ...6-14 - 2001 Nissan Quest | Owner's Manual - Page 209
A FLAT TIRE If you have a flat tire, follow the instructions below: ● Never change tires if oncoming traffic is close to 3. Park on a level surface and apply the parking brake. Move the gearshift lever to the P (Park) position. 4. Turn off the engine. 5. Raise the hood to warn other traffic, and - 2001 Nissan Quest | Owner's Manual - Page 210
ACE1026 ACE0006 1. Locate the cut in the carpet for the hex nut in the the cargo area. The hex nut is used to lower and raise the spare tire located underneath the vehicle. 2. Place the tire and tools Remove the jack jack storage bag located under the third row seat. In case of emergency 6-3 - 2001 Nissan Quest | Owner's Manual - Page 211
ACE0014 ACE1023 ACE1022 4. Stand the tire up to remove the retainer. Removing wheel cover Remove the jack rod from the jack storage bag. For wheel cover removal, place the screwdriver tip of the jack rod between the wheel cover and the edge of the rim. Push and twist - 2001 Nissan Quest | Owner's Manual - Page 212
in the vehicle while it is on the jack. ● Never run the engine with the wheels off of the ground. It may cause the vehicle to move. Carefully read the caution label attached to the jack body and the following instructions. 1. Loosen each wheel nut one or two turns by turning counterclockwise with - 2001 Nissan Quest | Owner's Manual - Page 213
directly under the jack-up point as illustrated above so the top of the jack contacts the vehicle at the jack-up point. Align the center of both the jack head and the notch at the jack-up point as shown. Also fit the notched portion of the vehicle in the - 2001 Nissan Quest | Owner's Manual - Page 214
the glove box. CE1003 Installing the spare tire The spare tire is designed for emergency use. See specific instructions under the heading ''Wheels and tires'' in the ''Doit-yourself'' section of this manual. 1. Clean any mud or dirt from the surface between the wheel and hub. 2. Carefully put the - 2001 Nissan Quest | Owner's Manual - Page 215
stop. ● The spare tire is designed for emergency use. See specific instructions under the heading ''Wheels and tires'' in the ''Do-it-yourself'' section of this manual. To start your engine with a booster battery, the instructions and precautions below must be followed. ● WARNING If done incorrectly - 2001 Nissan Quest | Owner's Manual - Page 216
two vehicles to touch. 2. Apply the parking brake. Move the gearshift lever to the P (Park) position. Switch off all unnecessary electrical systems (lights, heater, air conditioner, etc.). 3. Remove vent caps on the battery (if so equipped). Cover the battery with an old cloth to reduce explosion - 2001 Nissan Quest | Owner's Manual - Page 217
high temperature gauge reading), or if you feel a lack of engine power, detect abnormal noise, etc., take the following steps: WARNING ● , apply the parking brake and move the gearshift lever to the P (Park) position. Do not stop the engine. 2. Turn off the air conditioner switch. Open all the - 2001 Nissan Quest | Owner's Manual - Page 218
is high. 6. After the engine cools down completely, check the coolant level in the reservoir tank with the engine running. Add coolant to the reservoir tank, if necessary. Have your vehicle repaired at an authorized NISSAN dealer. ACE1020 INERTIA FUEL SHUT-OFF SWITCH When the vehicle is involved - 2001 Nissan Quest | Owner's Manual - Page 219
shut-off switch. 4. Turn the ignition key ON for a few seconds, then turn it OFF. 5. Check under the instructions are available from an authorized NISSAN dealer. Local service make sure that the transmission, axles, steering system and powertrain are in working condition. If any unit is damaged, - 2001 Nissan Quest | Owner's Manual - Page 220
ACE1029 TOWING RECOMMENDED BY NISSAN NISSAN recommends that your vehicle be towed with the driving (front) wheels off the ground or place the vehicle on a flat bed truck as illustrated. In case of emergency 6-13 - 2001 Nissan Quest | Owner's Manual - Page 221
bumper when you tow your vehicle. It may damage the bumper and cause damage to the transmission. ● Do not tow with a sling type truck, either from the front or rear. It may cause body so they do not touch any part of the suspension, steering, brake or cooling systems. ● Always pull the cable straight - 2001 Nissan Quest | Owner's Manual - Page 222
Washing...7-2 Waxing...7-2 Removing spots...7-3 Underbody ...7-3 Glass...7-3 Aluminum alloy wheels...7-3 Chrome parts...7-3 Cleaning interior ...7-3 Floor mats...7-4 Seat belts ...7-4 Corrosion protection ...7-4 Most common factors contributing to vehicle corrosion...7-4 Environmental factors - 2001 Nissan Quest | Owner's Manual - Page 223
regularly cleaned. Take care that the drain holes in the lower edge of the door are open. Spray water under the body and in the wheel wells to loosen the dirt and wash away road salt. up residue and to avoid a ''weathered'' appearance. An authorized NISSAN dealer can assist 7-2 Appearance and care - 2001 Nissan Quest | Owner's Manual - Page 224
after a thorough washing. Follow the instructions supplied with the wax. ● Do not radio antenna elements or rear window defogger elements. Occasionally remove loose dust from the interior trim, plastic parts available at an authorized NISSAN dealer or any automotive accessory store. ALUMINUM ALLOY - 2001 Nissan Quest | Owner's Manual - Page 225
NISSAN floor mats can extend the life of your vehicle carpet belts, since these may severely weaken the seat belt webbing. MOST COMMON FACTORS CONTRIBUTING TO VEHICLE CORROSION 1. The accumulation of moisture-retaining dirt and debris in body centering the mat in the footwell. Periodically check to - 2001 Nissan Quest | Owner's Manual - Page 226
deterioration of underbody components such as the exhaust system, fuel and brake lines, brake cables, floor pan and fenders. In winter, check for minor damage to the paint and repair it as soon as possible. ● keep drain holes at the bottom of the doors open to avoid water accumulation. ● check the - 2001 Nissan Quest | Owner's Manual - Page 227
MEMO 7-6 Appearance and care - 2001 Nissan Quest | Owner's Manual - Page 228
Checking engine oil level ...8-5 Changing engine oil ...8-6 Changing engine oil filter...8-7 Automatic transmission fluid ...8-8 Temperature conditions for checking ...8-8 Power steering fluid...8-9 Brake fluid ...8-9 Window washer fluid ...8-10 Battery ...8-10 Jump starting ...8-11 Drive belts - 2001 Nissan Quest | Owner's Manual - Page 229
under the vehicle, support it with safety stands. ● Keep smoking materials, flame and sparks away from the fuel tank and battery. ● On gasoline engine models with the multiport fuel injection (MFI) system, the fuel filter or fuel lines should be serviced by an authorized NISSAN dealer because the - 2001 Nissan Quest | Owner's Manual - Page 230
ENGINE COMPARTMENT CHECK LOCATIONS ADI1082 Do-it-yourself 8-3 - 2001 Nissan Quest | Owner's Manual - Page 231
of coolant solutions or coolant colors, such as orange, may damage the engine cooling system. Genuine NISSAN Anti-freeze Coolant or equivalent 50% WARNING ● Never remove the radiator cap when the engine is hot. Serious burns could be caused by high pressure fluid escaping from the radiator. ● The - 2001 Nissan Quest | Owner's Manual - Page 232
system frequently requires coolant, have it checked by an authorized NISSAN dealer. CHANGING ENGINE COOLANT An authorized NISSAN dealer can change the engine coolant. The service procedure is found in NISSAN's service manual. Improper servicing can result in reduced heater performance and engine - 2001 Nissan Quest | Owner's Manual - Page 233
engine oil filter'' later in this section ADI0057 CHANGING ENGINE OIL 1. Park the vehicle on a level surface and apply the parking brake. 2. Start the engine as possible. Keep used engine oil out of reach of children. Waste oil must be disposed of properly. Check your local regulations. 6. Clean - 2001 Nissan Quest | Owner's Manual - Page 234
Start the engine and check for leakage around the oil filter. Correct as required. 9. Turn the engine off and wait several minutes. Check the oil level. Add engine oil if necessary. CHANGING ENGINE OIL FILTER 1. Park the vehicle on a level surface and apply the parking brake. 2. Turn the engine off - 2001 Nissan Quest | Owner's Manual - Page 235
jewelry and clothing away from any moving parts such as the cooling fan and drive belts. ● Automatic transmission fluid is poisonous and should be stored carefully in marked containers out of the reach of children. 3. Check the fluid level with the engine idling. 4. Remove the dipstick and wipe it - 2001 Nissan Quest | Owner's Manual - Page 236
brake warning light comes on, add DOT 3 fluid up to the MAX line. If fluid must be added frequently, the system should be thoroughly checked by an authorized NISSAN dealer. For further brake fluid specification information, refer to the ''Technical and Consumer Information'' section in this manual - 2001 Nissan Quest | Owner's Manual - Page 237
the washer fluid reservoir in the engine compartment. Add fluid when the low washer fluid warning light (Canada only) comes on. To add fluid, remove the reservoir cap and refill the reservoir. This reservoir serves both the front and rear washer systems. CAUTION Do not substitute engine anti-freeze - 2001 Nissan Quest | Owner's Manual - Page 238
JUMP STARTING If jump starting is necessary, see the ''In case of emergency'' section. If the engine does not start by jump starting, the battery may have to be replaced. Contact an authorized NISSAN dealer. Check the fluid level in each cell. It should be between the MAX and MIN lines. If it is - 2001 Nissan Quest | Owner's Manual - Page 239
unusual wear, cuts, fraying or looseness. If the belt is loose or in poor condition, have it replaced or adjusted by an authorized NISSAN dealer. REPLACING SPARK PLUGS WARNING Be sure the engine and ignition switch are off and that the parking brake is engaged securely. CAUTION Be sure to use the - 2001 Nissan Quest | Owner's Manual - Page 240
should not be cleaned and reused. Replace it according to the maintenance intervals shown in the ''Maintenance'' section of this manual. When replacing the filter, unclip the four clamps and remove the filter. Wipe the inside of the air cleaner housing and the cover with a damp cloth when replacing - 2001 Nissan Quest | Owner's Manual - Page 241
Remove the cowl cover. ● Remove the six screws. ● Open the hood. CABIN AIR FILTER The cabin air filter restricts the entry of airborne dust and pollen particles and reduces some objectionable outside odors. The filter is located just in front of the windshield under the cowl cover on the passenger - 2001 Nissan Quest | Owner's Manual - Page 242
of the engine compartment. ● Push the windshield washer hose and the grommet through the sheet metal hole. ● Lift the cowl cover and remove it from the vehicle. 3. Locate the cabin air filter on the passenger side of the vehicle. ● Remove the four screws from the cabin air filter cover. ● Remove - 2001 Nissan Quest | Owner's Manual - Page 243
surface of the filter and lifting. 4. Install the new cabin air filter element into the filter retaining frame, ensure that you insert the three retaining tabs in the bottom of the filter frame. 5. Install the filter top cover and the four screws. 6. Feed the windshield washer hose from the cowl - 2001 Nissan Quest | Owner's Manual - Page 244
, replace the blades. CAUTION ● After wiper blade replacement, return the wiper arm to its original position; otherwise it may be damaged when the engine hood is opened. ● Make sure the wiper blades contact the glass; otherwise the arms may be damaged from wind pressure. REPLACING 1. Lift the - 2001 Nissan Quest | Owner's Manual - Page 245
ADI1114 Rear window wiper blade 1. Lift the wiper arm away from the windshield. 2. Push the tab, then move the wiper blade down the wiper arm to remove. 3. Insert a new wiper blade onto the wiper arm and press down until the blade clicks into place. 8-18 Do-it-yourself - 2001 Nissan Quest | Owner's Manual - Page 246
checked as soon as possible if the wear indicator sound is heard. Under some driving or climate conditions, occasional brake squeak, squeal or other noise may be heard. Occasional brake noise during light to moderate stops is normal and does not affect the function or performance of the brake system - 2001 Nissan Quest | Owner's Manual - Page 247
section of this manual. as the vacuum is released from the booster. If the brakes do not operate properly, see an authorized NISSAN dealer. BRAKE BOOSTER Check the brake booster function as follows: 1. With the engine off, press and release the brake pedal several times. When brake pedal movement - 2001 Nissan Quest | Owner's Manual - Page 248
1. Turn the headlight switch to the OFF position. 2. Open the engine hood. 3. Remove condition, check the fusible links. If any of these fusible links are melted, replace only with genuine NISSAN parts. If the new fusible link melts again, have the system checked and repaired by an authorized NISSAN - 2001 Nissan Quest | Owner's Manual - Page 249
for compliance could void the user's authority to operate the equipment. This device complies with part 15 of the FCC Rules and RSS-210 of Industry Canada. Operation is subject to the following two conditions: (1) This device may not cause harmful interference, and (2) this device must accept any - 2001 Nissan Quest | Owner's Manual - Page 250
LIGHTS aiming adjustment is necessary, contact an authorized NISSAN dealer. ● Do not leave the bulb body and affect the performance of the headlight. Removing the headlight bulb 1. Disconnect the negative (-) battery be replaced from inside the engine compartment without removing the headlight - 2001 Nissan Quest | Owner's Manual - Page 251
LDI0065 FOG LIGHTS Replacing the fog light bulb 1. Remove the three splash shield screws and three push pins. LDI0064 2. Move the splash shield out of the way. 3. Disconnect electrical connector. 4. Rotate the bulb counterclockwise until it is free from the fog light housing. 8-24 Do-it-yourself - 2001 Nissan Quest | Owner's Manual - Page 252
signal light Front fog light Front combination light: Front side marker light Parking/Cornering Rear combination light: Turn signal Stop/Tail Rear side marker light Back-up light License plate light High-mounted stop light Interior lights Personal reading light Luggage compartment light Steplight - 2001 Nissan Quest | Owner's Manual - Page 253
ADI1093 Replacement procedures All lights (except for headlights) are either type A, B, C or D. When replacing a bulb, first remove the lens and/or cover. WDI0059 8-26 Do-it-yourself - 2001 Nissan Quest | Owner's Manual - Page 254
WDI0062 Do-it-yourself 8-27 - 2001 Nissan Quest | Owner's Manual - Page 255
ADI1096 8-28 Do-it-yourself - 2001 Nissan Quest | Owner's Manual - Page 256
flat tire, see the ''In case of emergency'' section of this manual. Maximum inflation pressure Do not exceed the maximum inflation pressure shown on the side wall of the tire. Tire inflation pressure Periodically check the tire pressure (including the spare). Incorrect tire pressure may adversely - 2001 Nissan Quest | Owner's Manual - Page 257
your vehicle beyond this capacity. Overloading your vehicle may result in reduced tire life, unsafe operating conditions due to premature tire rating of the tire. If you operate your vehicle in snowy or icy conditions, NISSAN recommends the use of snow or all season tires on all four wheels. - 2001 Nissan Quest | Owner's Manual - Page 258
of tire chains may be prohibited according to location. Check the local laws before installing tire chains. only on the front wheels and not on the rear wheels. WARNING ● After rotating the tires, check and adjust the tire pressure. ● Retighten the wheel nuts when the vehicle has been driven for - 2001 Nissan Quest | Owner's Manual - Page 259
and consumer information'' section of this manual. WARNING ● The use of tires other than those recommended, or the mixed use of tires of different brands, construction (bias, bias-belted or radial), or tread patterns can adversely affect the ride, braking, handling, ground clearance, body-to - 2001 Nissan Quest | Owner's Manual - Page 260
service or poor seal at the tire bead. ● NISSAN recommends waxing the road wheels to protect against road sharp turns and abrupt braking while driving. Periodically check spare tire inflation pressure . For tire placard location, see ''Tire placard'' in the index of this manual. With the TEMPORARY - 2001 Nissan Quest | Owner's Manual - Page 261
CAUTION ● Do not use tire chains on the TEMPORARY USE ONLY spare tire. Tire chains will not fit properly and may cause damage to the vehicle. ● Because the TEMPORARY USE ONLY spare tire is smaller than the original tire, ground clearance is reduced. To avoid damage to the vehicle, do not drive over - 2001 Nissan Quest | Owner's Manual - Page 262
9 Maintenance Maintenance precautions ...9-2 General maintenance ...9-2 Explanation of maintenance items ...9-2 Exterior maintenance...9-2 Interior maintenance...9-3 Periodic maintenance schedules ...9-5 Schedule 1 ...9-5 Schedule 2 ...9-5 Explanation of maintenance items ...9-10 - 2001 Nissan Quest | Owner's Manual - Page 263
. However, under severe driving conditions, additional or more frequent maintenance is required. Where to go for service If maintenance service is required or your vehicle appears to malfunction, have the systems checked and tuned by an authorized NISSAN dealer. NISSAN technicians are well-trained - 2001 Nissan Quest | Owner's Manual - Page 264
down rear seat and detachable rear seat (if so equipped). Seat belts - Check that all parts of the seat belt system (e.g. buckles, anchors, adjusters and retractors) operate properly and smoothly, and are installed securely. Check the belt webbing for cuts, fraying, wear or damage. Accelerator pedal - 2001 Nissan Quest | Owner's Manual - Page 265
without applying any brakes. to drain back into the oil pan. Brake fluid level* - Make sure the brake fluid level is between the MIN and MAX lines on the reservoir. Power steering fluid level* and lines - Check the level when the fluid is cold with the engine off. Check the lines for proper - 2001 Nissan Quest | Owner's Manual - Page 266
PERIODIC MAINTENANCE SCHEDULES To ensure smooth, trouble-free, safe and economical driving, NISSAN provides two periodic maintenance schedules that may be used, depending upon the conditions in which you usually drive. These schedules contain both distance and time intervals, up to 60,000 miles (96, - 2001 Nissan Quest | Owner's Manual - Page 267
system maintenance Drive belts Air cleaner filter EVAP vapor lines Fuel lines Fuel filter Engine coolant Engine oil Engine oil filter Spark plugs (Use PLATINUM-TIPPED type) Timing belt mainly in dusty conditions, more frequent maintenance may be required. When the filter becomes clogged, the - 2001 Nissan Quest | Owner's Manual - Page 268
Chassis and body maintenance Brake lines & cables Brake pads, rotors, drums & linings Automatic transmission fluid Steering gear & linkage, axle & suspension parts Tire Rotation Exhaust system Drive shaft boots Cabin air filter (if so equipped) Supplemental air bag system Automatic speed control - 2001 Nissan Quest | Owner's Manual - Page 269
first. Miles × 1,000 (km × 1,000) Months Emission control system maintenance Drive belts Air cleaner housing filter EVAP vapor lines Fuel lines Fuel filter Engine coolant Engine oil Engine oil filter Spark plugs (Use PLATINUM-TIPPED) Timing belt R R See NOTE (2)*. Replace every 30,000 miles (48,000 - 2001 Nissan Quest | Owner's Manual - Page 270
. Chassis and body maintenance Brake lines & cables Brake pads, rotors, drums & linings Automatic transmission fluid Steering gear & linkage, axle & suspension parts Tire rotation Exhaust system Drive shaft boots Cabin air filter (if so equipped) Supplemental air bag system Automatic speed control - 2001 Nissan Quest | Owner's Manual - Page 271
the timing belt for driving the camshaft. Brake pads, rotors, drums & linings - Check these and the other brake components for wear, deterioration and leaks. Under severe driving conditions, they may have to be inspected more frequently. Automatic transmission fluid* - Check the fluid level and - 2001 Nissan Quest | Owner's Manual - Page 272
on the supplemental air bag system should be done by an authorized NISSAN dealer. Cabin air filter - Under normal driving conditions, the cabin air filter should be replaced in accordance with the maintenance schedule. However, driving the vehicle in dusty areas may cause rapid clogging of the - 2001 Nissan Quest | Owner's Manual - Page 273
MEMO 9-12 Maintenance - 2001 Nissan Quest | Owner's Manual - Page 274
and consumer information Capacities and recommended fuel/lubricants ...10-2 Fuel recommendation...10-2 Engine oil and oil filter recommendation...10-4 Recommended SAE viscosity number...10-6 Air conditioner system refrigerant and lubricant recommendations ...10-6 Specifications ...10-7 Engine ...10 - 2001 Nissan Quest | Owner's Manual - Page 275
Engine oil (7) Drain and refill With oil filter change Without oil filter change Cooling system With reservoir tank Reservoir Automatic transaxle fluid Power steering fluid Brake fluid 4 qt 3-7/8 qt 11-1/4 qt 3-3/8 qt 3-1/8 qt 9-3/8 qt 3.8 3.6 10.6 Multi-purpose grease Air conditioning system - 2001 Nissan Quest | Owner's Manual - Page 276
containing oxygenates can cause paint damage. can be harmful to the fuel system and engine. Octane rating tips In most parts of North America, you should use unleaded gasoline with an octane rating of at least 87 AKI (Anti-Knock Index) number. However, you may use unleaded gasoline with an octane - 2001 Nissan Quest | Owner's Manual - Page 277
, which may cause excessive fuel consumption or engine damage. If any of the above symptoms are encountered, have your vehicle checked at an authorized NISSAN dealer or other competent service facility. However, now and then you may notice light spark knock for a short time while accelerating or - 2001 Nissan Quest | Owner's Manual - Page 278
also be used. Mineral based or synthetic type oils may be used in your NISSAN vehicle. These oils must, however, meet the API quality and SAE viscosity ratings following conditions may require more frequent oil and filter changes: Technical and consumer information 10-5 Oil viscosity The engine oil - 2001 Nissan Quest | Owner's Manual - Page 279
(-18°C). to recover and recycle your air conditioning system refrigerant. Contact an authorized NISSAN dealer when servicing your air conditioning system. AIR CONDITIONER SYSTEM REFRIGERANT AND LUBRICANT RECOMMENDATIONS The air conditioning system in this NISSAN vehicle must be charged with the - 2001 Nissan Quest | Owner's Manual - Page 280
SPECIFICATIONS ENGINE Model Type Cylinder arrangement Bore × Stroke Displacement Firing order Idle speed Ignition timing degree (B.T.D.C.) at idle speed CO percentage at idle speed [No air] Spark plug Hot Standard Cold Spark plug gap (Nominal): Camshaft operation in (mm) cu in (cm3) rpm degree/rpm - 2001 Nissan Quest | Owner's Manual - Page 281
Model Drive belts [Width × Length] Generator belt Air conditioner compressor Power steering pump VG33E in (mm) 0.7008 × 33.66 (17.80 × 855) 0.5606 × 46.65 (14.24 × 1,185) 0.5606 × 40.74 (14.24 × 1,035) 10-8 Technical and consumer information - 2001 Nissan Quest | Owner's Manual - Page 282
(mm) in (mm) in (mm) 194.8 (4,949) 74.9 (1,903) 67.3 (1,710) 63.4 (1,610) 63.4 (1,610) 112.2 (2,850) Gross vehicle weight rating lb (kg) Gross axle weight rating Front Rear lb (kg) lb (kg) See the ''F.M.V.S.S. certification label'' on the left center pillar. Technical and consumer information 10-9 - 2001 Nissan Quest | Owner's Manual - Page 283
is suitable for your vehicle's engine. Using fuel with an octane/cetane rating that is too low may cause engine damage. All gasoline vehicles must and registration are the responsibility of the user. NISSAN is not responsible for any inconvenience that may 10 Technical and consumer information - 2001 Nissan Quest | Owner's Manual - Page 284
NUMBER The number is stamped on the engine as shown. F.M.V.S.S. CERTIFICATION LABEL The F.M.V.S.S. certification label is affixed as shown. This label contains valuable vehicle information, such as: Gross Vehicle Weight Rating (GVWR), Gross Axle Weight Rating (GAWR), month and year of manufacture - 2001 Nissan Quest | Owner's Manual - Page 285
cold tire pressure is shown on the tire placard affixed to the inside of the glove box. AIR CONDITIONER SPECIFICATION LABEL The air conditioner specification label is attached as shown. ATI0564 Have your front license plate installed by your NISSAN dealer. 10-12 Technical and consumer information - 2001 Nissan Quest | Owner's Manual - Page 286
belts. ● Be sure everyone in the vehicle is in a seat with their seat belt properly fastened. maximum total weight (load) limit specified for the vehicle. ● GAWR (Gross Axle front and rear axle to the GAWR. CAPACITY The load capacity capacity of your vehicle. To determine vehicle load capacity fluids, - 2001 Nissan Quest | Owner's Manual - Page 287
maximum front and rear GAWRs. If you do, parts of your vehicle can break, or it can kg) requires the use of trailer brakes. ● NISSAN recommends the use of a tandem axle trailer whenever towing above 3,000 lbs engine, drive train, steering, braking and other systems. A NISSAN Trailer Towing Guide - 2001 Nissan Quest | Owner's Manual - Page 288
improper towing procedures are not covered by NISSAN warranties. A NISSAN Trailer Towing Guide (U.S. only) containing information on trailer to or affect the operation of the impactabsorbing bumper. Maximum gross vehicle weight/ maximum gross axle weight The gross vehicle weight of the towing - 2001 Nissan Quest | Owner's Manual - Page 289
chains should be crossed and should be attached to the hitch, not to the vehicle bumper or axle. Be sure to leave enough slack in the chains to permit turning corners. Trailer lights Trailer lights should comply with Federal and/or local regulations. When wiring the vehicle for towing, connect - 2001 Nissan Quest | Owner's Manual - Page 290
tow harness to the vehicle harness located behind the rear bumper. 3) Connect the tow harness connector NISSAN. The trailer tow module includes: ● trailer tow module which draws power from the vehicle stop lamp fuse ● one subharness containing a SAE J1239 specified connector Technical and consumer - 2001 Nissan Quest | Owner's Manual - Page 291
speed to reduce chances of engine overloading and/or overheating. ● If the engine coolant rises to an extremely high temperature when the air conditioning system is on, turn the air conditioner off. Coolant heat can be additionally vented by opening the windows, switching the fan control dial to - 2001 Nissan Quest | Owner's Manual - Page 292
brakes to overheat, resulting in reduced braking efficiency. When towing a trailer, change fluid in the transmission more frequently. For additional information see the ''Maintenance'' section earlier in this manual conditions, and may vary significantly, due to variations in driving habits, service - 2001 Nissan Quest | Owner's Manual - Page 293
it has become lost, you may obtain a replacement by writing to: ● Nissan North America Inc. Consumer Affairs Department P.O. Box 191 Gardena, CA 90248-0191 ● Nissan Canada Inc. 5290 Orbitor Drive Mississauga, Ontario, L4W 4Z5 REPORTING SAFETY DEFECTS (US only) If you believe that your vehicle has - 2001 Nissan Quest | Owner's Manual - Page 294
condition can be obtained by ordinary usage of the vehicle. If a powertrain system component is repaired or the battery is disconnected, the vehicle may be reset to a not ready condition seconds at idle. 11. Rev the engine up between 2,000 and Technical and consumer information 10-21 3,000 rpm and - 2001 Nissan Quest | Owner's Manual - Page 295
OWNER'S MANUAL/SERVICE MANUAL ORDER INFORMATION A genuine NISSAN Service Manual is the best source of service and repair information for your vehicle. Filled with wiring diagrams, illustrations and step-by-step diagnostic and adjustment procedures, this manual is the same one used by the factory - 2001 Nissan Quest | Owner's Manual - Page 296
location of a NISSAN Dealer in your area call the NISSAN Satisfaction Center at 1-800-387-0122 and a bilingual NISSAN representative will assist you. Also available are Genuine NISSAN Service and Owner's Manuals for older NISSAN models. Insist on the use of Genuine Nissan/Infiniti Collision Parts - 2001 Nissan Quest | Owner's Manual - Page 297
MEMO 10-24 Technical and consumer information - 2001 Nissan Quest | Owner's Manual - Page 298
air filter ...8-14 Air flow charts ...4-7 Alarm system (See vehicle security system) ...2-11 Anti-lock brake system (ABS)...5-14 Anti-lock brake warning light ...2-9 Armrests...1-11 Ashtray (See cigarette lighter and ashtray) ...2-22 Audio system Compact disc (CD) player...4-30, 4-32 FM-AM radio - 2001 Nissan Quest | Owner's Manual - Page 299
Compact disc (CD) player...4-30, 4-32 Controls Audio controls (rear) ...4-35 Audio controls (steering wheel) ...4-34 Heater and air conditioner controls (automatic)...4-11 Heater and air conditioner controls (manual)...4-3 Rear seat air conditioner ...4-14 Coolant Capacities and recommended fuel/ - 2001 Nissan Quest | Owner's Manual - Page 300
the license plate ...10-12 Light Air bag warning light...1-37 Brake light (See stop light) ...8-25 Bulb check/instrument panel ...2-7 Bulb replacement...8-25 Cornering light ...2-18 Headlight control switch ...2-15 Headlights...8-23 Interior lights ...2-33 Light bulbs ...8-23 Luggage compartment - 2001 Nissan Quest | Owner's Manual - Page 301
's manual/service manual order information ...10-22 P Parcel Shelf ...2-27 Parking Parking brake check ...8-19 Parking brake operation ...5-9 Parking/parking on hills ...5-13 Periodic maintenance schedules...9-5 Personal reading light...2-33 Power Power door locks ...3-2, 3-4 Power steering fluid - 2001 Nissan Quest | Owner's Manual - Page 302
the engine ...5-5 Steering Power steering fluid ...10-2, 8-9 Tilting steering wheel...3-11 Stop light...8-25 Storage Overhead storage compartment...2-23 Under seat storage tray...1-11 Sun shade...2-32 Sunroof ...2-32 Supplemental restraint system Information and warning labels ...1-37 Switch - 2001 Nissan Quest | Owner's Manual - Page 303
...10-13 Vehicle recovery ...6-14 Vehicle security system ...2-11 Ventilators ...4-2 W Warning Air bag warning light...1-37 Hazard warning flasher switch ...2-18 Vehicle security system ...2-11 Warning labels (for SRS) ...1-37 Warning/indicator lights and chimes ...2-7 Weights (See dimensions and - 2001 Nissan Quest | Owner's Manual - Page 304
SG/SH, Energy Conserving I & II or API grade SJ Energy Conserving ● ILSAC grade GF-I & GF-II See ''Engine oil and oil filter recommendation'' in the ''Technical and consumer information'' section. Cold tire pressure: See tire placard affixed to the glove compartment lid. Recommended new vehicle
-
 1
1 -
 2
2 -
 3
3 -
 4
4 -
 5
5 -
 6
6 -
 7
7 -
8
-
9
-
10
-
11
-
12
-
13
-
14
-
15
-
16
-
17
-
18
-
19
-
20
-
21
-
22
-
23
-
24
-
25
-
26
-
27
-
28
-
29
-
30
-
31
-
32
-
33
-
34
-
35
-
36
-
37
-
38
-
39
-
40
-
41
-
42
-
43
-
44
-
45
-
46
-
47
-
48
-
49
-
50
-
51
-
52
-
53
-
54
-
55
-
56
-
57
-
58
-
59
-
60
-
61
-
62
-
63
-
64
-
65
-
66
-
67
-
68
-
69
-
70
-
71
-
72
-
73
-
74
-
75
-
76
-
77
-
78
-
79
-
80
-
81
-
82
-
83
-
84
-
85
-
86
-
87
-
88
-
89
-
90
-
91
-
92
-
93
-
94
-
95
-
96
-
97
-
98
-
99
-
100
-
101
-
102
-
103
-
104
-
105
-
106
-
107
-
108
-
109
-
110
-
111
-
112
-
113
-
114
-
115
-
116
-
117
-
118
-
119
-
120
-
121
-
122
-
123
-
124
-
125
-
126
-
127
-
128
-
129
-
130
-
131
-
132
-
133
-
134
-
135
-
136
-
137
-
138
-
139
-
140
-
141
-
142
-
143
-
144
-
145
-
146
-
147
-
148
-
149
-
150
-
151
-
152
-
153
-
154
-
155
-
156
-
157
-
158
-
159
-
160
-
161
-
162
-
163
-
164
-
165
-
166
-
167
-
168
-
169
-
170
-
171
-
172
-
173
-
174
-
175
-
176
-
177
-
178
-
179
-
180
-
181
-
182
-
183
-
184
-
185
-
186
-
187
-
188
-
189
-
190
-
191
-
192
-
193
-
194
-
195
-
196
-
197
-
198
-
199
-
200
-
201
-
202
-
203
-
204
-
205
-
206
-
207
-
208
-
209
-
210
-
211
-
212
-
213
-
214
-
215
-
216
-
217
-
218
-
219
-
220
-
221
-
222
-
223
-
224
-
225
-
226
-
227
-
228
-
229
-
230
-
231
-
232
-
233
-
234
-
235
-
236
-
237
-
238
-
239
-
240
-
241
-
242
-
243
-
244
-
245
-
246
-
247
-
248
-
249
-
250
-
251
-
252
-
253
-
254
-
255
-
256
-
257
-
258
-
259
-
260
-
261
-
262
-
263
-
264
-
265
-
266
-
267
-
268
-
269
-
270
-
271
-
272
-
273
-
274
-
275
-
276
-
277
-
278
-
279
-
280
-
281
-
282
-
283
-
284
-
285
-
286
-
287
-
288
-
289
-
290
-
291
-
292
-
293
-
294
-
295
-
296
-
297
-
298
-
299
-
300
-
301
-
302
-
303
-
304
 |
 |
Foreword
Welcome to the growing family of new
NISSAN owners. This vehicle is delivered
to you with confidence. It was produced
using the latest techniques and strict quality
control.
This
manual
was
prepared
to
help
you
understand the operation and maintenance
of your vehicle so that you may enjoy many
miles
of
driving
pleasure.
Please
read
through this manual before operating your
vehicle.
In the U.S., a separate Warranty Informa-
tion and Maintenance Log Booklet and in
Canada, a Warranty and Roadside Assis-
tance Information Booklet explains de-
tails about the warranties covering your
vehicle and vehicle maintenance sched-
ules. Additionally, a separate Customer
Care/Lemon Law Booklet (U.S. only) will
explain how to resolve any concerns you
may have with your vehicle, as well as
clarify
your
rights
under
your
state’s
lemon law.
Your NISSAN dealership knows your ve-
hicle best. When you require any service or
have any questions, they will be glad to
assist you with the extensive resources
available to them.
READ FIRST — THEN DRIVE SAFELY
Before driving your vehicle read this own-
er’s manual carefully. This will ensure famil-
iarity with controls and maintenance re-
quirements,
assisting
you
in
the
safe
operation of your vehicle.
WARNING
IMPORTANT SAFETY INFORMATION
REMINDERS FOR SAFETY!
Follow these important driving rules to
help ensure a safe and comfortable trip
for you and your passengers!
●
NEVER drive under the influence of
alcohol or drugs.
●
ALWAYS observe posted speed lim-
its and never drive too fast for con-
ditions.
●
ALWAYS use your seat belts and
appropriate child restraint
systems.
Pre-teen children should be seated
in the rear seat.
●
ALWAYS provide information about
the proper use of vehicle safety fea-
tures to all occupants of the vehicle.
●
ALWAYS review this owner’s manual
for important safety information.
MODIFICATION OF YOUR VEHICLE
This vehicle should not be modified.
Modification
could
affect
its
perfor-
mance, safety or durability, and may
even violate governmental regulations.
In addition, damage or performance
problems resulting from modifications
may
not
be
covered
under
NISSAN
warranties.
WHEN READING THE MANUAL
This manual includes information for all
options available on this model. Therefore,
you may find some information that does
not apply to your vehicle.
All information, specifications and illustra-
tions in this manual are those in effect at the
time of printing. NISSAN reserves the right
to change specifications or design without
notice and without obligation.
The inside pages of this manual contain
a minimum of 50% recycled fibers,
including 10% post-consumer fibers.