AIWA CX-NA71 Operating Instructions - Page 22

Setting, The Clock, The Timer

Page 22 highlights

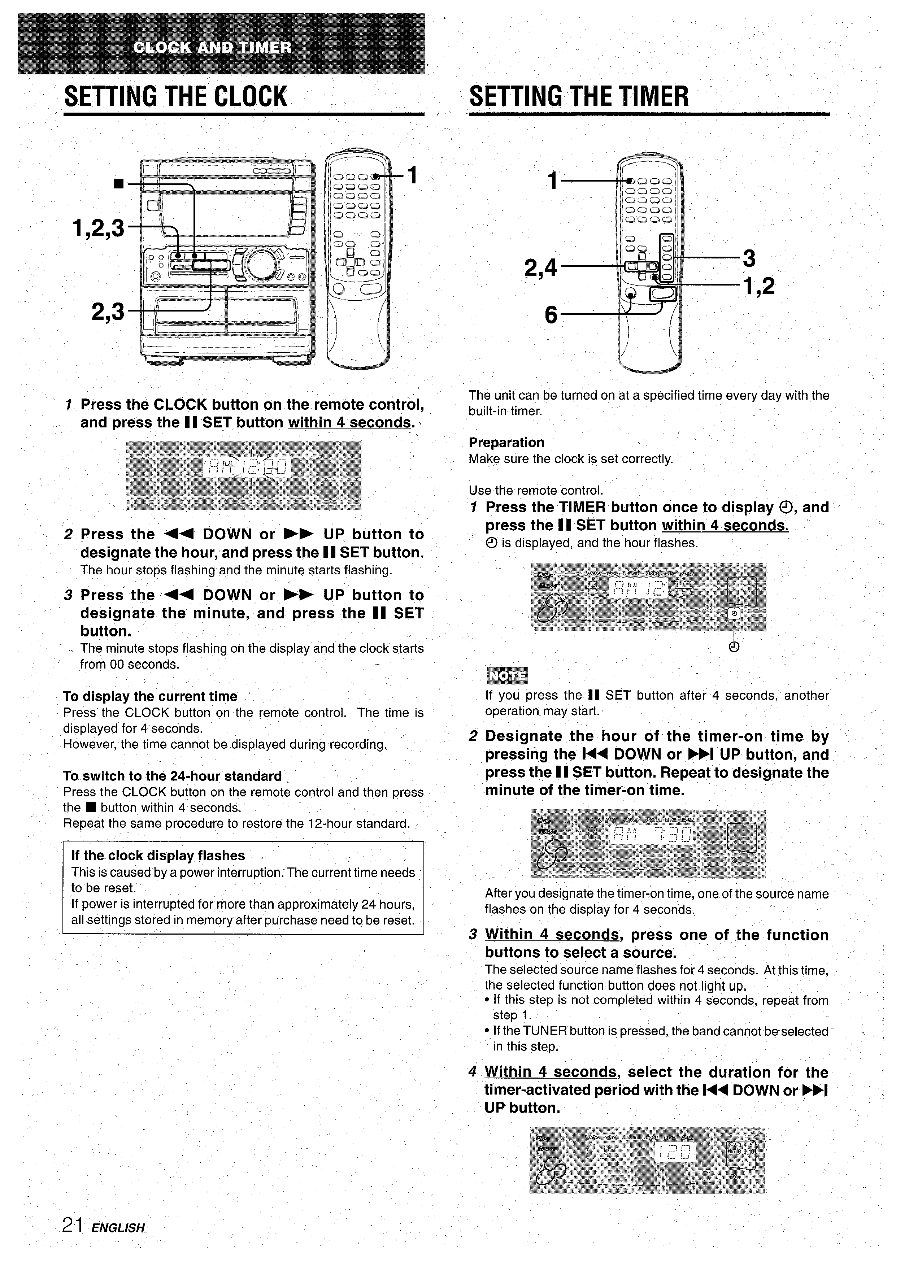
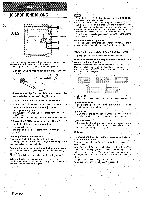
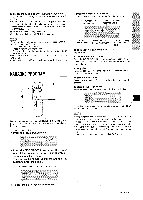
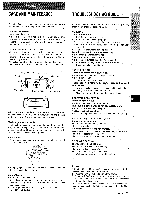
\ SETTING THE CLOCK ] ~ ~\\, s j[ k8 1,2,3 at, 2,3 SETTING THE TIMER 1 i 2,4 6 ,, 3 1,2 1 Press the CLOCK button on the remote control, and press the I I SET button within 4 seconds. ,'@#fu,$,$%..'~,q~-.~!,~A-,i~~',p&w~*~~gB,h#~.i-g&%w,,.Ea&'z$%.8:,@~,.LQi=~$~g.qy~,p,.,l&f%u k=:$;,pE',~,-_-~*,B&g'ga,,:@s"~y.p:..,.:.*&,.~s*l:.@."gM-,=Ej.V.-z."#.@,.~!.@k!$j*-B@,~~".&$bw"bL~M.%Ye.~@g.~=.&=q@?,%[email protected]+=.*@.d&,.T.#-$.mbF@*=%B-%@& @'B1; 8,,~~;@ -hw&i? mlip,p~g$p~ $,9@,,,Fq!"?p~&iP#B&~~i'$~b#~JJ~$,@#**#l$*$nJ,kik* ~~% z.. a~,e,,..,:,:.,b,,Ez$,~;j.~3g:~,~6~t@g~@~~':B~E"~z'~,:t~~d8"M:#k!i.i3i!!'@m,*.,=,8,,,eq 2 Press the 4+ DOWN or ® F UP button to designate the hour, and press the 11 SET button. The hour stops flashing and the minute starts flashing. The unit can be turned on at a specified time every day with the built-in timer. Preparation Make sure the clock is set correctly. Use the remote control. 7 Press the TIMER button once to display 0, and press the II SET button within 4 seconds. O is displayed, and the hour flashes. 3 Press the UP button to I designate the minute, and press the II SET button. The minute stops flashing on the display and the clock starts from 00 seconds. m To display the current time Press the CLOCK button on the remote control. The time is If you press the II SET button after 4 seconds, another operation may start. displayed for 4 seconds. However, the time cannot be displayed during recording. 2 Designate the hour of the timer-on time by pressing the l

  • 1
  • 2
  • 3
  • 4
  • 5
  • 6
  • 7
  • 8
  • 9
  • 10
  • 11
  • 12
  • 13
  • 14
  • 15
  • 16
  • 17
  • 18
  • 19
  • 20
  • 21
  • 22
  • 23
  • 24
  • 25
  • 26
  • 27
  • 28
  • 29
  • 30
  • 31
  • 32
  • 33
  • 34
  • 35
  • 36
  • 37
  • 38
  • 39
  • 40
  • 41
  • 42
  • 43
  • 44
  • 45
  • 46
  • 47
  • 48
  • 49
  • 50
  • 51
  • 52
  • 53
  • 54
  • 55
  • 56
  • 57
  • 58
  • 59
  • 60
  • 61
  • 62
  • 63
  • 64
  • 65
  • 66
  • 67
  • 68
  • 69
  • 70
  • 71
  • 72
  • 73
  • 74
  • 75
  • 76
  • 77
  • 78
  • 79
  • 80

SETTING
THE CLOCK
SETTING
THE TIMER
1
~
i
j
[
1,2,3
,,
2,4
3
1,2
2,3
6
1
Press the CLOCK
button
on the remote
control,
The
unit can
be turned
on at a specified
time
every
day with
the
built-in
timer.
and press the I I SET button
within
4 seconds.
@~~p~~,a@yf~:E~gy*~g.#@&M
Bap,s@z~*~bY&.-
,,,.q & i%.:L.p&k’-*’@&.,E@Bwe=,e=,Tb
.. %
....
-
‘$’-!-’whw%~,%~,-
,,,:
,“, *M” -“”%=9+
=-,k,.b..@?M&$@B-
Preparation
, .,.,,,
~~,.-,&.~,
,,=,,
.u,=~,g~
&s
#$~A~B&$Q~
.’z~gl~,;p_ :::.:“jV!j@Lgq@@.F=%%@&
Make
sure
the clock
is set correctly.
fu%~i~*g#gE8i$q&**$
, ,, ,
,
.....
l.-
.....
!$~$~~~@J*d#m*
zae.::bE;3:6@@’:Ez:td8:kiii!!
,9,,,
!“?~iPB~’$#JJ$@#**#l$*$nJ,kik*
~~%
@’B18
; ,,~~
;@-hw&i?
mlip,p~g$p~
$@Fqp&#~ib
& ~~~,
Use the
remote
control.
. ~, ,,,,,~jg~~g
~t ~~~B
~~~
, ~ M!.
‘@m,*.=
,,,,
8,,eq
.,..,
,.$~,
z.
“’~”#3
7
Press
the TIMER
button
once to display
0,
and
2
Press
the
4+
DOWN
or
F
UP
button
to
press
the II
SET button
within
4 seconds.
designate
the hour, and press the 11 SET button.
O
is displayed,
and the
hour
flashes.
The
hour
stops
flashing
and the
minute
starts
flashing.
3
Press
the
<<
DOWN
or
>
UP
button
to
designate
the
minute,
and
press
the
II
SET
button.
The
minute
stops
flashing
on the display
and the clock
starts
from
00 seconds.
m
To display
the current
time
If you
press
the
II
SET
button
after
4 seconds,
another
Press
the
CLOCK
button
on
the
remote
control.
The
time
is
operation
may
start.
displayed
for 4 seconds.
However,
the time
cannot
be displayed
during
recording.
2
Designate
the
hour
of
the
timer-on
time
by
pressing
the
l<<
DOWN
or
WI
UP button,
and
TO
switch
to the 24-hour
standard.
press the 11 SET button.
Repeat
to designate
the
Press
the CLOCK
button
on the
remote
control
and
then
press
minute
of the timer-on
time.
the
button
within
4 seconds.
Repeat
the same
procedure
to restore
the
12-hour
standard.
If the clock display
flashes
.
This
is caused
by a power
interruption;
The current
time
needs
to be reset.
After
you designate
the timer-on
time,
one of the source
name
If power
is interrupted
for more
than
approximately
24 hours,
flashes
on the display
for 4 seconds.
all settings
stored
in memory
after
purchase
need
to be reset.
3 Within
4 seconds,
press
one
of
the
function
buttons
to select
a source.
The selected
source
name
flashes
for4
seconds.
At this time,
the selected
function
button
does
not light
up,
If this
step
is not completed
within
4 seconds,
repeat
from
step
1.-
If the TUNER
button
is pressed,
the band cannot
deselected’
in this
step.
4
Within
4 seconds,
select
the
duration
for
the
timer-activated
period with the 1<4 DOWN or WI