Acer Aspire G7710 Aspire G7710 Series User's Guide - EN - Page 75
To install a second CrossFire graphic card, Pull out the slot cover and store it for reassembly later. - motherboard
 |
View all Acer Aspire G7710 manuals
Add to My Manuals
Save this manual to your list of manuals |
Page 75 highlights
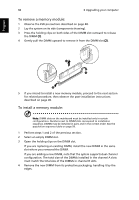
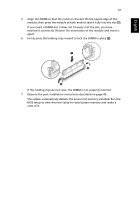
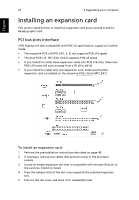
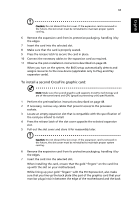
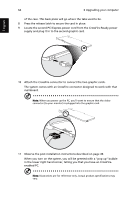
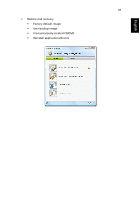
English 63 Caution: Do not discard the slot cover. If the expansion card is removed in the future, the slot cover must be reinstalled to maintain proper system cooling. 6 Remove the expansion card from its protective packaging, handling it by the edges. 7 Insert the card into the selected slot. 8 Make sure that the card is properly seated. 9 Press the release latch to secure the card in place. 10 Connect the necessary cables to the expansion card as required. 11 Observe the post-installation instructions described on page 49. When you turn on the system, the BIOS setup automatically detects and assigns resources to the new device (applicable only to Plug-and-Play expansion cards). To install a second CrossFire graphic card: Note: Make sure the second graphic card supports CrossFire technology and are of the same brand and GPU (graphics processing unit) specifications. 1 Perform the preinstallation instructions described on page 48. 2 If necessary, remove any cables that prevent access to the processor sockets. 3 Locate an empty expansion slot that is compatible with the specification of the card you intend to install. 4 Press the release latch of the slot cover opposite the selected expansion slot. 5 Pull out the slot cover and store it for reassembly later. Caution: Do not discard the slot cover. If the expansion card is removed in the future, the slot cover must be reinstalled to maintain proper system cooling. 6 Remove the expansion card from its protective packaging, handling it by the edges. 7 Insert the card into the selected slot. When installing the card, ensure that the gold "fingers" on the card line up with the slot on your motherboard. While lining up your gold "fingers" with the PCI Express slot, also make sure that you line up the back plate (the part of the graphics card that your monitor plugs into) in between the edge of the motherboard and the back
-
 1
1 -
2
-
3
-
4
-
5
-
6
-
7
-
8
-
9
-
10
-
11
-
12
-
13
-
14
-
15
-
16
-
17
-
18
-
19
-
20
-
21
-
22
-
23
-
24
-
25
-
26
-
27
-
28
-
29
-
30
-
31
-
32
-
33
-
34
-
35
-
36
-
37
-
38
-
39
-
40
-
41
-
42
-
43
-
44
-
45
-
46
-
47
-
48
-
49
-
50
-
51
-
52
-
53
-
54
-
55
-
56
-
57
-
58
-
59
-
60
-
61
-
62
-
63
-
64
-
65
-
66
-
67
-
68
-
69
-
 70
70 -
 71
71 -
 72
72 -
 73
73 -
 74
74 -
 75
75 -
 76
76 -
 77
77 -
 78
78 -
 79
79 -
 80
80 -
81
-
82
-
83
-
84
-
85
-
86
-
87
-
88
-
89
-
90
-
91
-
92
-
93
-
94
-
95
-
96
-
97
-
98
-
99
-
100
-
101
-
102
 |
 |
