Acer G330 Altos G330 User's Guide - Page 58
Under the Exit, Run the BIOS setup utility.
 |
UPC - 750519177044
View all Acer G330 manuals
Add to My Manuals
Save this manual to your list of manuals |
Page 58 highlights
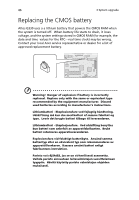
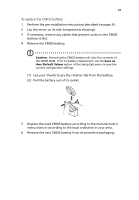
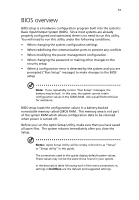
48 3 System upgrade 7 Install the new CMOS battery. (1) Insert the new battery into its socket with the positive (+) side facing the processor socket. (2) Make sure the retainer tab secures the battery in place. 8 Observe the post-installation instructions described on page 26. 9 Run the BIOS setup utility. 10 Under the Exit menu you can either load the system default configuration settings, or you can restore the customized user values you've save in step 4.
-
 1
1 -
2
-
3
-
4
-
5
-
6
-
7
-
8
-
9
-
10
-
11
-
12
-
13
-
14
-
15
-
16
-
17
-
18
-
19
-
20
-
21
-
22
-
23
-
24
-
25
-
26
-
27
-
28
-
29
-
30
-
31
-
32
-
33
-
34
-
35
-
36
-
37
-
38
-
39
-
40
-
41
-
42
-
43
-
44
-
45
-
46
-
47
-
48
-
49
-
50
-
51
-
52
-
 53
53 -
 54
54 -
 55
55 -
 56
56 -
 57
57 -
 58
58 -
 59
59 -
 60
60 -
 61
61 -
 62
62 -
 63
63 -
64
-
65
-
66
-
67
-
68
-
69
-
70
-
71
-
72
-
73
-
74
-
75
-
76
-
77
-
78
-
79
-
80
-
81
-
82
-
83
-
84
-
85
-
86
-
87
-
88
-
89
-
90
-
91
-
92
-
93
-
94
-
95
-
96
-
97
-
98
-
99
-
100
-
101
-
102
-
103
-
104
-
105
-
106
-
107
-
108
-
109
-
110
-
111
-
112
-
113
-
114
-
115
-
116
-
117
-
118
-
119
-
120
-
121
-
122
-
123
-
124
 |
 |
3 System upgrade
48
7
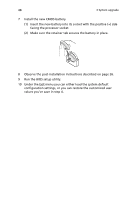
Install the new CMOS battery.
(1)
Insert the new battery into its socket with the positive (+) side
facing the processor socket.
(2)
Make sure the retainer tab secures the battery in place.
8
Observe the post-installation instructions described on page 26.
9
Run the BIOS setup utility.
10
Under the Exit
menu you can either load the system default
configuration settings, or you can restore the customized user
values you’ve save in step 4.