Acer Predator GX21-71 User Manual W10 - Page 75
Installing the new panel, push down carefully so the clasps around the panel lock
 |
View all Acer Predator GX21-71 manuals
Add to My Manuals
Save this manual to your list of manuals |
Page 75 highlights
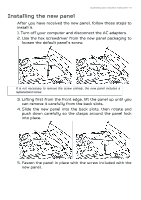
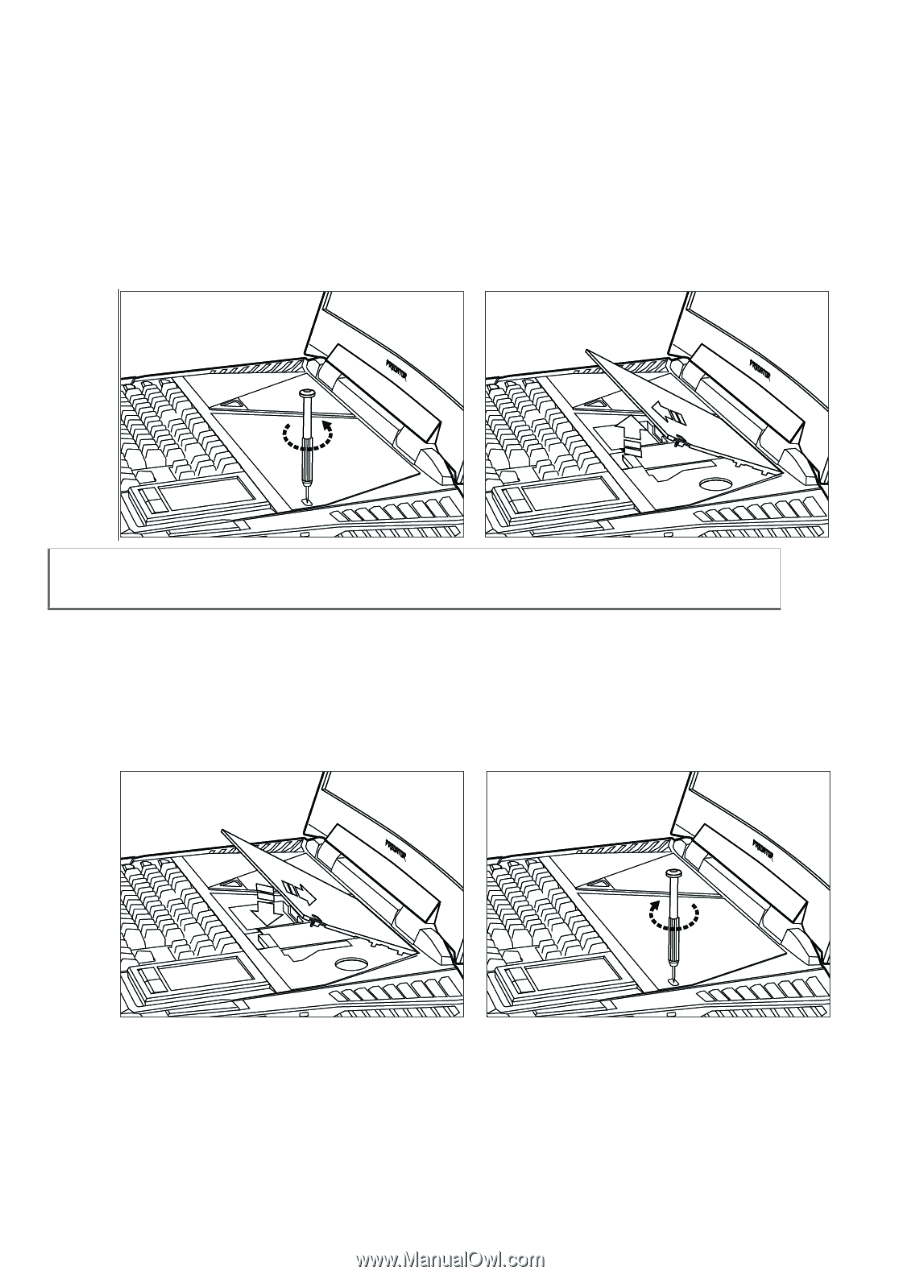
Customizing your computer's inside panel - 75 Installing the new panel After you have received the new panel, follow these steps to install it. 1. Turn off your computer and disconnect the AC adapters. 2. Use the hex screwdriver from the new panel packaging to loosen the default panel's screw. It is not necessary to remove the screw entirely, the new panel includes a replacement screw. 3. Lifting first from the front edge, lift the panel up until you can remove it carefully from the back slots. 4. Slide the new panel into the back slots, then rotate and push down carefully so the clasps around the panel lock into place. 5. Fasten the panel in place with the screw included with the new panel.
-
 1
1 -
2
-
3
-
4
-
5
-
6
-
7
-
8
-
9
-
10
-
11
-
12
-
13
-
14
-
15
-
16
-
17
-
18
-
19
-
20
-
21
-
22
-
23
-
24
-
25
-
26
-
27
-
28
-
29
-
30
-
31
-
32
-
33
-
34
-
35
-
36
-
37
-
38
-
39
-
40
-
41
-
42
-
43
-
44
-
45
-
46
-
47
-
48
-
49
-
50
-
51
-
52
-
53
-
54
-
55
-
56
-
57
-
58
-
59
-
60
-
61
-
62
-
63
-
64
-
65
-
66
-
67
-
68
-
69
-
 70
70 -
 71
71 -
 72
72 -
 73
73 -
 74
74 -
 75
75 -
 76
76 -
 77
77 -
 78
78 -
 79
79 -
 80
80 -
81
-
82
-
83
-
84
-
85
-
86
-
87
-
88
-
89
-
90
-
91
-
92
-
93
-
94
-
95
-
96
-
97
-
98
-
99
-
100
 |
 |
Customizing your computer’s inside panel - 75
Installing the new panel
After you have received the new panel, follow these steps to
install it.
1. Turn off your computer and disconnect the AC adapters.
2. Use the hex screwdriver from the new panel packaging to
loosen the default panel’s screw.
3. Lifting first from the front edge, lift the panel up until you
can remove it carefully from the back slots.
4. Slide the new panel into the back slots, then rotate and
push down carefully so the clasps around the panel lock
into place.
5. Fasten the panel in place with the screw included with the
new panel.
It is not necessary to remove the screw entirely, the new panel includes a
replacement screw.