Alpine CDE-HD137BT Owners Manual (english) - Page 10
Radio/HD Radio™, Reception - remote
 |
View all Alpine CDE-HD137BT manuals
Add to My Manuals
Save this manual to your list of manuals |
Page 10 highlights
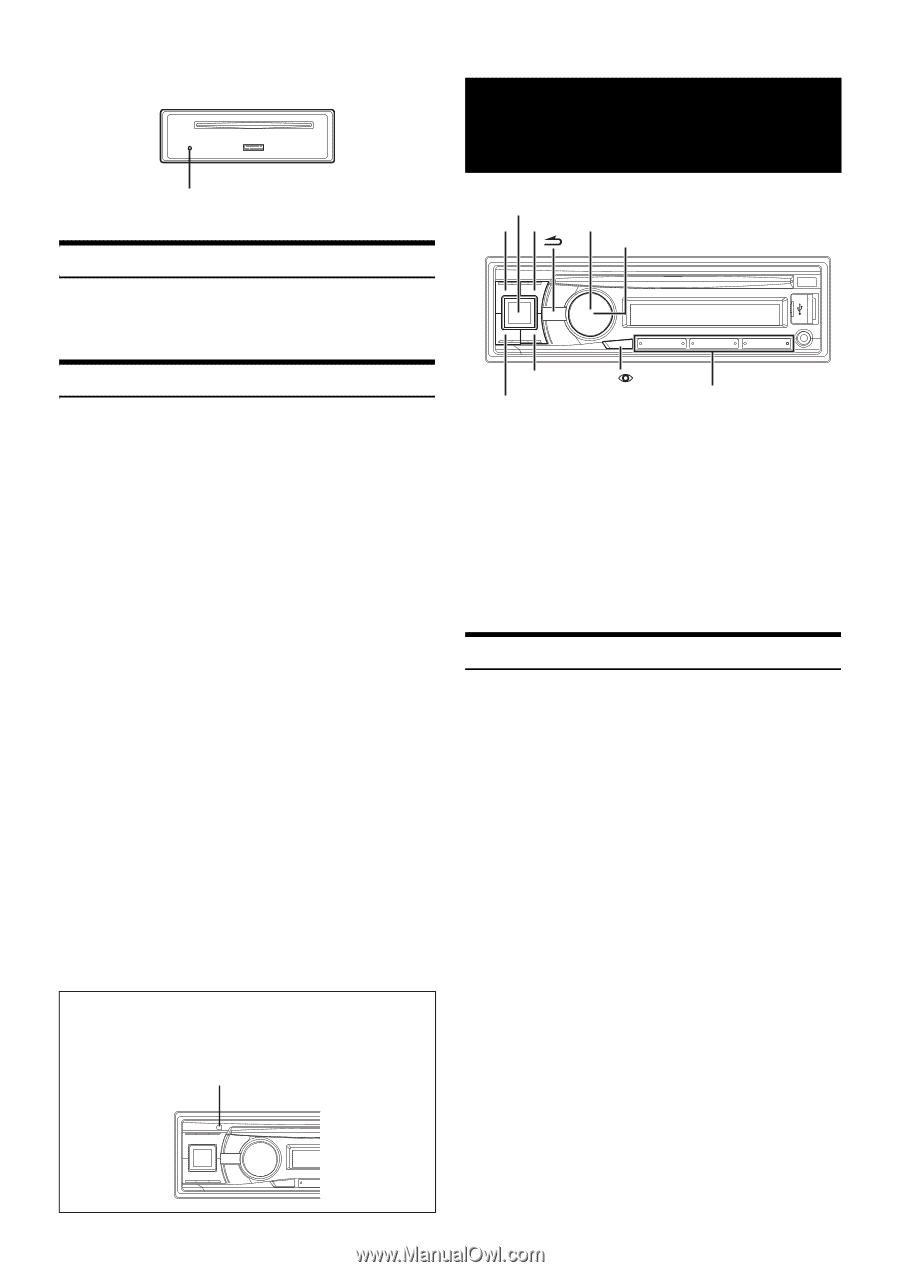
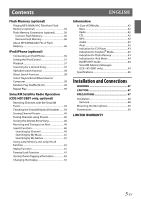
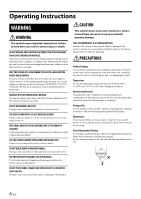
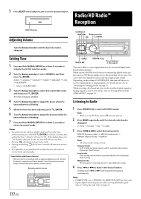
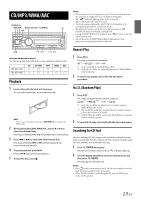
3 Press RESET with a ballpoint pen or similar pointed object. Radio/HD Radio™ Reception RESET button Adjusting Volume SOURCE/ Rotary encoder /ENTER Turn the Rotary encoder until the desired sound is obtained. Setting Time 1 Press and hold AUDIOSETUP for at least 2 seconds to activate the SETUP selection mode. 2 Turn the Rotary encoder to select GENERAL, and then press ENTER. AUDIO GENERAL DISPLAY TUNER SIRIUSXM* iPod BLUETOOTH * Only for CDE-HD138BT. 3 Turn the Rotary encoder to select the CLOCK ADJ mode, and then press ENTER. The time indication will blink. 4 Turn the Rotary encoder to adjust the hours while the time indication is blinking. 5 When the hour has been adjusted, press ENTER. 6 Turn the Rotary encoder to adjust the minutes while the time indication is blinking. 7 Press and hold AUDIOSETUP for at least 2 seconds to return to normal mode. Notes • To synchronize the clock to another clock/watch or radio time announcement, press and hold ENTER for at least 2 seconds after setting the "hour". Minutes will reset to "00". If the display shows over "30" minutes when you do this, the time will advance one hour. • Pressing will return to the previous mode. • Pressing and holding for at least 2 seconds will return to normal mode. • If no operation is performed for 60 seconds, the unit will return to normal mode automatically. Controllable with Remote Control This unit can be controlled with an optional Alpine remote control. For details, consult your Alpine dealer. Point the optional remote control transmitter at the remote-control sensor. Remote control sensor BAND TUNE/A.ME VIEW /Tag Preset buttons (1 through 6) This unit is able to receive signals based on the terrestrial digital radio broadcasting standard. When current AM/FM broadcasters are transmitting digital audio and data services, HD Radio signals are on-the-air in their service area. You can receive their digital broadcast and enjoy high quality sound. Depending on the setting of LISTENMODE, this unit will choose to receive Digital signals or Analog signals. For details, please refer to "Switching the listening mode" on page 24. While receiving a live broadcast, you can fix on either Digital signals or Analog signals to receive. For details, refer to "Setting the Live mode (LIVE MODE)" on page 24. Listening to Radio 1 Press SOURCE to select HD RADIO mode. Note • While receiving HD Radio signals, indicator lights up. 2 Press BAND repeatedly until the desired radio band is displayed. F1 (FM1) F2 (FM2) AM F1 (FM1) 3 Press TUNE/A.ME to select the tuning mode. SEEK DX (Distance mode) SEEK LO (Local mode) MANUAL (Manual mode) SEEK DX Note • The initial mode is Distance mode. Distance mode: Both strong and weak stations will be automatically tuned in (Automatic Seek Tuning). Local mode: Only strong stations will be automatically tuned in (Automatic Seek Tuning). Manual mode: The frequency is manually tuned in steps (Manual tuning). 4 Press or to tune in the desired station. Holding down or will change the frequency continuously. Note • If SEEK TYPE is set to DIGITAL, the SEEK UP/DOWN functions only stop on digital station frequencies while receiving HD Radio signal. Refer to "Setting the Seek Type" on page 24. 10-EN
-
 1
1 -
2
-
3
-
4
-
 5
5 -
 6
6 -
 7
7 -
 8
8 -
 9
9 -
 10
10 -
 11
11 -
 12
12 -
 13
13 -
 14
14 -
 15
15 -
16
-
17
-
18
-
19
-
20
-
21
-
22
-
23
-
24
-
25
-
26
-
27
-
28
-
29
-
30
-
31
-
32
-
33
-
34
-
35
-
36
-
37
-
38
-
39
-
40
-
41
-
42
-
43
-
44
-
45
-
46
-
47
-
48
-
49
-
50
-
51
-
52
-
53
 |
 |