Alpine X409-WRA-JL Installation Manual - Page 16
Incorrect, Correct
 |
View all Alpine X409-WRA-JL manuals
Add to My Manuals
Save this manual to your list of manuals |
Page 16 highlights
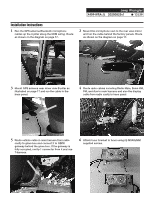
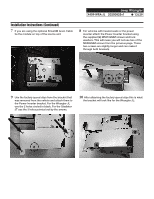
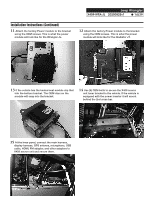
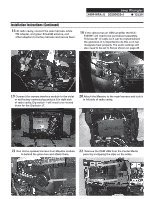
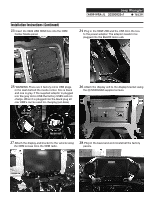
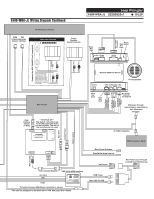
Installation Instructions (Continued) 23 Insert the X409 USB HDMI box into the OEM Center Media panel. Jeep Wrangler X409-WRA-JL 20200825v1 ˜ 16/29 24 Plug in the OEM USB and the USB from the box to the power adapter. The adaptor needs to be plugged into the BLACK micro usb. 25 WARNING: There are 2 factory micro USB plugs in the dash behind the media center. One is black and one is grey. If the supplied adaptor is plugged into the grey micro USB the factory USB's will not charge. When it is plugged into the black plug all rear USB's can be used for charging (not data). 26 Attach the display unit to the display bracket using the (4) M5X8LMM supplied screws. Correct Incorrect 27 Attach the display and bracket to the vehicle using the OEM screws from the OEM radio. 28 Plug in the bezel and and reinstall all the factory panels.
-
 1
1 -
2
-
3
-
4
-
5
-
6
-
7
-
8
-
9
-
10
-
 11
11 -
 12
12 -
 13
13 -
 14
14 -
 15
15 -
 16
16 -
 17
17 -
 18
18 -
 19
19 -
 20
20 -
 21
21 -
22
-
23
-
24
-
25
-
26
-
27
-
28
-
29
 |
 |
