Alpine X409-WRA-JL Installation Manual - Page 17
GPS Antenna
 |
View all Alpine X409-WRA-JL manuals
Add to My Manuals
Save this manual to your list of manuals |
Page 17 highlights
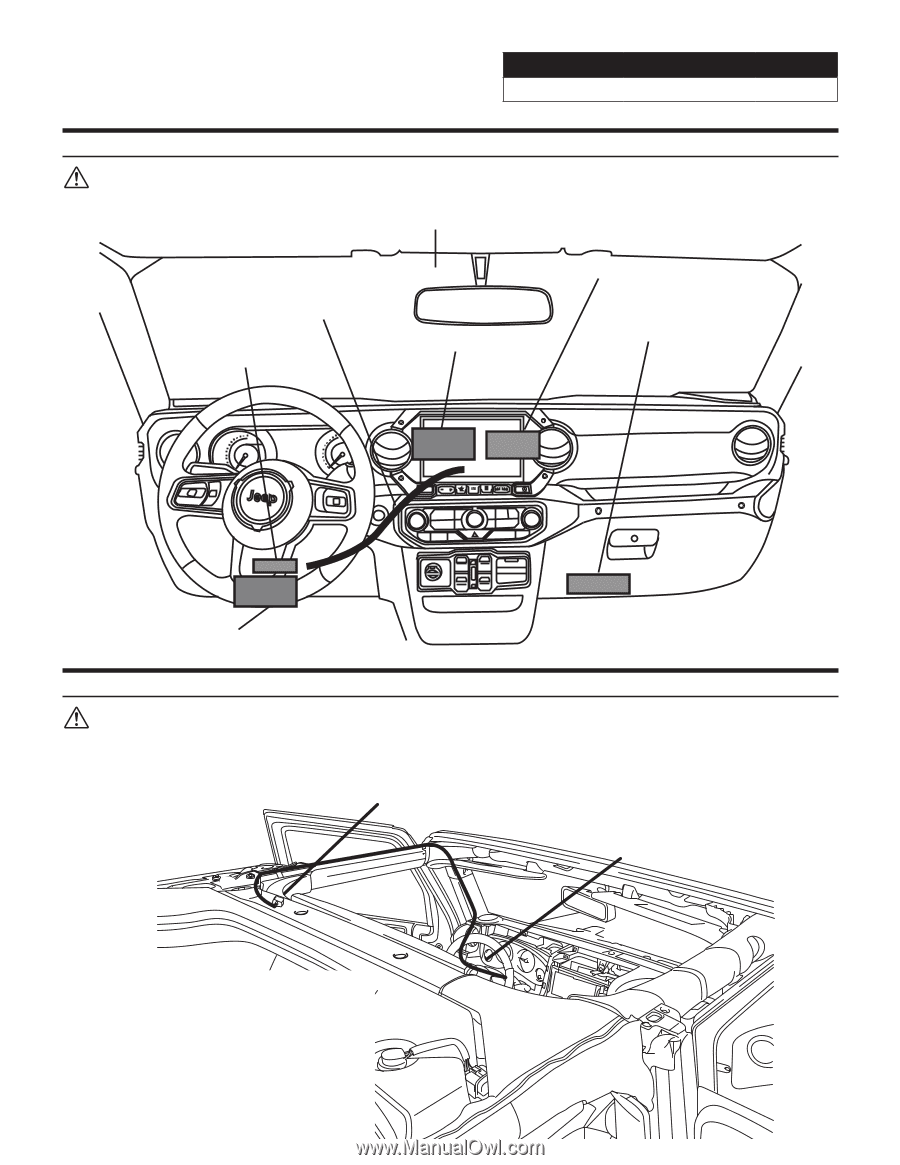
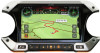
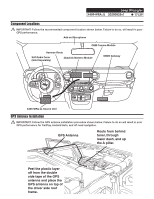
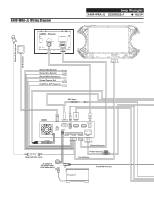
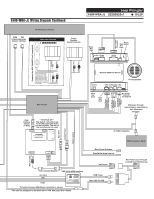
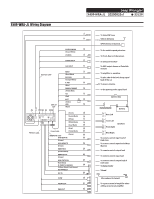
Jeep Wrangler X409-WRA-JL 20200825v1 ˜ 17/29 Component Locations IMPORTANT: Follow the recommended component location shown below. Failure to do so, will result in poor GPS performance. Add-on Microphone OEM Camera Module Harness Route SAT-Radio Tuner (Sold Separately) iDatalink Maestro Module OBDII Gateway 5 4 3 2 1 0 6 7 RPM X1000 Jeep 50 40 30 20 10 0 MPH START ENGINE STOP /////alpine AUDIO MENU CAM NAV MEDIA X409-WRA-JL Source Unit GPS Antenna Installation IMPORTANT: Follow the GPS antenna installation procedure shown below. Failure to do so will result in poor GPS performance for CarPlay, Android Auto, and off-road navigation. GPS Antenna Route from behind tuner, through lower dash, and up the A pillar. Peel the plastic layer off from the double side tape of the GPS antenna and place the GPS antenna on top of the driver side roof frame.
-
 1
1 -
2
-
3
-
4
-
5
-
6
-
7
-
8
-
9
-
10
-
11
-
 12
12 -
 13
13 -
 14
14 -
 15
15 -
 16
16 -
 17
17 -
 18
18 -
 19
19 -
 20
20 -
 21
21 -
 22
22 -
23
-
24
-
25
-
26
-
27
-
28
-
29
 |
 |