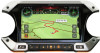
Alpine X409-WRA-JL Installation Manual - Page 9
Factory Unit Disassembly Process Continued
 |
View all Alpine X409-WRA-JL manuals
Add to My Manuals
Save this manual to your list of manuals |
Page 9 highlights
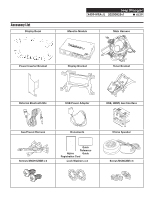
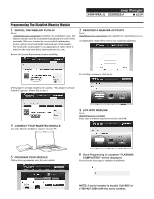
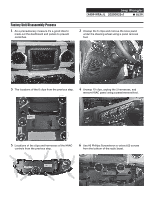
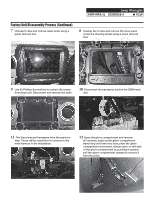
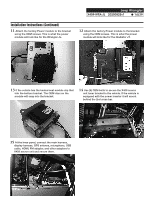
Jeep Wrangler X409-WRA-JL 20200825v1 ˜ 9/29 Factory Unit Disassembly Process (Continued) 7 Unsnap 6 clips and remove radio bezel using a panel removal tool. 8 Unsnap the 6 clips and remove the knee panel under the steering wheel using a panel removal tool. 9 Use #2 Phillips Screwdriver to extract (4) screws from head unit. Disconnect and remove the radio. 10 Disconnect the harnesses behind the OEM head unit. 11 The disconnected harnesses from the previous step. These will be used later to connect to the main harness in the installation. 12 Open the glove compartment and remove all contents, push up the glove compartment travel stop and lower the door, pivot the glove compartment downward, release latch on left side of the glove compartment by pushing it upward, pull the glove compartment upward to remove it from the pivot.
-
 1
1 -
2
-
3
-
 4
4 -
 5
5 -
 6
6 -
 7
7 -
 8
8 -
 9
9 -
 10
10 -
 11
11 -
 12
12 -
 13
13 -
 14
14 -
15
-
16
-
17
-
18
-
19
-
20
-
21
-
22
-
23
-
24
-
25
-
26
-
27
-
28
-
29
 |
 |
