Asus A7V8X A7V8X User Manual - Page 127
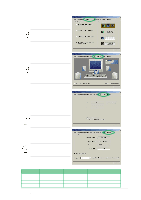
Connect one Serial ATA HDD to the PRI_RAID1 connector, - la sata enable
 |
View all Asus A7V8X manuals
Add to My Manuals
Save this manual to your list of manuals |
Page 127 highlights
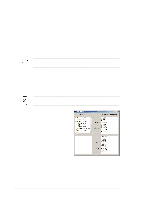
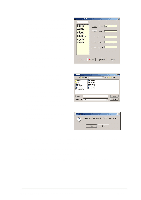
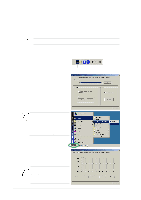
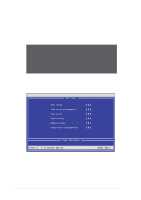
Follow these steps to install the hard disks for RAID configuration. 1. Set the jumpers of each hard disk as Master. 2. Install the hard disks into the drive bays. 3. Connect the HDD cables. Three connection options are available for creating a RAID 0 or RAID 1 array: a) Connect one Parallel ATA HDD to PRI_RAID1 connector and one Serial ATA HDD to either one of the two Serial ATA connectors, using separate parallel ATA or serial ATA cables. b) Connect one Serial ATA HDD to each Serial ATA connector, using separate serial ATA cables. c) Connect one Serial ATA HDD to the PRI_RAID1 connector, and one Serial ATA HDD to either one of the two serial ATA connectors, using separate parallel/serial ATA cables. 4. Connect the power cable to the power connector on each drive. 5. Boot the system and enter the BIOS Setup Utility. 6. Go to the Advanced menu and select PCI Configuration. Make sure that the Onboard SATA/IDE RAID Controller field is set to Enabled, and the Onboard ATA Device First field set to Yes. 7. Save your changes and Exit Setup. 8. Proceed to section 5.4.2 for the next procedure. ASUS A7V8X motherboard user guide 5-27
-
 1
1 -
2
-
3
-
4
-
5
-
6
-
7
-
8
-
9
-
10
-
11
-
12
-
13
-
14
-
15
-
16
-
17
-
18
-
19
-
20
-
21
-
22
-
23
-
24
-
25
-
26
-
27
-
28
-
29
-
30
-
31
-
32
-
33
-
34
-
35
-
36
-
37
-
38
-
39
-
40
-
41
-
42
-
43
-
44
-
45
-
46
-
47
-
48
-
49
-
50
-
51
-
52
-
53
-
54
-
55
-
56
-
57
-
58
-
59
-
60
-
61
-
62
-
63
-
64
-
65
-
66
-
67
-
68
-
69
-
70
-
71
-
72
-
73
-
74
-
75
-
76
-
77
-
78
-
79
-
80
-
81
-
82
-
83
-
84
-
85
-
86
-
87
-
88
-
89
-
90
-
91
-
92
-
93
-
94
-
95
-
96
-
97
-
98
-
99
-
100
-
101
-
102
-
103
-
104
-
105
-
106
-
107
-
108
-
109
-
110
-
111
-
112
-
113
-
114
-
115
-
116
-
117
-
118
-
119
-
120
-
121
-
 122
122 -
 123
123 -
 124
124 -
 125
125 -
 126
126 -
 127
127 -
 128
128 -
 129
129 -
 130
130 -
 131
131 -
 132
132 -
133
-
134
-
135
-
136
-
137
-
138
-
139
-
140
-
141
-
142
 |
 |