Asus AP3000 Hardware Reference - Page 20
Install the, Baseboard, Motherboard, Screws, Spacers
 |
View all Asus AP3000 manuals
Add to My Manuals
Save this manual to your list of manuals |
Page 20 highlights
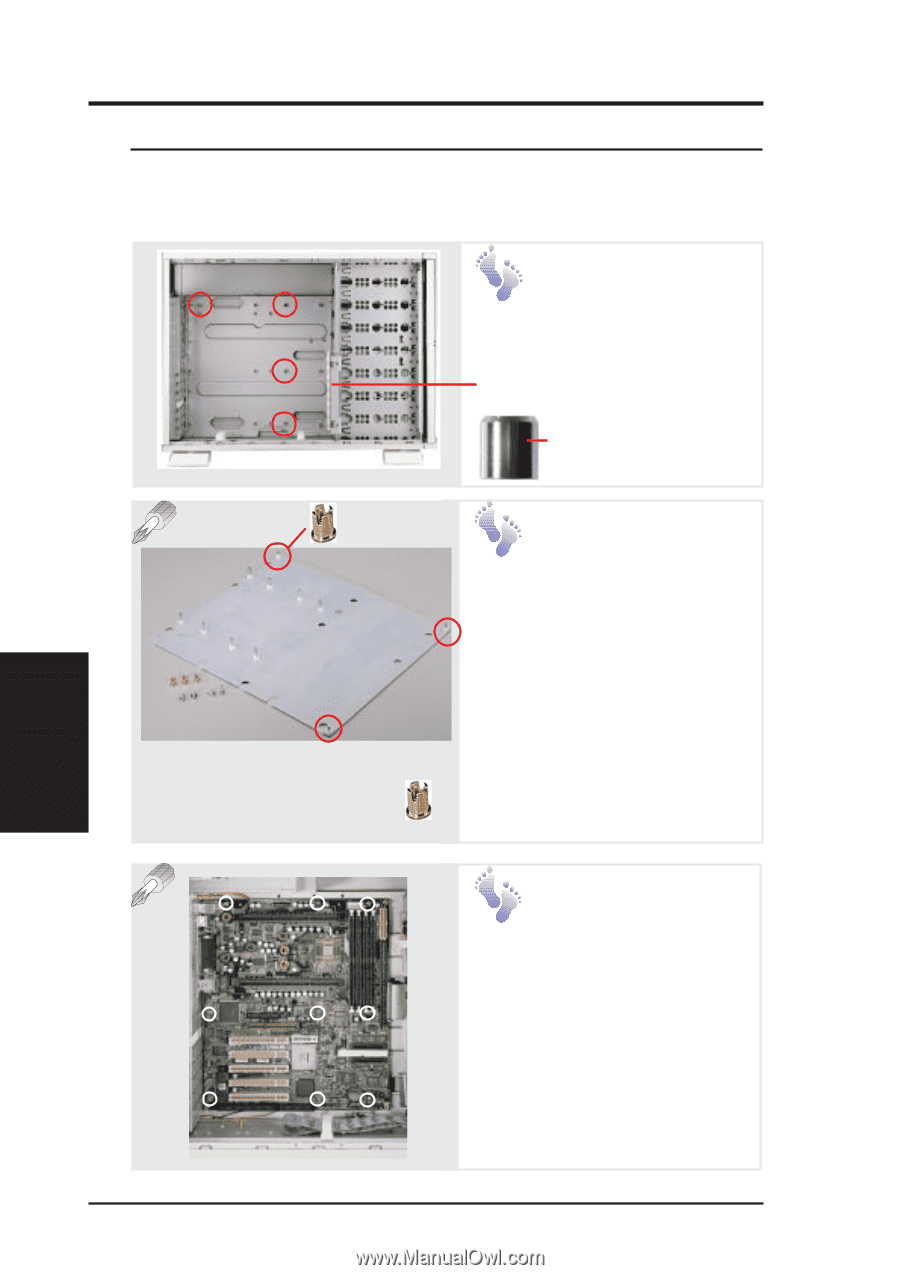
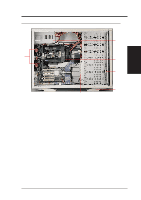
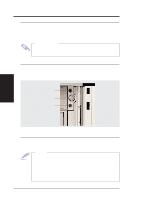
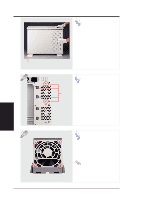
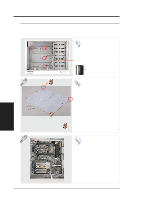
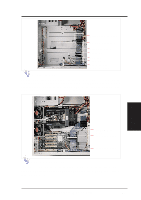
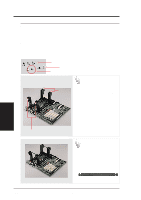
IV. Hardware Setup • 4-3. Motherboard You can remove the extended expansion card guide before installing or removing the motherboard. All screws are necessary to provide the needed stabilization to support all the motherboard expansion cards used in this chassis. Motherboard Spacers Place four spacers in the areas circled on the chassis. Extended Expansion Card Guide Spacer Place and tighten three captive nuts in the corner locations circled. Install the Baseboard A metal baseboard is required to add stability to the motherboard. A rubber pad is placed between the metal board and motherboard to provide insulation to prevent shorting. Align the rubber pad over the metal baseboard so that the holes match. Align the XG-DLS motherboard over the rubber pad and metal baseboard so that the screws match up with the motherboard's screw holes. Motherboard Screws Place nine screws in the areas circled on the motherboard. The four screws used with the motherboard spacers are longer than the others. (See page 22 for samples.) Be careful not to overtighten the screws. Doing so may damage your motherboard. IV. Hardware Setup Motherboard 20 AP 3000 Hardware Reference Guide
-
 1
1 -
2
-
3
-
4
-
5
-
6
-
7
-
8
-
9
-
10
-
11
-
12
-
13
-
14
-
 15
15 -
 16
16 -
 17
17 -
 18
18 -
 19
19 -
 20
20 -
 21
21 -
 22
22 -
 23
23 -
 24
24 -
 25
25 -
26
-
27
-
28
-
29
-
30
-
31
-
32
-
33
-
34
-
35
-
36
-
37
-
38
-
39
-
40
-
41
-
42
 |
 |