Asus E210 User Guide
Asus E210 Manual
 |
View all Asus E210 manuals
Add to My Manuals
Save this manual to your list of manuals |
Asus E210 manual content summary:
- Asus E210 | User Guide - Page 1
E10148b Revised Edition V2 January 2015 Mini Desktop PC (Thin Client) User Guide E210 Series - Asus E210 | User Guide - Page 2
COMPUTER INC. ("ASUS"). ASUS PROVIDES THIS MANUAL "AS IS" listed contract price of each product. ASUS will only ASUS, ITS SUPPLIERS OR YOUR RESELLER IS INFORMED OF THEIR POSSIBILITY. SERVICE AND SUPPORT Visit our multi-language web site at http://support.asus.com 2 Mini Desktop PC User Guide - Asus E210 | User Guide - Page 3
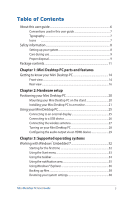
3: Supported operating systems Working with Windows® Embedded 7 32 Starting for the first time 32 Using the Start menu 33 Using the taskbar 34 Using the notification area 35 Using Windows® Explorer 36 Backing up files 38 Restoring your system settings 38 Mini Desktop PC User Guide 3 - Asus E210 | User Guide - Page 4
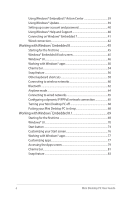
39 Using Windows® Update 39 Setting up a user account and password 40 Using Windows® Help and Support 40 Connecting on Windows® Embedded 7 41 Wired connection 42 Working with Windows® Embedded 8 45 Starting the Apps screen 79 Charms bar...81 Snap feature...83 4 Mini Desktop PC User Guide - Asus E210 | User Guide - Page 5
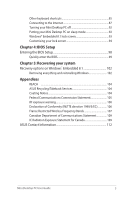
Removing everything and reinstalling Windows 102 Appendices REACH ...104 ASUS Recycling/Takeback Services 104 Coating Notice 104 Federal Communications Commission Statement 105 RF 109 IC Radiation Exposure Statement for Canada 109 ASUS Contact Information 112 Mini Desktop PC User Guide 5 - Asus E210 | User Guide - Page 6
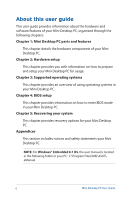
recovery options for your Mini Desktop PC. Appendices This section includes notices and safety statements your Mini Desktop PC. NOTE: For Windows® Embedded 8.1 OS, the user manual is located in the following folder in your PC: C:\Program Files(X86)\ASUS\ eManual 6 Mini Desktop PC User Guide - Asus E210 | User Guide - Page 7
that you can refer to in this user guide. Icons The icons below indicate the devices you can use for completing a series of tasks or procedures while working on the Windows® Embedded 8.1 operating system of your Mini Desktop PC. = Use a mouse. = Use a keyboard. Mini Desktop PC User Guide 7 - Asus E210 | User Guide - Page 8
into the extension cord does not exceed its ampere rating. NOTE: While working on your Mini Desktop PC, ensure that you mount it in an upright position using its stand. For more details, refer to the Mounting your Mini Desktop PC on the stand section in this manual. 8 Mini Desktop PC User Guide - Asus E210 | User Guide - Page 9
the following technical problems with the product, unplug the power cord and contact a qualified service technician or instructions. • The system was dropped or the cabinet is damaged. • The system performance changes. Proper disposal Do not throw your Mini Desktop PC Mini Desktop PC User Guide 9 - Asus E210 | User Guide - Page 10
replaced. Replace only with the same or equivalent type recommended by the manufacturer. Dispose of used batteries according to the manufacturer's instructions. LASER PRODUCT WARNING CLASS 1 LASER PRODUCT NO DISASSEMBLY The warranty does not apply to the products that have been disassembled by - Asus E210 | User Guide - Page 11
your Mini Desktop PC's model type or with country or region. • If the device or its components fail or malfunction during normal and proper use within the warranty period, bring the warranty card to the ASUS Service Center for replacement of the defective components. Mini Desktop PC User Guide 11 - Asus E210 | User Guide - Page 12
12 Mini Desktop PC User Guide - Asus E210 | User Guide - Page 13
Chapter 1: Mini Desktop PC parts and features 1 Mini Desktop PC parts and features - Asus E210 | User Guide - Page 14
Getting to know your Mini Desktop PC Front view X Memory card slot The built-in memory card reader enables your Mini Desktop PC to read and write data to and from MMC/SD/SDHC/SDXC cards. Power button The power button allows powering ON and OFF the system. 14 Mini Desktop PC User Guide - Asus E210 | User Guide - Page 15
(3.5mm) is used to connect the system's audio out signal to amplified speakers or headphones. NOTE: When using the S/PDIF Out function, use a mini jack to S/PDIF adapter to connect the system audio to an amplifier. Mini jack to S/PDIF adapters are sold separately. Mini Desktop PC User Guide 15 - Asus E210 | User Guide - Page 16
Rear view Wireless antenna jack The jack is used to connect the supplied wireless antenna to enhance wireless signal reception. 16 Mini Desktop PC User Guide - Asus E210 | User Guide - Page 17
a local network. Display (Monitor) Output The 15-pin D-sub monitor port supports a standard VGAcompatible device such as a monitor or projector to allow viewing on allows you to secure your Mini Desktop PC using Kensington® compatible Mini Desktop PC security products. Mini Desktop PC User Guide 17 - Asus E210 | User Guide - Page 18
18 Mini Desktop PC User Guide - Asus E210 | User Guide - Page 19
Chapter 2: Hardware setup 2 Hardware setup Mini Desktop PC User Guide 19 - Asus E210 | User Guide - Page 20
PC. 2. Align the stand's mounting hole with the mounting hole on your Mini Desktop PC, then secure it in place with the stand screw. X stand screw IMPORTANT! Ensure that your Mini Desktop PC is mounted on its stand and placed in a vertical position before usage. 20 Mini Desktop PC User Guide - Asus E210 | User Guide - Page 21
To install your Mini Desktop PC to a monitor: 1. Secure the VESA mount to your monitor* with four screws bundled with your VESA mount kit. NOTE: Your monitor must comply with VESA75 or VESA100 standard. * The Mini Desktop PC can be mounted on an ASUS VS228H monitor. Mini Desktop PC User Guide 21 - Asus E210 | User Guide - Page 22
PC into the VESA mount as shown. Mini Desktop PC VESA mount NOTE: Ensure that the ASUS trademark on the rotation wheel of the VESA mount is set to its customary position when putting in the Mini Desktop PC so that the machine can rotate properly. ASUS trademark 22 Mini Desktop PC User Guide - Asus E210 | User Guide - Page 23
3. Secure the Mini Desktop PC and the VESA mount assembly with a stand screw. Ensure that the Mini Desktop PC is firmly attached to the VESA mount. Mini Desktop PC and VESA mount assembly stand screw NOTE: Use the stand screw bundled with the stand. Mini Desktop PC User Guide 23 - Asus E210 | User Guide - Page 24
(A) then rotate the Mini Desktop PC and VESA mount assembly accordingly (B). rotation wheel lever switch Mini Desktop PC and VESA mount assembly in use. • Please take note of the cables connected to the Mini Desktop PC while operating the rotation wheel. To prevent hazards from loosened cables, - Asus E210 | User Guide - Page 25
Using your Mini Desktop PC Connecting to an external display Connect one end of an HDMI or a VGA cable to an external display, and the other end of the cable to your Mini Desktop PC's HDMI or VGA port. Mini Desktop PC User Guide 25 - Asus E210 | User Guide - Page 26
Connecting to a USB device Connect USB devices like wired/wireless keyboards, mouse devices, and printers to the USB ports on your Mini Desktop PC. NOTE: The keyboard varies with country or region. X 26 Mini Desktop PC User Guide - Asus E210 | User Guide - Page 27
Connecting the wireless antenna Connect the wireless antenna to your Mini Desktop PC to enhance the wireless signal. Ensure that the wireless antenna is in an upright position (90o angle) to get the best wireless reception. Mini Desktop PC User Guide 27 - Asus E210 | User Guide - Page 28
the power button off to save on power consumption. • Adjust the power management settings in the Window® Control Panel. This is to ensure that your Mini Desktop PC is set to a low power consumption mode and is fully operational at the same time. 28 - Asus E210 | User Guide - Page 29
configure the audio output via an HDMI device: 1. Do any of the following based on your Mini Desktop PC's operating system. On Windows® Embedded 7 Right-click the Volume Mixer icon on the Windows® right option, and click Next. 6. Click Finish to exit the speaker setup. Mini Desktop PC User Guide 29 - Asus E210 | User Guide - Page 30
30 Mini Desktop PC User Guide - Asus E210 | User Guide - Page 31
Chapter 3: Supported operating systems 3 Supported operating systems - Asus E210 | User Guide - Page 32
refer to the Setting up a user account and password section in this user guide. 6. Carefully read the license terms. Tick I accept the license terms then set up the security settings of your Mini Desktop PC. To skip this step, select Ask me later. 8. Review your date and time settings. Click Next - Asus E210 | User Guide - Page 33
Start menu The Start menu gives access to programs, utilities and other useful items on your Mini Desktop PC. Launching items from the Start menu 1. From the Windows® taskbar, click . 2. From 3. From the list of available tasks, select the task that you want to do. Mini Desktop PC User Guide 33 - Asus E210 | User Guide - Page 34
the taskbar The taskbar allows you to launch and manage programs or items installed in your Mini Desktop PC. Launching a program from the taskbar From the Windows® taskbar, click an icon to right-click the item you want to remove then select Unpin from this list. 34 Mini Desktop PC User Guide - Asus E210 | User Guide - Page 35
wired or wireless network connection. Volume Click this icon to adjust the volume of your Mini Desktop PC. Displaying an alert notification To display an alert notification, click open it. then your preferred behavior for the icons or items you want to customize. Mini Desktop PC User Guide 35 - Asus E210 | User Guide - Page 36
file or folder. Arranging files 1. Launch Windows® Explorer. 2. From the Arrange by field, click to display the dropdown list. 3. Select your preferred arrangement type. 36 Mini Desktop PC User Guide - Asus E210 | User Guide - Page 37
by then select your preferred grouping. Adding a new folder 1. Launch Windows® Explorer. 2. From the toolbar, click New folder. 3. Key in a name for the new folder. Mini Desktop PC User Guide 37 - Asus E210 | User Guide - Page 38
your Mini Desktop PC's system settings without affecting your personal data. To restore your system: 1. Close all running applications. 2. Click > All Programs > Accessories > System Tools > System Restore. 3. Follow the onscreen instructions to complete the process. 38 Mini Desktop PC User Guide - Asus E210 | User Guide - Page 39
the option to automatically troubleshoot and fix some commong Mini Desktop PC problems. Launching Windows® Embedded Mini Desktop PC. Launching Windows® Update 1. Click to launch the Start menu. 2. Select All Programs > Windows Update. 3. Click the task that you want to do. Mini Desktop PC User Guide - Asus E210 | User Guide - Page 40
Windows® Help and Support provides you with guides and answers about using the applications included with your Windows® Embedded 7. To launch Windows® Help and Support, click > Help and Support. NOTE: Connec to the Internet to get the latest Windows® online help. 40 Mini Desktop PC User Guide - Asus E210 | User Guide - Page 41
enter a password. 4. After a connection has been established, the connection is shown on the list. 5. You can see the wireless network icon in the Notification area. Mini Desktop PC User Guide 41 - Asus E210 | User Guide - Page 42
-45) cable to connect your Mini Desktop PC to a DSL/cable modem or a local area network (LAN). DSL/Cable Modem Modem RJ-45 cable LAN RJ-45 cable LAN 2. Configure a dynamic IP/PPPoE or static IP network connection. NOTE: For more details, refer to the next sections. 42 Mini Desktop PC User Guide - Asus E210 | User Guide - Page 43
Change adapter settings in the left blue pane. 3. Right-click Local Area Connection and select Properties. 4. Click Internet Protocol Version 4(TCP/IPv4) and click Properties. Mini Desktop PC User Guide 43 - Asus E210 | User Guide - Page 44
a. Click Use the following IP address. b. Enter the IP address, Subnet mask and Gateway from your service provider. c. If needed, enter the preferred DNS Server address and alternative address. 6. Return to the and password. Click Connect to connect to the Internet. 44 Mini Desktop PC User Guide - Asus E210 | User Guide - Page 45
guide you in configuring your Windows® Embedded 8 operating system. To start your Mini Desktop PC for the first time: 1. Press the power button on your Mini Desktop PC instructions to configure the following basic items: • Keep your PC secure • Personalize • Wireless • Settings • Sign in to your PC - Asus E210 | User Guide - Page 46
Start screen. It also includes the following features that you can use while working on your Mini Desktop PC. Start screen The Start screen appears after successfully signing in to your user account. It helps in to your Microsoft account before they are fully launched. 46 Mini Desktop PC User Guide - Asus E210 | User Guide - Page 47
Hotspots Onscreen hotspots allow you to launch programs and access the settings of your Mini Desktop PC. The functions in these hotspots can be activated using your mouse. Hotspots on a running app Hotspots on the Start screen Mini Desktop PC User Guide 47 - Asus E210 | User Guide - Page 48
Start screen: Hover your mouse pointer on the lower left corner then click on the running app's thumbnail to go back to that app. 48 Mini Desktop PC User Guide - Asus E210 | User Guide - Page 49
Working with Windows® apps. upper or lower Hover your mouse pointer on the upper or lower right corner right corner to launch the Charms bar. Mini Desktop PC User Guide 49 - Asus E210 | User Guide - Page 50
Working with Windows® apps Use your Mini Desktop PC's mouse or keyboard to launch, customize, and close apps. Launching apps Position your mouse pointer over the a new location. Resizing apps Right-click on the app to activate its settings bar then click or . 50 Mini Desktop PC User Guide - Asus E210 | User Guide - Page 51
to change to a hand icon. 2. Drag then drop the app to the bottom of the screen to close it. From the running app's screen, press . Mini Desktop PC User Guide 51 - Asus E210 | User Guide - Page 52
Accessing the Apps screen Aside from the apps already pinned on your Start screen, you can also open other applications through the Apps screen. Horizontal scroll bar 52 Mini Desktop PC User Guide - Asus E210 | User Guide - Page 53
Launching the Apps screen Launch the Apps screen using your Mini Desktop PC's mouse or keyboard. Swipe from the top edge to launch the All Apps bar. From the Start on the Start screen. 2. Right-click on the app to activate its settings. 3. Click on the icon. Mini Desktop PC User Guide 53 - Asus E210 | User Guide - Page 54
and provide quick access for customizing the settings of your Mini Desktop PC. Charms bar Launching the Charms bar NOTE: When called out above shows how the Charms bar looks like once activated. Use your Mini Desktop PC's mouse or keyboard to launch the charms bar. Move your mouse pointer - Asus E210 | User Guide - Page 55
to revert back to a recently opened app. Devices This charm allows you to access and share files with the devices attached to your Mini Desktop PC such as an external display or printer. Settings This charm allows you to access the PC settings of your Mini Desktop PC. Mini Desktop PC User Guide 55 - Asus E210 | User Guide - Page 56
Snap feature The Snap feature displays two apps side-by-side, allowing you to work or switch between apps. IMPORTANT! Ensure that your Mini Desktop PC's screen resolution is set to 1366 x 768 pixels or higher before using the Snap feature. Snap bar 56 Mini Desktop PC User Guide - Asus E210 | User Guide - Page 57
Using Snap Use your Mini Desktop PC's mouse or keyboard to activate and use Snap. 1. Launch the app you wish to snap. 2. Hover the mouse 4. Launch another app. 1. Launch the app you wish to snap. 2. Press . 3. Launch another app. 4. To switch between apps, press . Mini Desktop PC User Guide 57 - Asus E210 | User Guide - Page 58
the File charm Opens the Share charm Opens the Settings charm Opens the Devices charm Activates the Lock screen Minimizes the currently active window 58 Mini Desktop PC User Guide - Asus E210 | User Guide - Page 59
Opens the Second screen pane Opens the Apps search pane Opens the Run window Opens Ease of Access Center Opens the Settings charm Opens a menu box of Windows® tools Launches the magnifier icon and zooms in your screen Zooms out your screen Mini Desktop PC User Guide 59 - Asus E210 | User Guide - Page 60
, and share applications via social networking sites using your Mini Desktop PC's Wi-Fi connection. IMPORTANT! The Airplane mode disables before enabling the Wi-Fi connection of your Mini Desktop PC. Enabling Wi-Fi Activate Wi-Fi in your Mini Desktop PC using the following steps: 1. Launch the - Asus E210 | User Guide - Page 61
connection. NOTE: You may be prompted to enter a security key to activate the Wi-Fi connection. 5. If you want to enable sharing between your Mini Desktop PC and other wireless-enabled systems, click Yes, turn on sharing and connect to devices. Click No, don't turn on sharing or connect to devices - Asus E210 | User Guide - Page 62
other Bluetoothenabled devices to enable data transfers. To do this, use your touchpad as follows: 1. Launch the Charms bar. 2. Click then click Change PC Settings. 3. Under PC Settings, select Devices then click Add a Device to search for Bluetooth-enabled devices. 62 Mini Desktop PC User Guide - Asus E210 | User Guide - Page 63
your Mini Desktop PC with the passcode sent to your chosen device. If they are the same, click Yes to successfully pair your Mini Desktop PC with the device. NOTE: For some bluetooth-enabled devices, you may be prompted to key in the passcode of your Mini Desktop PC. Mini Desktop PC User Guide 63 - Asus E210 | User Guide - Page 64
and click . 3. Move the slider to the left to turn the Airplane mode off. Press . NOTE: Contact your airline provider to learn about related inflight services that can be used and restrictions that must be followed when using your Mini Desktop PC in-flight. 64 Mini Desktop PC User Guide - Asus E210 | User Guide - Page 65
as local area networks and broadband Internet connection, using your Mini Desktop PC's LAN port. NOTE: Contact your Internet Service Provider (ISP) for details or your network administrator for adapter settings. 4. Right-click on your LAN then select Properties. Mini Desktop PC User Guide 65 - Asus E210 | User Guide - Page 66
taskbar then click the connection you just created. 13. Type your user name and password then click Connect to start connecting to the Internet. 66 Mini Desktop PC User Guide - Asus E210 | User Guide - Page 67
1 to 5 under Configuring a dynamic IP/PPPoE network connection. 2 Click Use the following IP address. 3. Type the IP address, Subnet mask and Default gateway from your service provider. 4. If needed, you can also type the preferred DNS server address and alternate DNS server address then click OK - Asus E210 | User Guide - Page 68
Mini Desktop PC on Sleep mode, press the power button once. You can also put your Mini Desktop PC to sleep mode using Desktop mode. To do this, launch the desktop then press alt + f4 to launch the Shut Down window. Select Sleep from the drop-down list then select OK. 68 Mini Desktop PC User Guide - Asus E210 | User Guide - Page 69
guide you in configuring your Windows® Embedded 8.1 operating system. To start your Mini Desktop PC for the first time: 1. Press the power button on your Mini Desktop PC on your Mini Desktop PC. 3. Carefully read the License Terms. Select I accept. 4. Follow the onscreen instructions to configure - Asus E210 | User Guide - Page 70
Start screen. It also includes the following features that you can use while working on your Mini Desktop PC. Start screen The Start screen appears after successfully signing in to your user account. It helps in to your Microsoft account before they are fully launched. 70 Mini Desktop PC User Guide - Asus E210 | User Guide - Page 71
Hotspots Onscreen hotspots allow you to launch programs and access the settings of your Mini Desktop PC. The functions in these hotspots can be activated using your mouse. Hotspots on a running app Hotspots on the Start screen Mini Desktop PC User Guide 71 - Asus E210 | User Guide - Page 72
the Start screen. From the Start screen: Hover your mouse pointer on the lower left corner then Click to go back to that app. 72 Mini Desktop PC User Guide - Asus E210 | User Guide - Page 73
Working with Windows® apps. upper or lower right corner Hover your mouse pointer on the upper or lower right corner to launch the Charms bar. Mini Desktop PC User Guide 73 - Asus E210 | User Guide - Page 74
Start screen. Hover your mouse pointer over the left corner of your Start screen or any opened app to call out the Start button. 74 Mini Desktop PC User Guide - Asus E210 | User Guide - Page 75
of the programs inside Windows® Embedded 8.1 when you rightclick on the Start button. The context menu also includes the following shut down options for your Mini Desktop PC: sign out, sleep, shut down, restart. Mini Desktop PC User Guide 75 - Asus E210 | User Guide - Page 76
the Navigation tab to tick the Navigation and Start screen options you want to use. 4. Click Apply to save the new settings then exit. 76 Mini Desktop PC User Guide - Asus E210 | User Guide - Page 77
Working with Windows® apps Use your Mini Desktop PC's optional keyboard and mouse to launch, customize, and close apps. Launching apps Position your mouse pointer over apps Right-click on the app to activate the Customize bar, then click and select an app tile size. Mini Desktop PC User Guide 77 - Asus E210 | User Guide - Page 78
change to a hand icon. 2. Drag then drop the app to the bottom of the screen to close it. From the running app's screen, press . 78 Mini Desktop PC User Guide - Asus E210 | User Guide - Page 79
the Apps screen Launch the Apps screen using the following options: On the Start screen, click the button. From the Start screen, Press then press . Mini Desktop PC User Guide 79 - Asus E210 | User Guide - Page 80
the apps that you want to add on the Start screen. 3. Click on the icon to pin the selected apps on the Start screen. 80 Mini Desktop PC User Guide - Asus E210 | User Guide - Page 81
Charms bar The Charms bar is a toolbar that can be triggered on the right side of your screen. It consists of several tools that allow you to share applications and provide quick access for customizing the settings of your Mini Desktop PC. Charms bar Mini Desktop PC User Guide 81 - Asus E210 | User Guide - Page 82
to revert back to a recently opened app. Devices This charm allows you to access and share files with the devices attached to your Mini Desktop PC such as an external display or printer. Settings This charm allows you to access the PC settings of your Mini Desktop PC. 82 Mini Desktop PC User Guide - Asus E210 | User Guide - Page 83
Snap feature The Snap feature displays two apps side-by-side, allowing you to work or switch between apps. Snap bar Mini Desktop PC User Guide 83 - Asus E210 | User Guide - Page 84
arrow key to snap the app to the left or right pane. 3. Launch another app. This app is automatically placed in the empty pane. 84 Mini Desktop PC User Guide - Asus E210 | User Guide - Page 85
launch applications and navigate Windows® Embedded 8.1. \ Switches between the Start screen and the last running app Launches the desktop Launches the This PC window on Desktop mode Opens the File option from the Search charm Opens the Share charm Opens the Settings charm Opens the Devices - Asus E210 | User Guide - Page 86
the context menu of the Start button Launches the magnifier icon and zooms in your screen Zooms out your screen Opens the Narrator Settings 86 Mini Desktop PC User Guide - Asus E210 | User Guide - Page 87
emails, surf the Internet, and share applications via social networking sites on or from your Mini Desktop PC using wireless/WiFi or wired connection. Setting up a Wi-Fi connection in Windows® Embedded to enter a security key to connect to a secured wireless network. Mini Desktop PC User Guide 87 - Asus E210 | User Guide - Page 88
the Property option then select your preferred bandwidth setting by clicking on the drop-down box below Value. 7. Click OK to save and exit. 88 Mini Desktop PC User Guide - Asus E210 | User Guide - Page 89
. NOTES: • For more details, refer to the sections Configuring a dynamic IP/ PPPoE network connection or Configuring a static IP network connection. • Contact your Internet Service Provider (ISP) for details or assistance in setting up your Internet connection. Mini Desktop PC User Guide 89 - Asus E210 | User Guide - Page 90
in the taskbar and click the connection you just created. 13. Enter your user name and password. Click Connect to connect to the Internet. 90 Mini Desktop PC User Guide - Asus E210 | User Guide - Page 91
Configuring a dynamic IP/PPPoE network connection. 2 Click Use the following IP address. 3. Enter the IP address, Subnet mask and Gateway from your service provider. 4. If needed, enter the preferred DNS Server address and alternative address. 5. When done, click OK. Mini Desktop PC User Guide 91 - Asus E210 | User Guide - Page 92
PC on sleep mode Activate sleep mode on your Mini Desktop PC using either of the following procedures: • Press the power button once. • Launch the Desktop mode then press + to launch the Shut Down window. Select Sleep from the drop-down list then select OK. 92 Mini Desktop PC User Guide - Asus E210 | User Guide - Page 93
The Windows® Embedded 8.1 lock screen appears when you wake your Mini Desktop PC from sleep or hibernate mode. It also appears when you lock background display and access some of your apps while your Mini Desktop PC is still locked. To proceed from the lock screen 1. Click on the mouse or press - Asus E210 | User Guide - Page 94
app updates, and quickly access your Mini Desktop PC's camera. To change the settings the Charms bar > Settings. 2. Select Change PC Settings > Lock screen. 3. Under the Lock screen 1. Launch the Charms bar > Settings. 2. Select Change PC Settings > Lock screen. 3. Under the Lock screen preview, - Asus E210 | User Guide - Page 95
your Mini Desktop PC camera from the lock screen From the lock screen, you can swipe down to activate and use your Mini Desktop PC's camera . Refer to the following steps on how to enable this feature: 1. Launch the Charms bar > Settings. 2. Select Change PC Settings - Asus E210 | User Guide - Page 96
96 Mini Desktop PC User Guide - Asus E210 | User Guide - Page 97
Chapter 4: BIOS Setup 4 BIOS Setup - Asus E210 | User Guide - Page 98
and Output System) stores system hardware settings that are needed for system startup in the PC. In normal circumstances, the default BIOS settings apply to most conditions to ensure optimal performance BIOS settings only with the help of a trained service personnel. 98 Mini Desktop PC User Guide - Asus E210 | User Guide - Page 99
the power cord from your PC's power connector. Reconnect the power cord and press the power button to turn on your PC. Press during POST. NOTE: POST (Power-On Self Test) is a series of software controlled diagnostic tests that run when you turn on your PC. Mini Desktop PC User Guide 99 - Asus E210 | User Guide - Page 100
100 Mini Desktop PC User Guide - Asus E210 | User Guide - Page 101
Chapter 5: Recovering your system 5 Recovering your system - Asus E210 | User Guide - Page 102
. 1. Launch the Charm bar. 2. Click Settings > Change PC Settings > Update and Recovery > Recovery. 3. From the Remove everything and reinstall Windows option, click Get Started. 4. Follow the onscreen instructions to complete the reinstallation and reset process. 102 Mini Desktop PC User Guide - Asus E210 | User Guide - Page 103
Appendices Appendices Mini Desktop PC User Guide 103 - Asus E210 | User Guide - Page 104
the chemical substances in our products at ASUS REACH website at http://csr.asus.com/english/REACH.htm ASUS Recycling/Takeback Services ASUS recycling and takeback programs come from our insulate the device except on the areas where the I/O ports are located. 104 Mini Desktop PC User Guide - Asus E210 | User Guide - Page 105
radio frequency energy and, if not installed and used in accordance with manufacturer's instructions, may cause harmful interference to radio communications. However, there is no guarantee that this device could void the user's authority to operate the equipment. Mini Desktop PC User Guide 105 - Asus E210 | User Guide - Page 106
or transmitter. End-users and installers must be provide with antenna installation instructions and transmitter operating conditions for satisfying RF exposure compliance. Declaration of spectrum as in [Article 3.2] • Radio test suites according to [EN 300 328-2] 106 Mini Desktop PC User Guide - Asus E210 | User Guide - Page 107
in which the use of the 2400-2483.5 MHz band is permitted with an EIRP of less than 100mW indoors and less than 10mW outdoors: Mini Desktop PC User Guide 107 - Asus E210 | User Guide - Page 108
. Please check with ART for the latest information (www.art-telecom.fr) NOTE: Your WLAN Card transmits less than 100mW, but more than 10mW. 108 Mini Desktop PC User Guide - Asus E210 | User Guide - Page 109
compliance requirements, please avoid direct contact to the transmitting antenna during transmitting. End users must follow the specific operating instructions for satisfying RF exposure compliance. Operation is subject to the following two conditions: • This device may not cause interference - Asus E210 | User Guide - Page 110
Different Domains N. America Japan Europe ETSI 2.412-2.462 GHz 2.412-2.484 GHz 2.412-2.472 GHz Ch01 through CH11 Ch01 through Ch14 Ch01 through Ch13 110 Mini Desktop PC User Guide - Asus E210 | User Guide - Page 111
save money and protect the environment through energy efficient products and practices. All ASUS products with the ENERGY STAR logo comply with the ENERGY STAR standard, and the joint program. NOTE: Energy Star is NOT supported on FreeDOS and Linux-based products. Mini Desktop PC User Guide 111 - Asus E210 | User Guide - Page 112
0800-093-456 Online support support.asus.com ASUS COMPUTER INTERNATIONAL (America) Address 800 Corporate Way, Fremont, CA 94539, USA Fax +1-510-608-4555 Website usa.asus.com Technical Support Telephone +1-812-282-2787 Online support support.asus.com 112 Mini Desktop PC User Guide - Asus E210 | User Guide - Page 113
ASUS COMPUTER GmbH (Germany and Austria) Address Fax Website Harkort Str. 21-23, D-40880 Ratingen, Germany +49-2102-959911 www.asus.de Technical Support Telephone +49-1805-010923 Support Fax +49-2102-9599-11 Online support support.asus.com Mini Desktop PC User Guide 113 - Asus E210 | User Guide - Page 114
114 Mini Desktop PC User Guide
-
 1
1 -
 2
2 -
 3
3 -
 4
4 -
 5
5 -
 6
6 -
 7
7 -
8
-
9
-
10
-
11
-
12
-
13
-
14
-
15
-
16
-
17
-
18
-
19
-
20
-
21
-
22
-
23
-
24
-
25
-
26
-
27
-
28
-
29
-
30
-
31
-
32
-
33
-
34
-
35
-
36
-
37
-
38
-
39
-
40
-
41
-
42
-
43
-
44
-
45
-
46
-
47
-
48
-
49
-
50
-
51
-
52
-
53
-
54
-
55
-
56
-
57
-
58
-
59
-
60
-
61
-
62
-
63
-
64
-
65
-
66
-
67
-
68
-
69
-
70
-
71
-
72
-
73
-
74
-
75
-
76
-
77
-
78
-
79
-
80
-
81
-
82
-
83
-
84
-
85
-
86
-
87
-
88
-
89
-
90
-
91
-
92
-
93
-
94
-
95
-
96
-
97
-
98
-
99
-
100
-
101
-
102
-
103
-
104
-
105
-
106
-
107
-
108
-
109
-
110
-
111
-
112
-
113
-
114
 |
 |

Mini Desktop PC
(Thin Client)
User Guide
E210 Series
E10148
b
Revised Edition V2
January 2015