Asus P4S8X P4S8X User Manual - Page 123
Changing the default language
 |
View all Asus P4S8X manuals
Add to My Manuals
Save this manual to your list of manuals |
Page 123 highlights
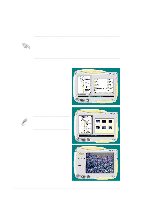
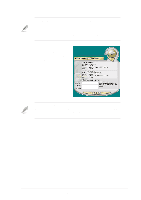
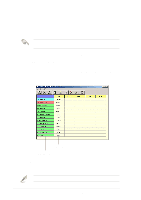
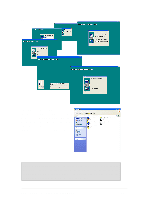
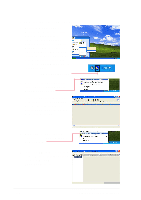
Changing the default language 1. Click on the Load button. a window showing the available languages appears. 2. Select your desired language then click Open. The event messages for the language you selected appear on the Voice Editor screen. For some languages, not all events have a corresponding message due to file size constraints. 3. Click on the Write button to update the EEPROM. 4. Click Yes on the confirmation window that appears. The next time you boot your computer, the POST messages are announced in the language that you selected . ASUS P4S8X motherboard user guide 105
-
 1
1 -
2
-
3
-
4
-
5
-
6
-
7
-
8
-
9
-
10
-
11
-
12
-
13
-
14
-
15
-
16
-
17
-
18
-
19
-
20
-
21
-
22
-
23
-
24
-
25
-
26
-
27
-
28
-
29
-
30
-
31
-
32
-
33
-
34
-
35
-
36
-
37
-
38
-
39
-
40
-
41
-
42
-
43
-
44
-
45
-
46
-
47
-
48
-
49
-
50
-
51
-
52
-
53
-
54
-
55
-
56
-
57
-
58
-
59
-
60
-
61
-
62
-
63
-
64
-
65
-
66
-
67
-
68
-
69
-
70
-
71
-
72
-
73
-
74
-
75
-
76
-
77
-
78
-
79
-
80
-
81
-
82
-
83
-
84
-
85
-
86
-
87
-
88
-
89
-
90
-
91
-
92
-
93
-
94
-
95
-
96
-
97
-
98
-
99
-
100
-
101
-
102
-
103
-
104
-
105
-
106
-
107
-
108
-
109
-
110
-
111
-
112
-
113
-
114
-
115
-
116
-
117
-
 118
118 -
 119
119 -
 120
120 -
 121
121 -
 122
122 -
 123
123 -
 124
124 -
 125
125 -
 126
126 -
 127
127 -
 128
128 -
129
-
130
-
131
-
132
-
133
-
134
-
135
-
136
-
137
-
138
-
139
-
140
-
141
-
142
-
143
-
144
 |
 |

ASUS P4S8X motherboard user guide
105
Changing the default language
1.
Click on the Load button. a
window showing the available
languages appears.
2.
Select your desired language then
click Open. The event messages
for the language you selected
appear on the Voice Editor screen.
For some languages, not all events have a corresponding message
due to file size constraints.
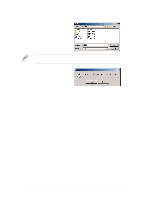
3.
Click on the Write button to update
the EEPROM.
4.
Click Yes on the confirmation
window that appears.
The next time you boot your computer, the POST messages are
announced in the language that you selected .