Asus SK8N SK8N User Manual - Page 108
Install the hard disks
 |
View all Asus SK8N manuals
Add to My Manuals
Save this manual to your list of manuals |
Page 108 highlights
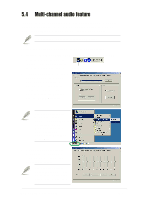
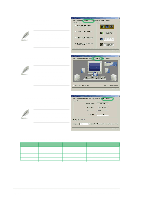
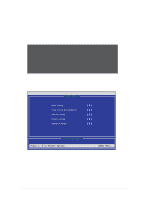
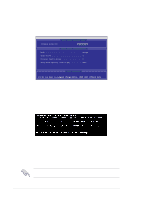
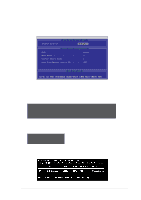
5.5.1 Install the hard disks The PDC20378 chipset supports Ultra ATA/133/100/66 hard disk drives. For optimal performance, install identical drives of the same model and capacity when creating a disk array. • If you are creating a RAID 0 (striping) array for perfomance, use two new drives. • If you are creating a RAID 1 (mirroring) array for protection, you can use two new drives or use an existing drive and a new drive (the new drive must be of the same size or larger than the existing drive). Follow these steps to install the hard disks for RAID configuration. 1. Set the jumpers of each hard disk as Master/Slave. 2. Install the hard disks into the drive bays. 3. Connect the HDD cables. These connection options are available for creating a RAID 0 or RAID 1 array: a) Connect two Parallel ATA HDDs to PRI_RAID connector and one Serial ATA HDD to either one of the two Serial ATA connectors, using separate parallel ATA or serial ATA cables. b) Connect one Serial ATA HDD to each Serial ATA connector, using separate serial ATA cables. 4. Connect the power cable to the power connector on each drive. 5. Boot the system and enter the BIOS Setup Utility. 6. Go to the Advanced menu in BIOS and set the appropriate IDE configuration settings. 7. Save your changes and Exit Setup. 8. Proceed to section 5.4.2 for the next procedure. 5-12 Chapter 5: Software support
-
 1
1 -
2
-
3
-
4
-
5
-
6
-
7
-
8
-
9
-
10
-
11
-
12
-
13
-
14
-
15
-
16
-
17
-
18
-
19
-
20
-
21
-
22
-
23
-
24
-
25
-
26
-
27
-
28
-
29
-
30
-
31
-
32
-
33
-
34
-
35
-
36
-
37
-
38
-
39
-
40
-
41
-
42
-
43
-
44
-
45
-
46
-
47
-
48
-
49
-
50
-
51
-
52
-
53
-
54
-
55
-
56
-
57
-
58
-
59
-
60
-
61
-
62
-
63
-
64
-
65
-
66
-
67
-
68
-
69
-
70
-
71
-
72
-
73
-
74
-
75
-
76
-
77
-
78
-
79
-
80
-
81
-
82
-
83
-
84
-
85
-
86
-
87
-
88
-
89
-
90
-
91
-
92
-
93
-
94
-
95
-
96
-
97
-
98
-
99
-
100
-
101
-
102
-
 103
103 -
 104
104 -
 105
105 -
 106
106 -
 107
107 -
 108
108 -
 109
109 -
 110
110 -
 111
111 -
 112
112 -
 113
113 -
114
-
115
-
116
 |
 |
