Asus Terminator A7VT400 Terminator A7VT400 User''s Manual for English - Page 25
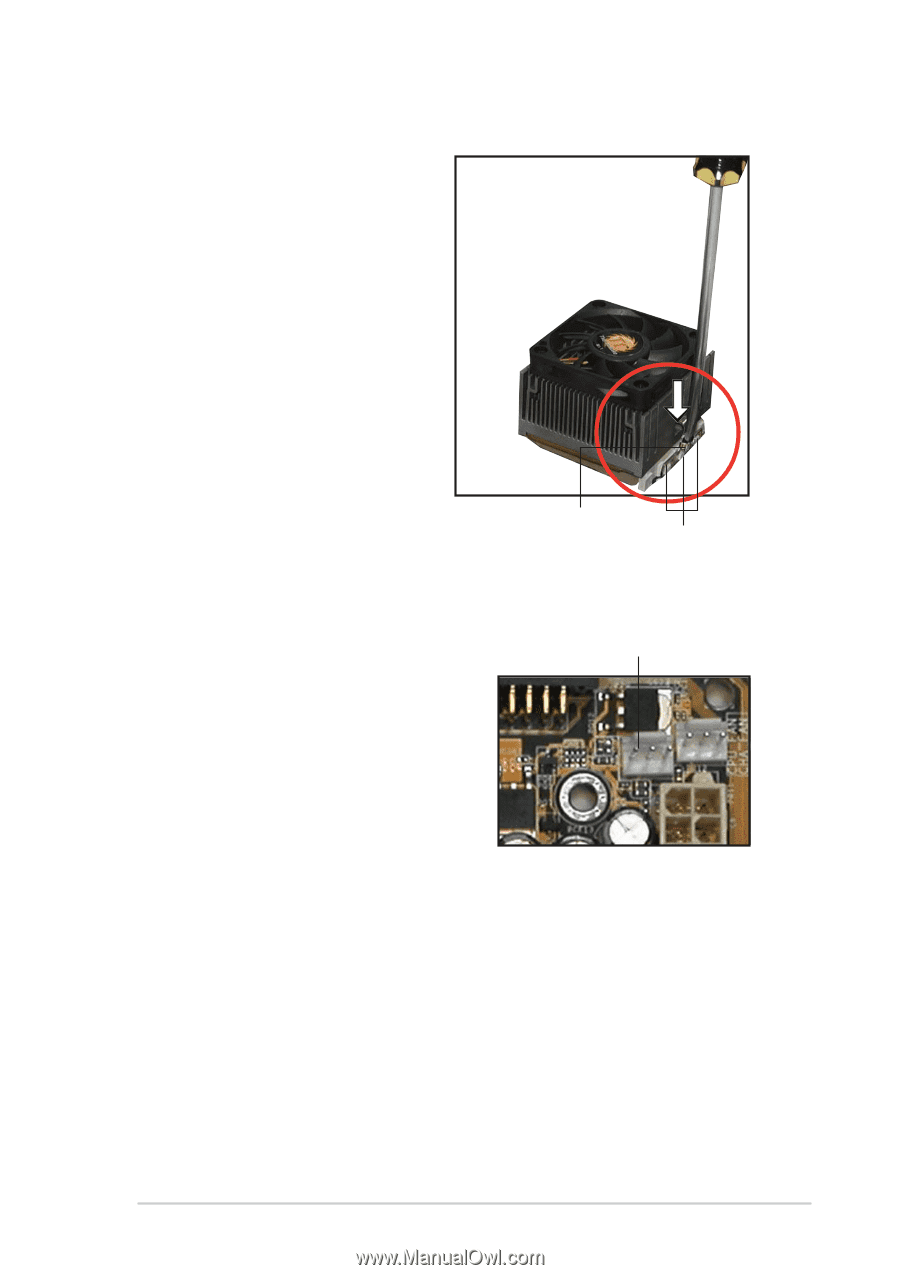
the heatsink bracket to
 |
View all Asus Terminator A7VT400 manuals
Add to My Manuals
Save this manual to your list of manuals |
Page 25 highlights
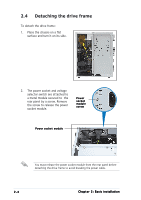
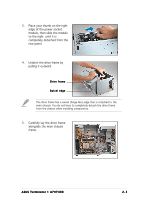
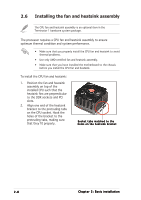
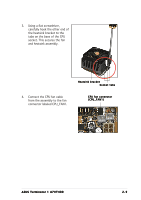
3. Using a flat screwdriver, carefully hook the other end of the heatsink bracket to the tabs on the base of the CPU socket. This secures the fan and heatsink assembly. 4. Connect the CPU fan cable from the assembly to the fan connector labeled CPU_FAN1. Heatsink bracket Socket tabs CPU fan connector (CPU_FAN1) ASUS Terminator 1 A7VT400 2-9
-
 1
1 -
2
-
3
-
4
-
5
-
6
-
7
-
8
-
9
-
10
-
11
-
12
-
13
-
14
-
15
-
16
-
17
-
18
-
19
-
 20
20 -
 21
21 -
 22
22 -
 23
23 -
 24
24 -
 25
25 -
 26
26 -
 27
27 -
 28
28 -
 29
29 -
 30
30 -
31
-
32
-
33
-
34
-
35
-
36
-
37
-
38
-
39
-
40
-
41
-
42
-
43
-
44
-
45
-
46
-
47
-
48
-
49
-
50
-
51
-
52
-
53
-
54
-
55
-
56
-
57
-
58
-
59
-
60
-
61
-
62
-
63
-
64
-
65
-
66
-
67
-
68
-
69
-
70
-
71
-
72
-
73
-
74
-
75
-
76
-
77
-
78
-
79
-
80
-
81
-
82
-
83
-
84
-
85
-
86
-
87
-
88
-
89
-
90
-
91
-
92
-
93
-
94
-
95
-
96
-
97
-
98
 |
 |
2-9
2-9
2-9
2-9
2-9
ASUS Terminator 1 A7VT400
ASUS Terminator 1 A7VT400
ASUS Terminator 1 A7VT400
ASUS Terminator 1 A7VT400
ASUS Terminator 1 A7VT400
4.
Connect the CPU fan cable
from the assembly to the fan
connector labeled CPU_FAN1.
CPU fan connector
CPU fan connector
CPU fan connector
CPU fan connector
CPU fan connector
(CPU_FAN1)
(CPU_FAN1)
(CPU_FAN1)
(CPU_FAN1)
(CPU_FAN1)
Socket tabs
Socket tabs
Socket tabs
Socket tabs
Socket tabs
Heatsink bracket
Heatsink bracket
Heatsink bracket
Heatsink bracket
Heatsink bracket
3.
Using a flat screwdriver,
carefully hook the other end of
the heatsink bracket to the
tabs on the base of the CPU
socket. This secures the fan
and heatsink assembly.