Belkin F5D6050 User Manual - Page 22
In the Computer Name field
 |
View all Belkin F5D6050 manuals
Add to My Manuals
Save this manual to your list of manuals |
Page 22 highlights
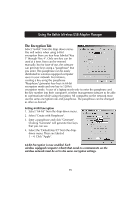
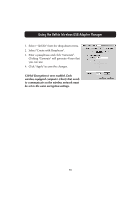
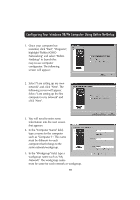
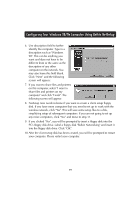
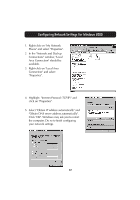
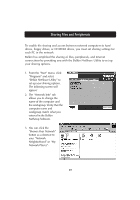
Installing the Belkin Wireless USB Adapter Manager Now that the first computer has been configured, we are ready to configure the other PCs on your network. 1. You should now be working with the next computer. Click "Start", "Programs", "Belkin SOHO Networking", and then "Belkin NetSetup" to launch the easy-to-use computer configurator. The following screen will appear: 2. Select "I am adding this computer to my network". Click "Next". 3. Windows will now prompt you to insert the newly created client setup disk into the PC's floppy drive. Insert the disk you labeled "Belkin Networking" into the floppy drive and click "OK". The following screen will appear: 4. In the "Computer Name" field, type a name for the computer such as "Computer 2". Remember, the name must be different from that of the other computers on the network. 5. The "Workgroup" field should be filled in with the workgroup name you entered on the previous computer. Do not change this setting. 6. Type in a description such as "Windows 98". This can be anything you want and does not have to be different from or the same as the description of any other computer on the network. You may also leave this field blank. 20
-
 1
1 -
2
-
3
-
4
-
5
-
6
-
7
-
8
-
9
-
10
-
11
-
12
-
13
-
14
-
15
-
16
-
 17
17 -
 18
18 -
 19
19 -
 20
20 -
 21
21 -
 22
22 -
 23
23 -
 24
24 -
 25
25 -
 26
26 -
 27
27 -
28
-
29
-
30
-
31
-
32
-
33
-
34
-
35
-
36
-
37
 |
 |
