Belkin F5D6130 User Manual - Page 10
Installation
 |
View all Belkin F5D6130 manuals
Add to My Manuals
Save this manual to your list of manuals |
Page 10 highlights
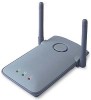
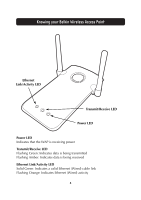
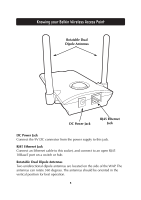
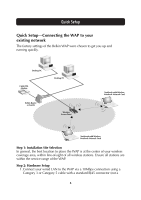
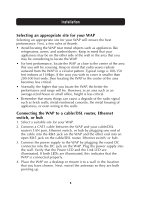
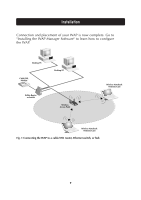
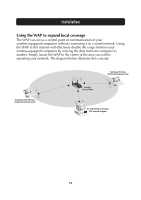
Installation Selecting an appropriate site for your WAP Selecting an appropriate site for your WAP will ensure the best performance. First, a few rules of thumb: • Avoid locating the WAP near metal objects such as appliances like refrigerators, ovens, and washer/dryers. Keep in mind that your appliances may be on the other side of the wall in the area that you may be considering to locate the WAP. • For best performance, locate the WAP as close to the center of the area that you will be covering. Keep in mind that radio waves radiate outward from the WAP in a circular pattern. Typical range is 100-150 feet indoors at 11Mbps. If the area you wish to cover is smaller than 200-300 feet wide, then locating the WAP in the center of the area becomes less critical. • Normally, the higher that you locate the WAP, the better the performance and range will be. However, in an area such as an average-sized house or small office, height is less critical. • Remember that many things can cause a degrade of the radio signal such as brick walls, metal-reinforced concrete, the metal housing of appliances, or even wiring in the walls. Connecting the WAP to a cable/DSL router, Ethernet switch, or hub 1. Select a suitable site for your WAP. 2. Connect a CAT5 cable between the WAP and your cable/DSL router's LAN port, Ethernet switch, or hub by plugging one end of the cable into the RJ45 jack on the WAP and the other end into an open RJ45 jack on the cable/DSL router, Ethernet switch, or hub. 3. Connect the power supply to the WAP by plugging the round DC connector into the DC jack on the WAP. Plug the power supply into the wall. Verify that the Power LED and the Link LED are illuminated. If both LEDs are illuminated, this indicates that the WAP is connected properly. 4. Place the WAP on a desktop or mount it to a wall in the location that you have chosen. Next, swivel the antennas so they are both pointing up. 8
-
 1
1 -
2
-
3
-
4
-
 5
5 -
 6
6 -
 7
7 -
 8
8 -
 9
9 -
 10
10 -
 11
11 -
 12
12 -
 13
13 -
 14
14 -
 15
15 -
16
-
17
-
18
-
19
-
20
-
21
-
22
-
23
-
24
-
25
-
26
-
27
-
28
-
29
-
30
-
31
-
32
-
33
-
34
-
35
-
36
-
37
 |
 |