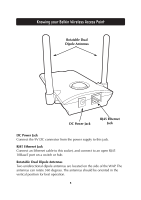
Belkin F5D6130 User Manual - Page 8
Quick Setup - as router
 |
View all Belkin F5D6130 manuals
Add to My Manuals
Save this manual to your list of manuals |
Page 8 highlights
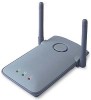
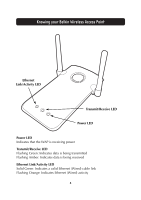
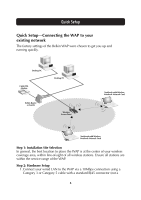
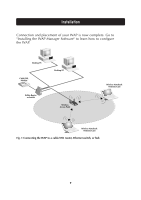
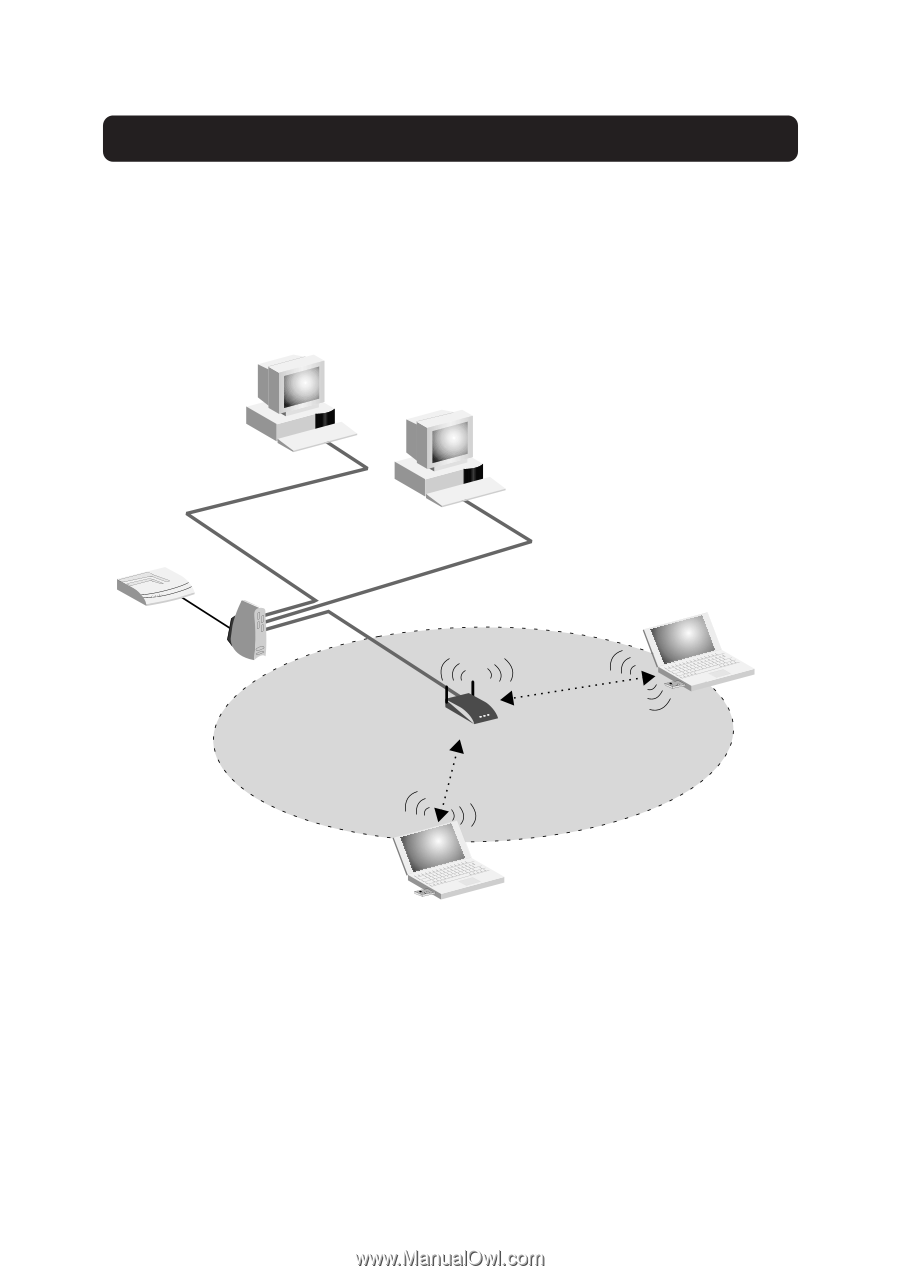
Quick Setup Quick Setup-Connecting the WAP to your existing network The factory settings of the Belkin WAP were chosen to get you up and running quickly. Desktop PC Cable/DSL Modem Desktop PC Belkin Router or Switch Wireless Access Point Notebook with Wireless Notebook Network Card Notebook with Wireless Notebook Network Card Step 1: Installation Site Selection In general, the best location to place the WAP is at the center of your wireless coverage area, within line-of-sight of all wireless stations. Ensure all stations are within the service range of the WAP. Step 2: Hardware Setup 1.Connect your wired LAN to the WAP via a 10Mbps connection using a Category 3 or Category 5 cable with a standard RJ45 connector (not a 6
-
 1
1 -
2
-
 3
3 -
 4
4 -
 5
5 -
 6
6 -
 7
7 -
 8
8 -
 9
9 -
 10
10 -
 11
11 -
 12
12 -
 13
13 -
14
-
15
-
16
-
17
-
18
-
19
-
20
-
21
-
22
-
23
-
24
-
25
-
26
-
27
-
28
-
29
-
30
-
31
-
32
-
33
-
34
-
35
-
36
-
37
 |
 |
Quick Setup
6
Quick Setup—Connecting the WAP to your
existing network
The factory settings of the Belkin WAP were chosen to get you up and
running quickly.
Step 1: Installation Site Selection
In general, the best location to place the WAP is at the center of your wireless
coverage area, within line-of-sight of all wireless stations. Ensure all stations are
within the service range of the WAP.
Step 2: Hardware Setup
1.Connect your wired LAN to the WAP via a 10Mbps connection using a
Category 3 or Category 5 cable with a standard RJ45 connector (not a
Desktop PC
Desktop PC
Cable/DSL
Modem
Belkin Router
or Switch
Wireless
Access Point
Notebook with Wireless
Notebook Network Card
Notebook with Wireless
Notebook Network Card