BenQ GV31 User Manual - Page 24
Rear Table, Installation, Projector Position, Rear Ceiling
 |
View all BenQ GV31 manuals
Add to My Manuals
Save this manual to your list of manuals |
Page 24 highlights
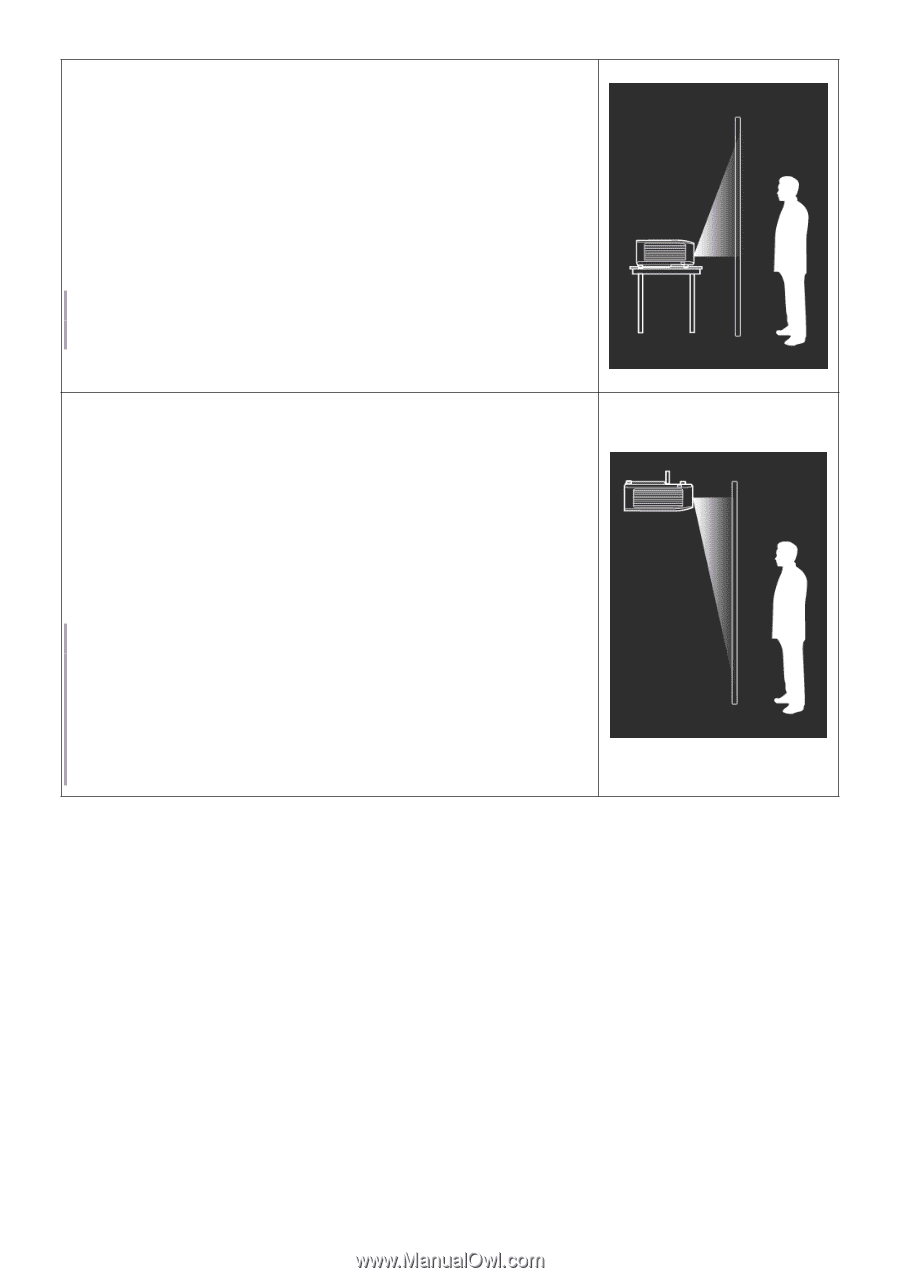
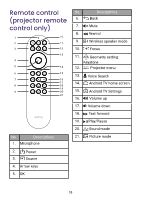
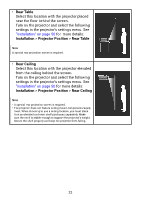
• Rear Table Select this location with the projector placed near the floor behind the screen. Turn on the projector and select the following settings in the projector's settings menu. See "Installation" on page 50 for more details: Installation > Projector Position > Rear Table Note A special rear projection screen is required. • Rear Ceiling Select this location with the projector elevated from the ceiling behind the screen. Turn on the projector and select the following settings in the projector's settings menu. See "Installation" on page 50 for more details: Installation > Projector Position > Rear Ceiling Note • A special rear projection screen is required. • The projector does not feature ceiling mount components/equip- ment. When choosing to use a ceiling location, you must place it on an elevated and even shelf purchased separately. Make sure the shelf is stable enough to support the projector's weight. Secure the shelf properly and keep the projector from falling. 22
-
 1
1 -
2
-
3
-
4
-
5
-
6
-
7
-
8
-
9
-
10
-
11
-
12
-
13
-
14
-
15
-
16
-
17
-
18
-
 19
19 -
 20
20 -
 21
21 -
 22
22 -
 23
23 -
 24
24 -
 25
25 -
 26
26 -
 27
27 -
 28
28 -
 29
29 -
30
-
31
-
32
-
33
-
34
-
35
-
36
-
37
-
38
-
39
-
40
-
41
-
42
-
43
-
44
-
45
-
46
-
47
-
48
-
49
-
50
-
51
-
52
-
53
-
54
-
55
-
56
-
57
-
58
-
59
-
60
-
61
-
62
-
63
-
64
-
65
-
66
-
67
-
68
-
69
 |
 |