Bernina Bernette 340 deco User Guide - Page 20
Attaching the Embroidery Hoop to the Machine, Caution
 |
View all Bernina Bernette 340 deco manuals
Add to My Manuals
Save this manual to your list of manuals |
Page 20 highlights
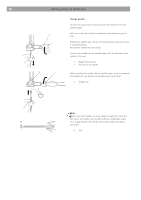
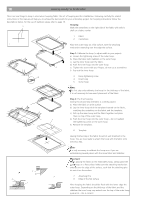
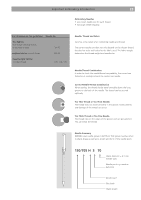
Getting Ready to Embroider 19 1 3 2 Attaching the Embroidery Hoop to the Machine Turn the attaching knob so it is parallel with the hoop, and set it on the carriage. 1. Attaching knob 2. Carriage holes 3. Pins 1 Turn the attaching knob clockwise. Caution: • Always provide sufficient clearance for the embroidery carriage behind your machine before starting the machine. • Do not force to move the carriage by hand. • Return the carriage to the idle position before turning the power off. Use the keys Utility and Return Carriage as described on page 25.
-
 1
1 -
2
-
3
-
4
-
5
-
6
-
7
-
8
-
9
-
10
-
11
-
12
-
13
-
14
-
 15
15 -
 16
16 -
 17
17 -
 18
18 -
 19
19 -
 20
20 -
 21
21 -
 22
22 -
 23
23 -
 24
24 -
 25
25 -
26
-
27
-
28
-
29
-
30
-
31
-
32
-
33
-
34
-
35
-
36
-
37
-
38
-
39
-
40
-
41
-
42
-
43
-
44
-
45
-
46
-
47
-
48
-
49
-
50
-
51
-
52
-
53
-
54
-
55
-
56
-
57
-
58
-
59
-
60
-
61
-
62
-
63
-
64
-
65
-
66
-
67
-
68
-
69
-
70
-
71
-
72
-
73
-
74
-
75
 |
 |

Getting Ready to Embroider
19
1
3
2
1
Attaching the Embroidery Hoop to the Machine
Turn the attaching knob so it is parallel with the hoop, and set it on
the carriage.
1.
Attaching knob
2.
Carriage holes
3.
Pins
Turn the attaching knob clockwise.
Caution:
• Always provide sufficient clearance for the embroidery carriage
behind your machine before starting the machine.
• Do not force to move the carriage by hand.
• Return the carriage to the idle position before turning the power
off. Use the keys Utility and Return Carriage as described on
page 25.