Bosch HBL8753UC Use and Care Manual - Page 30
Cleaning and Maintenance-Oven
 |
View all Bosch HBL8753UC manuals
Add to My Manuals
Save this manual to your list of manuals |
Page 30 highlights
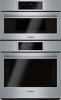
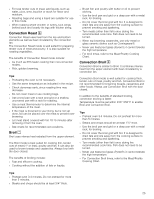
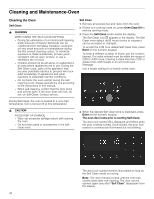
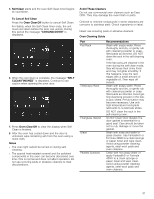
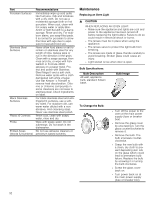
Cleaning and Maintenance-Oven Cleaning the Oven Self-Clean 9 WARNING WHEN USING THE SELF-CLEAN SETTING ▯ During the elimination of soil during self-cleaning, small amounts of Carbon Monoxide can be created and the fiberglass insulation could give off very small amounts of formaldehyde during the first several cleaning cycles. To minimize exposure to these substances, provide good ventilation with an open window, or use a ventilation fan or hood. ▯ Children should not be left alone or unattended in an area where appliances are in use. During the Self Clean cycle, parts of the appliance may become potentially harmful to persons who lack adult knowledge of appliances and adult reactions to potentially harmful conditions. ▯ Do not block the oven vent(s) during the selfcleaning cycle. Always operate the unit according to the instructions in this manual. ▯ When self-cleaning, confirm that the door locks and will not open. If the door does not lock, do not run Self-Clean. Contact service. During Self-Clean, the oven is heated to a very high temperature. Soil is burned off at this temperature. 9 CAUTION AVOID RISK OF DAMAGE ▯ Wipe out excessive spillage before self-cleaning the oven. ▯ Do not clean parts or accessories in the self- clean oven. Self Clean 1. Remove all accessories and racks from the oven. 2. If there is a cooking mode on, press Oven Clear/Off to end the running mode. 3. Press the Self Clean button below the display. The Self Clean icon q appears in the display. The Self Clean timer default (4:00 hours) blinks to indicate it can be accepted or changed. To accept the 4:00 hour default Self Clean time, press Enter on the numeric keypad. To enter a different number of hours, use the numeric keypad. The value entered must be within the range of 2:00 to 4:00 hours. Entering a value less than 2:00 or greater than 4:00 results in an error tone and message. Use a longer setting for a heavily soiled oven. 4. When the desired Self Clean time is displayed, press Enter on the numeric keypad. The oven door locks prior to starting Self Clean. The door lock symbol L is displayed and blinks while the door is being locked. Once locked, the door lock symbol is continuously illuminated but not blinking. The door lock symbol remains illuminated as long as the Self Clean mode is running. Note: The door remains locked until the oven has cooled down after self-cleaning. The door can be opened again only after "Self Clean" disappears from the display. 30
-
 1
1 -
2
-
3
-
4
-
5
-
6
-
7
-
8
-
9
-
10
-
11
-
12
-
13
-
14
-
15
-
16
-
17
-
18
-
19
-
20
-
21
-
22
-
23
-
24
-
 25
25 -
 26
26 -
 27
27 -
 28
28 -
 29
29 -
 30
30 -
 31
31 -
 32
32 -
 33
33 -
 34
34 -
 35
35 -
36
-
37
-
38
-
39
-
40
-
41
-
42
-
43
-
44
-
45
-
46
-
47
-
48
-
49
-
50
-
51
-
52
-
53
-
54
-
55
-
56
-
57
-
58
-
59
-
60
-
61
-
62
-
63
-
64
-
65
-
66
-
67
-
68
-
69
-
70
-
71
-
72
-
73
-
74
-
75
-
76
 |
 |