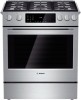
Bosch HDI8054U Instructions for Use
Bosch HDI8054U Manual
 |
View all Bosch HDI8054U manuals
Add to My Manuals
Save this manual to your list of manuals |
Bosch HDI8054U manual content summary:
- Bosch HDI8054U | Instructions for Use - Page 1
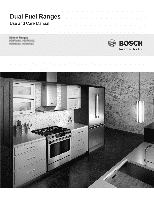
Slide-In Ranges HDIP054U, HDIP054C, HDI8054U, HDI8054C - Bosch HDI8054U | Instructions for Use - Page 2
- Bosch HDI8054U | Instructions for Use - Page 3
1 Safety 2 Important Safety Instructions 2 Getting Started 6 Parts and Accessories 8 Before Using the Appliance for the First Time 12 Operation - Cooktop 12 About the Cooktop 12 Operation - Oven 14 Operation 15 About the Oven 15 Operation - Warming Drawer (some models 21 About the Warming - Bosch HDI8054U | Instructions for Use - Page 4
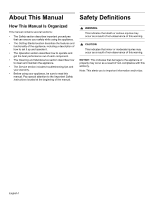
clean and maintain the appliance. • The Service section includes troubleshooting tips and your warranty. • Before using your appliance, be sure to read this manual. Pay special attention to the Important Safety Instructions located at the beginning of the manual. 9 WARNING This indicates that death - Bosch HDI8054U | Instructions for Use - Page 5
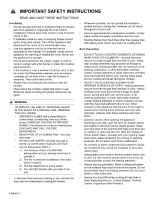
. Verify that the anti-tip bracket is securely installed. Ensure the anti-tip bracket is engaged whenever the range is moved to a new location. Do not operate the range without the anti-tip bracket in place. Failure to follow the instructions in this manual can result in death or serious burns to - Bosch HDI8054U | Instructions for Use - Page 6
INSTRUCTIONS Fire Safety • Do not use aluminum foil or protective liners to line any part of an appliance, especially the oven bottom. Installation intended use as described in this manual. For example, never use the appliance a working smoke detector near the kitchen. • Never leave the cooktop - Bosch HDI8054U | Instructions for Use - Page 7
INSTRUCTIONS • Use high heat settings on the cooktop only when necessary. To avoid bubbling and splattering, heat oil slowly on no more than a low in this manual. NEVER use instructed in safe practices by qualified persons. • Do not allow anyone to climb, stand, lean, sit, or hang on any part fuel - Bosch HDI8054U | Instructions for Use - Page 8
are suitable). See Cookware Selection Guide for further details. • Always the range is not installed by a qualified installer or LP Gas Conversion kit should be installed by a qualified service technician. When installing the kit be sure to follow the LP Gas Conversion Installation Instructions - Bosch HDI8054U | Instructions for Use - Page 9
Getting Started Parts and Accessories Your appliance may vary slightly. 1 2 4 3 5 6 7 8 9 Range Parts Key 1 Oven Control Panel 2 Cooktop Control Knobs 3 Door Gasket 4 Door Latch 5 Probe Jack 6 Convection Fan 7 Rack Position Guides with 6 rack positions 8 Oven Bottom 9 Door Hinge - Bosch HDI8054U | Instructions for Use - Page 10
caps must be properly placed for the cooktop to function properly. If the burner cap is not properly placed, one or more of the following problems may occur: • Burner flames are too high. • Flames shoot out of burners. • Burners do not ignite. • Burner flames light unevenly. • Burner emits gas odor - Bosch HDI8054U | Instructions for Use - Page 11
1: Burner Cap Placement 9 WARNING To prevent flare-ups, properly support pots, and avoid spills, all grates must be properly positioned are missing or damaged. For replacement rubber feet: Part # 416438, contact your dealer or call the service number listed inside the cover. Control Knobs The - Bosch HDI8054U | Instructions for Use - Page 12
Accessories The following accessories are available to add additional capabilities to your range . May run during self clean. Note: On some models, the convection fan also runs during preheat for the any part of an appliance, especially soven bottom. Installation of these liners may result in a - Bosch HDI8054U | Instructions for Use - Page 13
a different one is needed. E Number Codes -These codes display when there is a problem with the range. Stand By Mode Stand by mode means that the oven is on but no cooking mode or timer is running. Accessories Probe (some models) The probe can be used to determine the internal doneness or the end - Bosch HDI8054U | Instructions for Use - Page 14
Telescopic Rack (some models) To insert the telescopic front portion of the rack guide above. 4. When the back part of the telescopic rack is securely anchored. 9 CAUTION To avoid possible injury or damage to the appliance, ensure the telescopic rack is installed exactly per installation instructions - Bosch HDI8054U | Instructions for Use - Page 15
all packing materials and labels from range. Remove packing materials from inside installer or agency to ensure proper combustion. Ensure proper ventilation with an open window or use a ventilation fan or hood when cooking with Gas. Always operate the unit according to the instructions in this manual - Bosch HDI8054U | Instructions for Use - Page 16
LP Gas. Soft Blue Flames: Normal for Natural Gas. If the flame is completely or mostly yellow, verify that the regulator is set for the correct fuel for Service" on page 17. NOTE: An audible "pop" may be heard when the burner is turned off manually. The "popping" may be louder with LP gas than - Bosch HDI8054U | Instructions for Use - Page 17
Operation - Oven Oven Control Panel 1 2 3 800 Series Oven Control Panel 1 Mode Selection Touchpads 2 Display 3 the oven lights on or off. Starts and stops the kitchen timer(s). Press to edit a timer. Provides access to user settings to allow customization of basic display, language and other - Bosch HDI8054U | Instructions for Use - Page 18
for the First Time • Oven must be properly installed by a qualified technician before use. • Remove all operating the oven very easy. This manual includes all instructions for operating the oven. Please call oven must be in Stand-By mode (oven is powered on, but no cooking mode or timer in operation - Bosch HDI8054U | Instructions for Use - Page 19
within the allowed range for the mode selected an error tone will sound and the lower part of the screen not within the allowed range for the mode an error tone will sound and the lower part of the screen will 100-200 201-550 Temperature in ºC 30-120 121-300 Max. time allowed without activity 24 - Bosch HDI8054U | Instructions for Use - Page 20
the oven off, stopping the current mode. The oven timer is used to set how long a mode will run. To set a kitchen timer: (for general kitchen timer needs) 1. Press the Kitchen Timer On/Off. 0:00 is displayed and blinks in the display. Enter the desired timer value in H/MM format using the numeric - Bosch HDI8054U | Instructions for Use - Page 21
entered is outside this range, an error is displayed models) The probe measures the internal temperature of the food. The probe is available for Bake, Roast and all convection cooking modes except Convection Broil. Inserting the probe: Insert the tip of the probe in the middle and thickest part - Bosch HDI8054U | Instructions for Use - Page 22
bake temperature must be within the Sabbath mode temperature range of 100° to 450° F. If the oven mode operation. To set the Sabbath Mode: No kitchen timers or oven timers may be running when Sabbath mode the current time and the message "SABBATH". No user input is accepted in this state. To end the - Bosch HDI8054U | Instructions for Use - Page 23
or °F Mode Celsius (° C) 2 Brightness High, Medium, Low High 3 Volume High, Medium, Low MED 4 Clock mode 12-hour or 24-hour display mode : consistently either too brown 5° F is or too light. entered as The range for changing the 05. offset is between +/- 35° F (+/ - 19° C) in 1° - Bosch HDI8054U | Instructions for Use - Page 24
If it melts onto the drawer, it may not be removable. Preheating For best results, preheat the warming drawer when warming food. Preheat Times: • Low: 10 minutes • Medium: 15 minutes • High: 20 minutes Turning Warming Drawer On and Off 1. Press the Warming Drawer touchpad. 2. WARMING DRAWER will be - Bosch HDI8054U | Instructions for Use - Page 25
Recommended Settings Use this chart as a guide for heat settings. A range of heat settings are listed because the - Med 2-3 - Med Low 1 - Low Cookware Selection Guide Cookware Characteristics Pan selection directly affects Never place a support ring, such as a wok ring or trivet, on - Bosch HDI8054U | Instructions for Use - Page 26
manual for recommended rack positions. The rail at the top of the oven is used as the guide for the top rack (position 6). Use rack positions 1 through 6 only. DO NOT attempt to use the top guide to support to line any part of the appliance, especially the oven bottom. Installing these liners may - Bosch HDI8054U | Instructions for Use - Page 27
not touch any other parts of the door. High Altitude Service, Colorado State University, Fort Collins, Colorado 80521. There may be a cost for the guides. Specify which high altitude food preparation guide panel. Temperature Range by Cooking Mode 550 Convection Broil (Low,High) 450 550 - Bosch HDI8054U | Instructions for Use - Page 28
as a result of using multiple racks at one time. Tips • Reduce recipe temperature by 25° F if Auto Convection Conversion is not activated. • Place food in low-sided, uncovered pans such as cookie sheets without sides. • If baking more than one pan on a rack, allow at least 1" to 1 1/2" of air space - Bosch HDI8054U | Instructions for Use - Page 29
using a lid are suitable for use in this mode. • When roasting whole chicken or turkey, tuck wings behind back and loosely tie legs with kitchen string. Convection Roast 2 Convection Roast uses heat from the top and bottom elements as well as heat circulated by the convection fan. The Convection - Bosch HDI8054U | Instructions for Use - Page 30
Chart. Proof Dough $ In Proof Dough, the oven uses the lower element to maintain a low temperature to proof bread or other yeast doughs. • Proofing is the rising of yeast dough. • The Proof Dough mode temperature range is 85 ºF to 125 ºF. • The default temperature in the Proof Dough mode is 100 - Bosch HDI8054U | Instructions for Use - Page 31
. Preheating the Warming Drawer Preheat the warming drawer when warming food. For best results, preheat for the following times: Setting Preheat Time LOW 5 minutes MED 10 minutes HIGH 15 minutes Warming Food 1. Preheat warming drawer. 2. Place cooked, hot food in the drawer. It is okay - Bosch HDI8054U | Instructions for Use - Page 32
soft rolls, coffe cakes Biscuits Casseroles Eggs Fish, seafood Fried foods Gravy, cream sauces Ham Setting PROOF HIGH MED LOW MED MED MED MED MED MED HIGH MED MED Cover Dish Yes No No No No Yes Yes Yes Yes HIGH No MED Yes HIGH Yes MED Yes MED Yes MED Yes LOW No MED Yes English 29 - Bosch HDI8054U | Instructions for Use - Page 33
the grates and burners are cool. • Do not clean removable cooktop parts in any selfcleaning oven. • After cleaning, place all parts in their proper positions before using cooktop. • For proper burner performance, minimal pressure with abrasive cleaners. • Dry thoroughly after cleaning. English 30 - Bosch HDI8054U | Instructions for Use - Page 34
Cooktop Part / Material Exterior Finish Stainless Steel Grates Porcelain Enamel on Cast Iron Igniters Ceramic Suggested Cleaners Important Reminders • Nonabrasive Cleaners: Hot water • Do not use steel - Bosch HDI8054U | Instructions for Use - Page 35
excessive spillage before self-cleaning the oven. NOTICE: Do not clean parts or accessories in the Self-Clean oven. Remove all baking dishes and oven number of hours use the numeric keypad. The value entered must be within the range of 2:00 to 4:00 hours. Entering a value less than 2:00 or greater - Bosch HDI8054U | Instructions for Use - Page 36
Never use scouring pads or abrasive cleaners. Oven Cleaning Guide Part Recommendations Flat Rack Wash with hot soapy water. Rinse a small amount of vegetable oil. Then wipe off excess. Part Telescopic Rack Fiberglass Gasket Glass Painted Surfaces Porcelain Surfaces Recommendations Wash - Bosch HDI8054U | Instructions for Use - Page 37
with soapy water. Do not submerge. Do not wash in the dishwasher. Do not use abrasive cleansers. Cleaning the Warming Drawer Part Drawer interior (polished stainless steel) Painted surfaces Drawer exterior frame (brushed stainless steel) Recommendations Use dish detergent. Wash, rinse well and - Bosch HDI8054U | Instructions for Use - Page 38
proper operation. No other maintenance is required Oven Maintenance Replacing an Oven Light 9 WARNING • Make sure the appliance and lights are cool and power to the appliance has been turned off before replacing the light bulb(s). Failure to do so could result in electrical shock or burns. • The - Bosch HDI8054U | Instructions for Use - Page 39
power to the oven has been turned off before removing the door. Failure to do so could result in electrical shock or burns. • The oven door is heavy and parts to use a tool, such as a screwdriver, to gently pry the upper part of the lever away from the housing. Take care to avoid scratching the - Bosch HDI8054U | Instructions for Use - Page 40
Drawer Maintenance Removing the Drawer 9 CAUTION To prevent burns, do not remove drawer while hot. Be sure drawer is empty before removing. MED LOW HIGH PROOF _+ Low Med ON/OFF High Proof _+ On/Off B 1. Pull drawer to fully open position. 2. Press down right drawer clip. 3. Lift up left drawer clip - Bosch HDI8054U | Instructions for Use - Page 41
Troubleshooting Use these suggestions before calling for service to avoid service charges. Cooktop Problem • Make sure the igniters are clean and dry. • Check the power supply. It should be properly grounded with the correct polarity. Make sure manual for tips to decrease time to boil. English 38 - Bosch HDI8054U | Instructions for Use - Page 42
Troubleshooting Use these suggestions before calling for service to avoid service charges. Oven Problem beeps Possible Causes and Suggested Solutions Review manual instructions when setting clock, timer, to Self-Clean. Make sure there is electrical power to oven. See Clock and Timer sections. When - Bosch HDI8054U | Instructions for Use - Page 43
"as is", or previously returned model), and not for resale, or commercial use; and (3) within the United States or Canada, and has at all times remained event, if you request, Bosch would still pay for labor and parts and ship the parts to the nearest authorized service provider, but you would still - Bosch HDI8054U | Instructions for Use - Page 44
on external surfaces and exposed parts; Products on which the serial numbers have been altered, defaced, or removed; service visits to teach you how to use the Product, or visits where there is nothing wrong with the Product; correction of installation problems (you are solely responsible for - Bosch HDI8054U | Instructions for Use - Page 45
8" or 9" square cookie sheet cookie sheet cookie sheet recipe time casserole dish 30-40 quiche dish 45-55 soufflé dish recipe cookie sheet pkg time pkg time cookie sheet cookie sheet The charts can be used as a guide. Follow package or recipe directions. The convection termperatures have - Bosch HDI8054U | Instructions for Use - Page 46
-20 10-20 10-20 22-35 20-25 cookie sheet cookie sheet cookie sheet 9" x 5" loaf pan cookie sheet The charts can be used as a guide. Follow package or recipe directions. The convection termperatures have been reduced 25° F from the recipe or package directions. English 43 - Bosch HDI8054U | Instructions for Use - Page 47
. 10-15 min. Loin Roast, 3 - 6 lbs. Convection Roast 350°F 2 145°F160°F 16-30 min./lb. No 14-23 min./lb. 30 min. 10-15 min. The charts can be used as a guide. Follow package or recipe directions. Roasting times are approximate and may vary depending on the shape of the meat. Stuffed turkey - Bosch HDI8054U | Instructions for Use - Page 48
Convection Roast 325°F 1 Unstuffed, 20-30 lbs. Convection Roast 325°F 1 Seafood Fish Filets, 3/4-1inch thick Broil 1 - Low 3 145°F 160°F 160°F 170°F 145 11-15 min. No none The charts can be used as a guide. Follow package or recipe directions. Roasting times are approximate and may vary - Bosch HDI8054U | Instructions for Use - Page 49
42 Aide sans assistance 42 Garantie 45 Tableux de cuisson 47 Cet appareil électroménager Bosch est fabriqué par BSH Home Appliances, Corporation 1901 Main Street, Suite 600 Irvine, CA 92614 Questions? 1-800-944-2904 www.bosch-home.com Il nous fait toujours plaisir de recevoir vos commentaires! - Bosch HDI8054U | Instructions for Use - Page 50
l'appareil. • La section Mise en route décrit les caractéristiques et fonctionnalités de l'appareil et comprend une description de son installation et fonctionnement. • La section Fonctionnement décrit comment actionner et obtenir le meilleur rendement de chaque composant. • La section Nettoyage et - Bosch HDI8054U | Instructions for Use - Page 51
support anti-basculement n'est pas en place. Le non-respect des instructions de ce manuel peut entraîner la mort ou des brûlures graves aux enfants ou adultes. Vérifier que le support anti-basculement est install l'entretien de l'appareil à un centre de service autorisé par l'usine. • En cas d' - Bosch HDI8054U | Instructions for Use - Page 52
le brûleur. FAIRE ATTENTION À NE PAS SE BRÛLER. Si les flammes ne s'éteignent pas immédiatement, ÉVACUER LES LIEUX ET FAIRE APPEL AU SERVICE D'INCENDIE. • NE JAMAIS SAISIR UN RÉCIPIENT QUI BRÛLE - Vous pourriez vous brûler. • NE PAS UTILISER D'EAU, y compris les chiffons ou serviettes mouillées - Bosch HDI8054U | Instructions for Use - Page 53
la circulation de l'air à l'intérieur du four et peur entraîner un empoisonnement au monoxyde de carbone. Les doublures de papier aluminium peuvent d'autre part piéger la chaleur ce qui peut entraîner un risque d'incendie. • Ne jamais déplacer un ustensile de cuisson rempli d'huile chaude, en - Bosch HDI8054U | Instructions for Use - Page 54
d'intérêt pour les enfants ne doivent pas être rangés dans un appareil électroménager, dans les armoires au , des malformations congénitales ou d'autres troubles de la reproduction. • AVIS DE SÉCURIT 3) utilisant l'appareil selon les instructions figurant dans ce guide. • Ne pas nettoyer l'appareil - Bosch HDI8054U | Instructions for Use - Page 55
9 IMPORTANTES CONSIGNES DE SÉCURITÉ LIRE ET CONSERVER CES CONSIGNES Sécurité alimentaire • ATTENTION : Pour assurer la sécurité alimentaire, respecter les règles d'hygiène suivantes : 1) NE PAS utiliser le tiroir-réchaud pour faire chauffer des aliments froids (exception : le tiroir-réchaud peut ê - Bosch HDI8054U | Instructions for Use - Page 56
1 Panneau de commande du four 2 Boutons de réglage de la table de cuisson 3 Joint de porte 4 Loquet de porte 5 Prise sonde 6 Ventilateur à convection 7 Guides de positionnement de grille avec 6 positions 8 Sole du four 9 Charnière de porte Tiroir-réchaud Français 7 10 Caractéristiques de la cuisini - Bosch HDI8054U | Instructions for Use - Page 57
de flamme et la génération de sous-produits nocifs, ne pas utiliser la table de cuisson sans les capuchons et grilles de brûleur correctement installés. 9 AVERTISSEMENT Pour éviter les brûlures, ne pas toucher les grilles ni les capuchons de brûleur chauds. Éteindre la table de cuisson et laisser - Bosch HDI8054U | Instructions for Use - Page 58
les pieds en caoutchouc sont endommagés ou manquants. Pour obtenir des pieds de caoutchouc de remplacement : Pièce n° 416438, contactez votre revendeur ou appelez le service après-vente dont le numéro figure à l'intérieur de la couverture. Français 9 - Bosch HDI8054U | Instructions for Use - Page 59
10 000 pieds - 3 050 mètres). 9 WARNING To prevent flare-ups, properly support pots, and avoid spills, all grates must be properly positioned on the cooktop whenever the brut. For replacement rubber feet: Part # 416438, contact your dealer or call the service number listed inside the cover. Caract - Bosch HDI8054U | Instructions for Use - Page 60
Sole du four La sole du four abrite l'élément chauffant inférieur. Ceci permet de protéger l'élément des dommages et des renversements Remarque : Ne pas placer les aliments directement sur la sole du four. Évent du four L'évent du four se trouve sur la partie arrière supérieure de la cuisinière. De - Bosch HDI8054U | Instructions for Use - Page 61
d'endommagement de l'appareil, s'assurer que les grilles sont installées exactement suivant les instructions de montage et non à l'envers ou sens dessus- la grille de glisser sous la butée moulée dans la partie avant du guide de grille comme illustré ci-dessus. 4. Lorsque la partie arrière de - Bosch HDI8054U | Instructions for Use - Page 62
de dégager la grille du guide de positionnement de grille. 2. Soulever la partie arrière la chaleur et restera chaude pendant 30 minutes après l'extinction des éléments fonctionner l'appareil en suivant les instructions de ce manuel. La table de comme l'indique la notice d'installation et non à l'envers ou - Bosch HDI8054U | Instructions for Use - Page 63
rifier les brûleurs afin de s'assurer que les orifices de combustion ne sont pas obstrués. Si les orifices sont bouchés, voir « Avant d'appeler le service de dépannage », page 19. REMARQUE : Un éclatement peut se fait entendre lorsque le brûleur est éteint manuellement. Ce bruit peut être plus fort - Bosch HDI8054U | Instructions for Use - Page 64
Fonctionnement - Four Panneau de commande du four 1 2 3 4 Panneau de commande du four de la série 800 1 Touches à effleurement de sélection des modes 2 Écran 3 Touches à effleurement du pavé numérique 4 Touches à effleurement de fonctions spéciales Touches à effleurement Remarque : Une légère - Bosch HDI8054U | Instructions for Use - Page 65
grandement l'utilisation du four. Ce manuel contient toutes les instructions relatives au fonctionnement du four. Veuillez nous appeler pour re utilisation du four • Avant l'utilisation, le four doit être correctement installé par un technicien qualifié. • Retirer tous les matériaux d'emballage à - Bosch HDI8054U | Instructions for Use - Page 66
Appuyer sur la touche à effleurement Réglages. L'écran indique « SET CLOCK » (Régler l'horloge). Appuyer sur Entrée pour modifier l'horloge. 3. Utiliser le pavé numérique pour saisir l'heure souhaitée. Chaque nombre correspondant à la touche enfoncée est affiché sur la droite ce qui a pour effet de - Bosch HDI8054U | Instructions for Use - Page 67
; pour tous les autres modes de cuisson, la durée maximale autorisée est de 24 heures. Température en Température en º F º C 100-200 201-550 30-120 121-300 Max. temps permis sans activité 24 heures 12 heures Minuterie Votre nouveau four est équipé de deux types de minuteries. Minuterie de - Bosch HDI8054U | Instructions for Use - Page 68
Fonctions spéciales 3. Lorsque la minuterie atteint :00, le mode de cuisson s'arrête et le message « MINUTERIE DU FOUR TERMINÉE » s'affiche. L'alarme du four retentit toutes les 10 secondes pendant 2 minutes. Modifier la minuterie du four - Si la minuterie du four fonctionne et que le temps minuté - Bosch HDI8054U | Instructions for Use - Page 69
affichera < 80 jusqu'à ce que la température de l'aliment atteigne 80 °F. La température de sonde affichée est mise à jour par incréments de 5° au cours du processus de cuisson. 6. Lorsque la température de la sonde atteint la température définie, le mode de cuisson est désactivé. L'heure en cours - Bosch HDI8054U | Instructions for Use - Page 70
2. Pour désactiver cette fonction, appuyer et maintenir enfoncée la touche à effleurement Verrouiller les touches pendant 3 secondes. L'écran retourne en mode Veille. 4. Lorsque le compte à rebours du mode Shabbat atteint zéro, le four affiche l'heure en cours et le message « SHABBAT ». Aucune entr - Bosch HDI8054U | Instructions for Use - Page 71
Réglages Le menu de configuration du four est utilisé pour personnaliser certains réglages du four. Le four doit être en mode Veille (aucun mode de cuisson ou minuterie ne doit s'exécuter) afin de pouvoir accéder au menu de Configuration. Apporter des modifications aux éléments du menu Réglages : 1. - Bosch HDI8054U | Instructions for Use - Page 72
. À propos du tiroir-réchaud Le tiroir-réchaud permet de conserver les aliments cuits et chauds à une température de service. Les réglages du tiroir-réchaud sont les suivants : Bas (Low), Moyen (Medium), et Élevé (High). Spécifications du tiroir réchaud Intérieur du tiroir : 25 po (63,5 cm) L x 17 - Bosch HDI8054U | Instructions for Use - Page 73
passer le réglage sur « LOW » (Bas). Pour accepter les plats. Tirer le meilleur parti de votre table de cuisson Guide de cuisson destiné à la table de cuisson Faire bouillir de casseroles d'un couvercle. • Utiliser une casserole dont les dimensions correspondent à la quantité d'eau et à la taille - Bosch HDI8054U | Instructions for Use - Page 74
ou par pression doivent avoir les mêmes caractéristiques que décrites ci-dessus. Utiliser uniquement un wok à fond plat. Ne jamais placer un anneau de support, tel qu'un anneau pour wok ou un trépied sur la surface de cuisson. Tirer le meilleur parti de votre four Conseils généraux Mise - Bosch HDI8054U | Instructions for Use - Page 75
pendant 3 à 4 minutes. Ne pas préchauffer le four au-delà de 5 minutes. Pour de meilleurs résultats • Utiliser les recommandations de cuisson comme guide. • Ouvrir la porte aussi brièvement que possible pour éviter les chutes de température. • Utiliser l'éclairage intérieur du four pour vérifier la - Bosch HDI8054U | Instructions for Use - Page 76
cuisson peuvent varier. • Pour des renseignements plus précis, écrire au Service de vulgarisation de la Colorado State University, à Fort Collins, Colorado 80521. que vous ayez à vous acquitter du coût des guides de cuisson. Préciser le nom du guide de préparation culinaire à haute altitude que vous - Bosch HDI8054U | Instructions for Use - Page 77
Cuisson par Convection 2 Le mode Cuisson par Convection est similaire au mode Cuisson. La chaleur provient des éléments chauffants supérieur et inférieur. La principale différence est que la chaleur circule à l'intérieur de la cavité du four grâce au ventilateur à convection. Le mode de Cuisson - Bosch HDI8054U | Instructions for Use - Page 78
croustillante et un moule non troué pour obtenir une croûte plus molle. • Préchauffer les pierres à pizza en suivant les recommandations du fabricant pendant le préchauffage du four. • Faire cuire les pizzas maison au centre de la grille et placer celle-ci en position 2. • Pour les pizzas surgelées, - Bosch HDI8054U | Instructions for Use - Page 79
un faible niveau dans la cavité du four pour conserver les aliments à la température adéquate jusqu'au service. • Utilisez le mode chaud pour conserver les aliments chauds (jusqu'à une heure) jusqu'au moment de servir devant rester humides avec un couvercle ou du papier aluminium Français 30 - Bosch HDI8054U | Instructions for Use - Page 80
-réchaud À propos de l'appareil Le tiroir-réchaud permet de conserver les aliments cuits et chauds à une température de service. Toujours utiliser des aliments chauds au départ. NE PAS utiliser pour réchauffer des aliments froids sauf pour redonner leur croquant aux biscuits salés, aux chips ou aux - Bosch HDI8054U | Instructions for Use - Page 81
ts Œufs Poisson, fruits de mer MOY Oui MOY Oui MOY Oui Sélectionner LOW (Bas). Aliments frits ÉLEVÉ Non Sauce au jus de viande, MOY Oui aliments dans des plats ou ustensiles à rebords peu élevés. 1. Appuyer sur LOW (Bas). Jambon Pancakes (crêpes américaines) MOY Oui ÉLEVÉ Oui - Bosch HDI8054U | Instructions for Use - Page 82
Nettoyage et entretien Soins d'entretien et nettoyage Nettoyage de la table de cuisson 9 ATTENTION N'utiliser aucun produit nettoyant sur une surface en verre chaude. Les fumées qui se dégagent peuvent présenter un danger pour la santé. Les produits nettoyants chauffés peuvent attaquer et - Bosch HDI8054U | Instructions for Use - Page 83
Pièces et matériaux de la table de cuisson Capuchon de brûleur Porcelaine émaillée Boutons de réglage et anneaux Fini extérieur Acier inoxydable Nettoyants suggérés Rappels importants • Eau savonneuse chaude. Rincer • Les déversements acides ou à et sécher soigneusement. base de sucre peuvent - Bosch HDI8054U | Instructions for Use - Page 84
Pièces et matériaux de la table de cuisson Grilles et grille pont Porcelaine émaillée sur fonte Allumeurs Céramique Nettoyants suggérés Rappels importants • Nettoyants non abrasifs : Eau chaude et détergent, Fantastic®, Formula 409®. Rincer et sécher immédiatement. • Les grilles sont lourdes : - Bosch HDI8054U | Instructions for Use - Page 85
Nettoyage du four 9 AVERTISSEMENT Les enfants ne doivent pas être laissés seuls ou sans surveillance à un endroit où des appareils électroménagers sont utilisés. Durant le cycle de nettoyage automatique, certaines parties de l'appareil peuvent poser un danger aux personnes qui n'ont pas les compé - Bosch HDI8054U | Instructions for Use - Page 86
des tampons à récurer ou des produits de nettoyage abrasifs. Guide de nettoyage du four Pièce Recommandations Grille plate Laver avec doucement avec de la poudre à récurer ou des tampons savonneux selon les instructions. NE PAS nettoyer la grille dans le four autonettoyant. Si les grilles - Bosch HDI8054U | Instructions for Use - Page 87
Pièce Surfaces en porcelaine Surfaces en acier inoxydable Matière plastique et commandes Sonde Zones de texte imprimé (mots et chiffres) Recommandations Essuyer immédiatement les déversements acides tels que jus de fruits, lait et tomates avec un chiffon sec. Ne pas utiliser d'éponge ou de chiffon - Bosch HDI8054U | Instructions for Use - Page 88
mais qui n'est pas incassable si une casserole ou tout autre objet tombe dessus. • Éviter de placer un anneau de support pour wok, un trépied ou une autre plaque de support en métal sur la surface en verre. Entretien du four Remplacement de l'ampoule du four 9 AVERTISSEMENT • Avant de remplacer une - Bosch HDI8054U | Instructions for Use - Page 89
fermement et correctement, il y a un risque de lésion corporelle ou de dommage au produit. • Pour éviter toute blessure causée par l'enclenchement soudain du support de charnière, s'assurer que les deux leviers sont bien enclenchés avant d'enlever la porte. En outre, ne pas forcer la porte pour - Bosch HDI8054U | Instructions for Use - Page 90
et ouvrir la porte lentement pour s'assurer qu'elle est correctement et solidement installée. Elle doit être droite et ne pas dévier. Entretien du tiroir il est chaud. S'assurer que le tiroir est vide avant de l'enlever. MED LOW HIGH PROOF _+ ON/OFF 1. Tirer sur le tiroir jusqu'à son ouverture compl - Bosch HDI8054U | Instructions for Use - Page 91
. Essayez ces suggestions avant de contacter un service de dépannage pour éviter les frais de service. Problème concernant la table de cuisson Un La casserole n'est pas de la taille ou du type approprié. Voir le Guide de sélection des ustensiles de cuisson. Ceci est normal. Le limiteur de tempé - Bosch HDI8054U | Instructions for Use - Page 92
de contacter un service de dépannage pour éviter les frais de service. Problème Causes possibles et solutions suggérées Revoir les instructions figurant dans le manuel pour le réglage de teint (en fonction de la sélection effectuée pendant l'installation) pendant toute la durée du mode Shabbat. Il - Bosch HDI8054U | Instructions for Use - Page 93
Problème concernant le four La fonction d'autonettoyage du four fonctionne mal. L'horloge et la minuterie fonctionnent mal. La porcelaine s'ébrèche Un « F » et un numéro s'affichent à l'écran et le panneau de commande émet un signal sonore. Une forte odeur se dégage de la cuisinière neuve lorsqu' - Bosch HDI8054U | Instructions for Use - Page 94
commerciale; (3) aux États-Unis ou au Canada, et qu'il soit en tout temps demeur ), pendant une période de trente (30) jours à compter de la date Bosch ou l'un de ses fournisseurs de services après-vente agréés réparera le Produit sans frais de votre part refus d'entretien, l'installation irrégulière - Bosch HDI8054U | Instructions for Use - Page 95
appareil et les cas de force majeure. Bosch ne sera en aucun cas responsable, de installation (vous êtes entièrement responsable de toute structure et réglage du Produit, y compris électricité, plomberie ou autres services SONT MANIFESTEMENT CAUSÉS EXCLUSIVEMENT PAR BOSCH OU AUTREMENT. CERTAINS ÉTATS - Bosch HDI8054U | Instructions for Use - Page 96
17 - 27 17 - 27 28 - 40 28 - 40 45 - 60 33 - 40 8 - 17 8 - 17 8 - 17 23 - 33 8 - 10 8 - 10 8 - 10 durée indiquée par la recette 30 - 40 minutes 45 - 55 minutes recette Taille et type d'ustensile Moule à savarin de 10 po Moule à savarin de 12 tasses moule à muffins de 12 alv - Bosch HDI8054U | Instructions for Use - Page 97
quée sur l'emballage durée indi- tôle à biscuits quée sur l'emballage durée indi- tôle à biscuits quée sur l'emballage Les tableaux peuvent être utilisés comme guides. Suivre les conseils de préparation de la recette ou de l'emballage. Les températures de convection ont été diminuées de 25° F par - Bosch HDI8054U | Instructions for Use - Page 98
la recette durée indi- instructions de quée sur l'emballage emballage durée indi- instructions de quée sur l'emballage po (22,8 x 12,7 cm) tôle à biscuits Les tableaux peuvent être utilisés comme guides. Suivez les conseils de préparation de l'emballage ou de la recette. Les températures de - Bosch HDI8054U | Instructions for Use - Page 99
: 11 - 14 15 - 24 min/lb Non À point, 145° F (62,7° C) À point, 160° F (71° C) Mi-saignant, 145° F (62,7° C) À point, 160° F (71° C) 25 - 30 min/lb Non 30 - 35 min/lb Non 1er côté : 4 - 6 Non 2ème côté : 4 - 5 1er côté : 5-7 Non 2ème côté : 5 - 6 aucun aucun 10 - 15 min 10 - 15 min 10 - 15 min - Bosch HDI8054U | Instructions for Use - Page 100
2 Température interne 145° F (62,7° C) 160° F (71° C) Durée de cuisson 16 - 30 min/lb 14 - 23 min/lb Aliments Durée de couverts repos Non 30 min 10 - 15 min Les tableaux peuvent être utilisés comme guides. Suivez les instructions de l'emballage ou de la recette. Les durées de rôtissage sont - Bosch HDI8054U | Instructions for Use - Page 101
Viandes Aliments Non farcie, 20 - 30 lb Mode de cuisson recommandé Rôtissage Convection Température du four 325 20 min pour découpage facile Non aucun Les tableaux peuvent être utilisés comme guides. Suivez les instructions de l'emballage ou de la recette. Les durées de rôtissage sont - Bosch HDI8054U | Instructions for Use - Page 102
- Bosch HDI8054U | Instructions for Use - Page 103
- Bosch HDI8054U | Instructions for Use - Page 104
1901 Main Street, Irvine, CA 92614 • 800-944-2904 • www.boschappliances.com 9000882024 • Rev. A • 03/14 © BSH Home Appliances Corporation, 2014
-
 1
1 -
 2
2 -
 3
3 -
 4
4 -
 5
5 -
 6
6 -
 7
7 -
8
-
9
-
10
-
11
-
12
-
13
-
14
-
15
-
16
-
17
-
18
-
19
-
20
-
21
-
22
-
23
-
24
-
25
-
26
-
27
-
28
-
29
-
30
-
31
-
32
-
33
-
34
-
35
-
36
-
37
-
38
-
39
-
40
-
41
-
42
-
43
-
44
-
45
-
46
-
47
-
48
-
49
-
50
-
51
-
52
-
53
-
54
-
55
-
56
-
57
-
58
-
59
-
60
-
61
-
62
-
63
-
64
-
65
-
66
-
67
-
68
-
69
-
70
-
71
-
72
-
73
-
74
-
75
-
76
-
77
-
78
-
79
-
80
-
81
-
82
-
83
-
84
-
85
-
86
-
87
-
88
-
89
-
90
-
91
-
92
-
93
-
94
-
95
-
96
-
97
-
98
-
99
-
100
-
101
-
102
-
103
-
104
 |
 |

Slide-In Ranges
HDIP054U, HDIP054C,
HDI8054U, HDI8054C