Brother International ADS-2500We Quick Setup Guide - Page 5
Finish
 |
View all Brother International ADS-2500We manuals
Add to My Manuals
Save this manual to your list of manuals |
Page 5 highlights
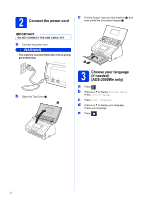
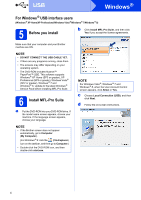
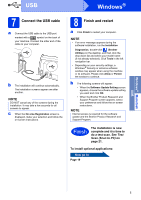
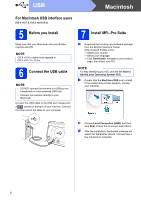
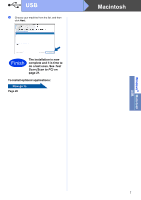
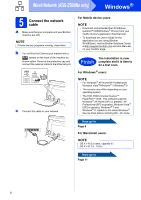
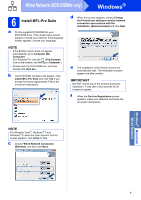
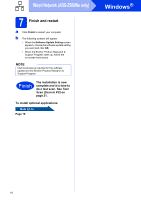
Windows® Macintosh USB USB Windows® 7 Connect the USB cable a Connect the USB cable to the USB port marked with a symbol on the back of your machine. Connect the other end of the cable to your computer. b The installation will continue automatically. The installation screens appear one after another. NOTE DO NOT cancel any of the screens during the installation. It may take a few seconds for all screens to appear. c When the On-Line Registration screen is displayed, make your selection and follow the on-screen instructions. 8 Finish and restart a Click Finish to restart your computer. NOTE • If an error message appears during the software installation, run the Installation Diagnostics, double-click (Brother Utilities) on the desktop, and then click the drop-down list and select your model name (if not already selected). Click Tools in the left navigation bar. • Depending on your security settings, a Windows ® Security or antivirus software window may appear when using the machine or its software. Please click Allow or Permit the window to continue. b The following screens will appear: • When the Software Update Setting screen appears, choose the software update setting you want and click OK. • When the Brother Product Research and Support Program screen appears, select your preference and follow the on-screen instructions. NOTE Internet access is required for the software update and the Brother Product Research and Support Program. Finish The installation is now complete and it is time to do a test scan. See Test Scan (Scan to PC) on page 21. To install optional applications: Now go to Page 19 5
-
 1
1 -
 2
2 -
 3
3 -
 4
4 -
 5
5 -
 6
6 -
 7
7 -
 8
8 -
 9
9 -
 10
10 -
 11
11 -
12
-
13
-
14
-
15
-
16
-
17
-
18
-
19
-
20
-
21
-
22
-
23
 |
 |