Brother International BAS-705 Instruction Manual - English - Page 2
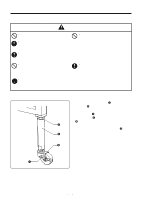
STANDARD ADJUSTMENT, MACHINE HEAD, STANDARD ADJUSTMENT MECHANISMS, 8 Adjusting the thread wiper
 |
View all Brother International BAS-705 manuals
Add to My Manuals
Save this manual to your list of manuals |
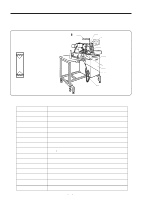
Page 2 highlights
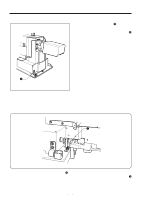
4-5-4 Adjusting the thread tension spring 29 4-6 Trial sewing 30 4-6-1 Raising and lowering the presser foot 30 4-6-2 If the upper thread breakage codes (E-181, E-182) are displayed 31 4-7 Automatic sewing 32 4-7-1 If the belt loops run out during automatic sewing 32 4-7-2 If the machine stops during sewing 33 4-7-3 If the EMERGENCY STOP switch is pressed (E-100 33 4-7-4 Resetting the belt loops 33 4-7-5 Removing an overlapping loop while in the sewing standby condition 33 4-7-6 Stopping sewing when the presser foot is lowered 33 4-7-7 Raising and lowering the presser foot 33 4-7-8 If the upper thread breakage codes (E-181, E-182) are displayed 33 4-7-9 If an error code is displayed during sewing 33 4-7-10 Replacing the bobbin 34 4-7-11 Altering the production counter value 34 5. STANDARD ADJUSTMENTʢMACHINE HEAD 35 5-1 Tilting back the machine head 35 5-2 Adjusting the needle bar height 36 5-3 Needle bar lift stroke adjustment 37 5-4 Shuttle driver needle contact adjustment 38 5-4-1 First bar tacking 38 5-4-2 Second bar tacking 38 5-5 Needle to shuttle hook point gap adjustment 39 5-5-1 First bar tacking 39 5-5-2 Second bar tacking 39 5-6 Adjusting the shuttle hook thread guide 40 5-7 Adjusting the movable knife 40 5-7-1 First bar tacking 40 5-7-2 Second bar tacking 41 5-7-3 Replacing the movable knife and fixed knife 43 5-8 Adjusting the thread wiper 45 5-8-1 First bar tacking 45 5-8-2 Second bar tacking 45 5-9 Adjusting the width between the needles 46 6. STANDARD ADJUSTMENT (MECHANISMS 48 6-1 Adjustments required when the belt loop length is changed 49 6-1-1 Adjusting fork bracket F 49 6-1-2 Adjusting slider base F 50 6-1-3 Adjusting the height of the slider bracket 50 6-1-4 Replacing the loop pressers 51 6-1-5 Adjusting the upper guide plates 51 6-2 Adjustments required when the belt loop width is changed 52 6-2-1 Adjusting channel 52 6-2-2 Adjusting the width adjustment plate 52 6-2-3 Adjusting the loop guide spring 53 6-2-4 During sewing 53
-
 1
1 -
 2
2 -
 3
3 -
 4
4 -
 5
5 -
 6
6 -
 7
7 -
 8
8 -
9
-
10
-
11
-
12
-
13
-
14
-
15
-
16
-
17
-
18
-
19
-
20
-
21
-
22
-
23
-
24
-
25
-
26
-
27
-
28
-
29
-
30
-
31
-
32
-
33
-
34
-
35
-
36
-
37
-
38
-
39
-
40
-
41
-
42
-
43
-
44
-
45
-
46
-
47
-
48
-
49
-
50
-
51
-
52
-
53
-
54
-
55
-
56
-
57
-
58
-
59
-
60
-
61
-
62
-
63
-
64
-
65
-
66
-
67
-
68
-
69
-
70
-
71
-
72
-
73
-
74
-
75
-
76
-
77
-
78
-
79
-
80
-
81
-
82
-
83
-
84
-
85
-
86
-
87
-
88
-
89
 |
 |
