Brother International HL-3070CW Quick Setup Guide - English - Page 31
Network, SES/WPS/AOSS - user manual
 |
UPC - 012502622345
View all Brother International HL-3070CW manuals
Add to My Manuals
Save this manual to your list of manuals |
Page 31 highlights
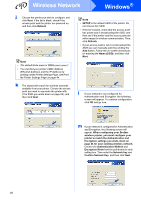
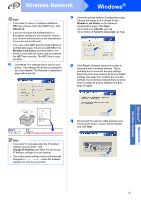
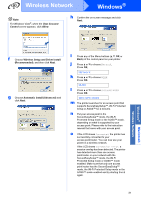
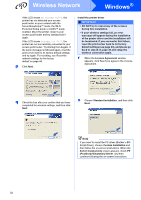
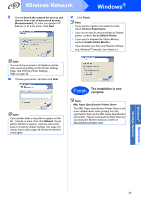
Wireless Network Windows® Note For Windows Vista®, when the User Account Control screen appears, click Allow. h Confirm the on-screen message and click Next. Windows® Macintosh Wireless Network f Choose Wireless Setup and Driver Install (Recommended), and then click Next. g Choose Automatic install (Advanced) and click Next. i Press any of the Menu buttons (a, b, OK or Back) of the control panel on your printer. j Press a or b to choose Network. Press OK. Network k Press a or b to choose WLAN. Press OK. WLAN l Press a or b to choose SES/WPS/AOSS. Press OK. SES/WPS/AOSS m The printer searches for an access point that supports SecureEasySetup™, Wi-Fi Protected Setup or AOSS™ for 2 minutes. n Put your access point in the SecureEasySetup™ mode, the Wi-Fi Protected Setup mode or the AOSS™ mode, depending on what is supported by your access point. Please refer to the instruction manual that came with your access point. o If the LCD shows Connected, the printer has successfully connected to your access point/router. You can now use your printer in a wireless network. If the LCD shows Connection Error, a session overlap has been detected. The printer has detected more than one access point/router on your network with the SecureEasySetup™ mode, the Wi-Fi Protected Setup mode or AOSS™ mode enabled. Make sure that only one access point/router has the SecureEasySetup™ mode, the Wi-Fi Protected Setup mode or the AOSS™ mode enabled and try starting from i again. 31
-
 1
1 -
2
-
3
-
4
-
5
-
6
-
7
-
8
-
9
-
10
-
11
-
12
-
13
-
14
-
15
-
16
-
17
-
18
-
19
-
20
-
21
-
22
-
23
-
24
-
25
-
 26
26 -
 27
27 -
 28
28 -
 29
29 -
 30
30 -
 31
31 -
 32
32 -
 33
33 -
 34
34 -
 35
35 -
 36
36 -
37
-
38
-
39
-
40
-
41
-
42
-
43
-
44
-
45
-
46
-
47
-
48
-
49
-
50
-
51
-
52
-
53
-
54
 |
 |
