Brother International HL-3140CW Quick Setup Guide - English - Page 30
Macintosh, Wireless Network
 |
View all Brother International HL-3140CW manuals
Add to My Manuals
Save this manual to your list of manuals |
Page 30 highlights
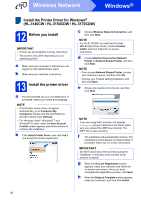
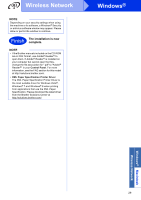
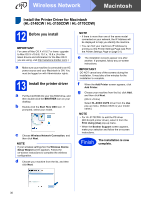
Wireless Network Macintosh Install the Printer Driver for Macintosh (HL-3140CW / HL-3150CDW / HL-3170CDW) 12 Before you install IMPORTANT For users of Mac OS X v10.6.7 or lower: upgrade to Mac OS X v10.6.8, 10.7.x, 10.8.x. (For the latest drivers and information for the Mac OS X you are using, visit http://solutions.brother.com/.) a Make sure your machine is connected to an AC power source and your Macintosh is ON. You must be logged on with Administrator rights. 13 Install the printer driver a Put the CD-ROM into your CD-ROM drive, and then double-click the BROTHER icon on your desktop. b Double-click the Start Here OSX icon. If prompted, select your model. c Choose Wireless Network Connection, and then click Next. NOTE If your wireless settings fail, the Wireless Device Setup Wizard screen appears. Follow the on-screen instructions to complete the wireless configuration. d Choose your machine from the list, and then click Next. NOTE • If there is more than one of the same model connected on your network, the IP Address will be displayed to help you identify the machine. • You can find your machine's IP Address by printing out the Printer Settings Page (see Print the Printer Settings Page on page 31). e The installation screens appear one after another. If prompted, follow any on-screen instructions. IMPORTANT DO NOT cancel any of the screens during the installation. It may take a few minutes for the installation to complete. f When the Add Printer screen appears, click Add Printer. g Choose your machine from the list, click Add, and then click Next. (OS X v10.8.x) Select HL-XXXX CUPS driver from the Use pop-up menu. (Where XXXX is your model name.) NOTE • For HL-3170CDW: to add the PS driver (BR-Script3 printer driver), select it from the Print Using (Use) pop-up menu. • When the Brother Support screen appears, make your selection and follow the on-screen instructions. Finish The installation is now complete. 30
-
 1
1 -
2
-
3
-
4
-
5
-
6
-
7
-
8
-
9
-
10
-
11
-
12
-
13
-
14
-
15
-
16
-
17
-
18
-
19
-
20
-
21
-
22
-
23
-
24
-
 25
25 -
 26
26 -
 27
27 -
 28
28 -
 29
29 -
 30
30 -
 31
31 -
 32
32 -
 33
33 -
 34
34
 |
 |
