Brother International PT2400 Users Manual - English and Spanish - Page 21
Designing An Auto Format Layout - labeling system
 |
UPC - 012502525912
View all Brother International PT2400 manuals
Add to My Manuals
Save this manual to your list of manuals |
Page 21 highlights
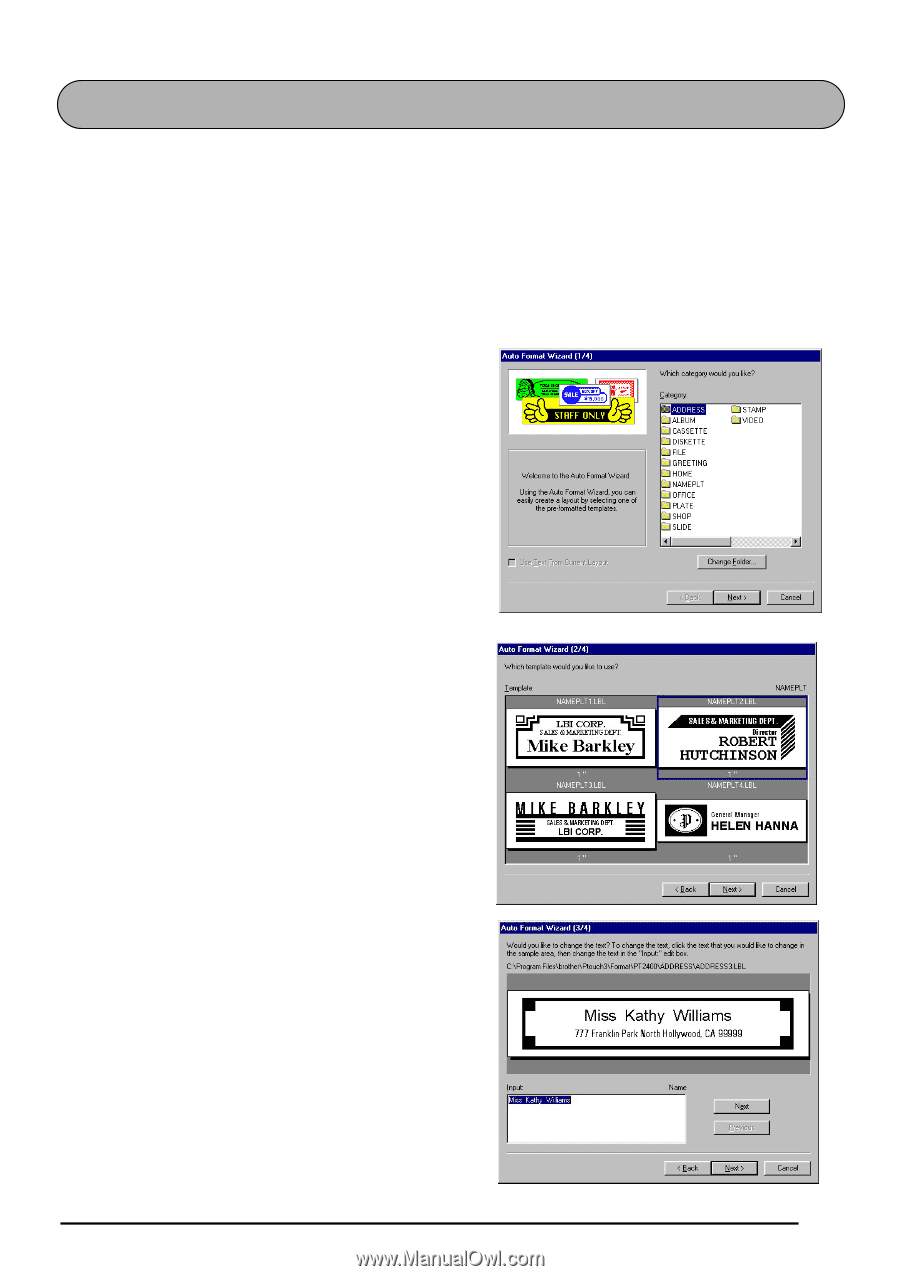
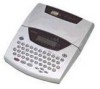
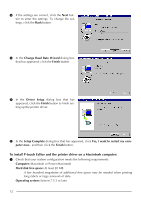
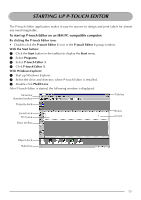
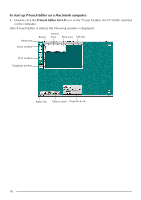
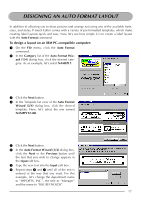
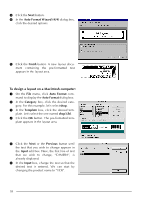
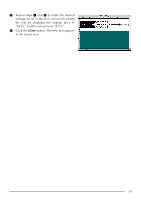
DESIGNING AN AUTO FORMAT LAYOUT In addition to allowing you to draw pictures and arrange text using any of the available fonts, sizes, and styles, P-touch Editor comes with a variety of pre-formatted templates, which make creating label layouts quick and easy. Now let's see how simple it is to create a label layout with the Auto Format command. To design a layout on an IBM PC-compatible computer: 1 On the File menu, click the Auto Format command. 2 In the Category list of the Auto Format Wiz- ard (1/4) dialog box, click the desired category. As an example, let's select NAMEPLT. 3 Click the Next button. 4 In the Template list view of the Auto Format Wizard (2/4) dialog box, click the desired template. Here, let's select the one named NAMEPLT2.LBL. 5 Click the Next button. 6 In the Auto Format Wizard (3/4) dialog box, click the Next or the Previous button until the text that you wish to change appears in the Input edit box. 7 Type the new text into the Input edit box. 8 Repeat steps 6 and 7 until all of the text is entered in the way that you want. For this example, let's change the department name to "IMPORTS, INC.", the title to "Manager" and the name to "BILL REYNOLDS". 17
-
 1
1 -
2
-
3
-
4
-
5
-
6
-
7
-
8
-
9
-
10
-
11
-
12
-
13
-
14
-
15
-
 16
16 -
 17
17 -
 18
18 -
 19
19 -
 20
20 -
 21
21 -
 22
22 -
 23
23 -
 24
24 -
 25
25 -
 26
26 -
27
-
28
-
29
-
30
-
31
-
32
-
33
-
34
-
35
-
36
-
37
-
38
-
39
-
40
-
41
-
42
-
43
-
44
-
45
-
46
-
47
-
48
-
49
-
50
-
51
-
52
-
53
-
54
-
55
-
56
-
57
-
58
-
59
-
60
-
61
-
62
-
63
-
64
-
65
-
66
-
67
-
68
-
69
-
70
-
71
-
72
-
73
-
74
-
75
-
76
-
77
-
78
-
79
-
80
-
81
-
82
-
83
-
84
-
85
-
86
-
87
-
88
-
89
-
90
-
91
-
92
-
93
-
94
-
95
-
96
-
97
-
98
-
99
-
100
-
101
-
102
-
103
-
104
-
105
-
106
-
107
-
108
-
109
-
110
-
111
-
112
-
113
-
114
-
115
-
116
-
117
-
118
-
119
-
120
-
121
-
122
-
123
-
124
-
125
-
126
-
127
-
128
-
129
-
130
-
131
-
132
-
133
-
134
-
135
-
136
-
137
-
138
-
139
-
140
-
141
-
142
-
143
-
144
-
145
-
146
-
147
-
148
-
149
-
150
-
151
-
152
-
153
-
154
-
155
-
156
-
157
-
158
-
159
-
160
-
161
-
162
-
163
-
164
-
165
-
166
-
167
-
168
-
169
-
170
-
171
-
172
-
173
-
174
-
175
-
176
-
177
-
178
-
179
-
180
-
181
-
182
-
183
-
184
-
185
-
186
-
187
-
188
-
189
-
190
-
191
-
192
-
193
-
194
-
195
-
196
-
197
-
198
-
199
-
200
-
201
-
202
 |
 |