Brother International TD-2120N Users Guide - Page 7
Getting Started, General Description
 |
View all Brother International TD-2120N manuals
Add to My Manuals
Save this manual to your list of manuals |
Page 7 highlights
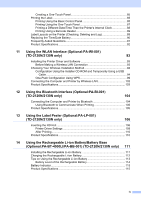
1 Getting Started 1 General Description 1 Front 1 4 1 5 2 6 7 3 8 1 POWER indicator 1 2 (Power) button 3 Media exit 4 RD Roll compartment top cover 5 STATUS indicator 6 (Feed) button 7 (Print) button 8 Cover release lever 9 Tear bar When the printer is purchased, the tear bar cover is installed. NOTE • Before using the printer, remove the cover over the tear bar. 9 10 11 • Do not dispose of the removed cover. In order to avoid injuries when the printer is not being used, attach the cover to the tear bar. 12 CAUTION 13 The tear bar is sharp. To avoid injury, do not touch the tear bar. 14 15 16 11 10 Print head 11 Transmissive/gap sensor 12 Media guide 13 Media tip guide 14 Media guide adjustment lever 15 Platen roller 16 Reflective/black mark sensor 1
-
 1
1 -
 2
2 -
 3
3 -
 4
4 -
 5
5 -
 6
6 -
 7
7 -
 8
8 -
 9
9 -
 10
10 -
 11
11 -
 12
12 -
13
-
14
-
15
-
16
-
17
-
18
-
19
-
20
-
21
-
22
-
23
-
24
-
25
-
26
-
27
-
28
-
29
-
30
-
31
-
32
-
33
-
34
-
35
-
36
-
37
-
38
-
39
-
40
-
41
-
42
-
43
-
44
-
45
-
46
-
47
-
48
-
49
-
50
-
51
-
52
-
53
-
54
-
55
-
56
-
57
-
58
-
59
-
60
-
61
-
62
-
63
-
64
-
65
-
66
-
67
-
68
-
69
-
70
-
71
-
72
-
73
-
74
-
75
-
76
-
77
-
78
-
79
-
80
-
81
-
82
-
83
-
84
-
85
-
86
-
87
-
88
-
89
-
90
-
91
-
92
-
93
-
94
-
95
-
96
-
97
-
98
-
99
-
100
-
101
-
102
-
103
-
104
-
105
-
106
-
107
-
108
-
109
-
110
-
111
-
112
-
113
-
114
-
115
-
116
-
117
-
118
-
119
-
120
-
121
-
122
 |
 |
