Brother International andtrade; QL-500 Software Users Manual - English - Page 10
Printing a Label, Print Options and label cutting
 |
View all Brother International andtrade; QL-500 manuals
Add to My Manuals
Save this manual to your list of manuals |
Page 10 highlights
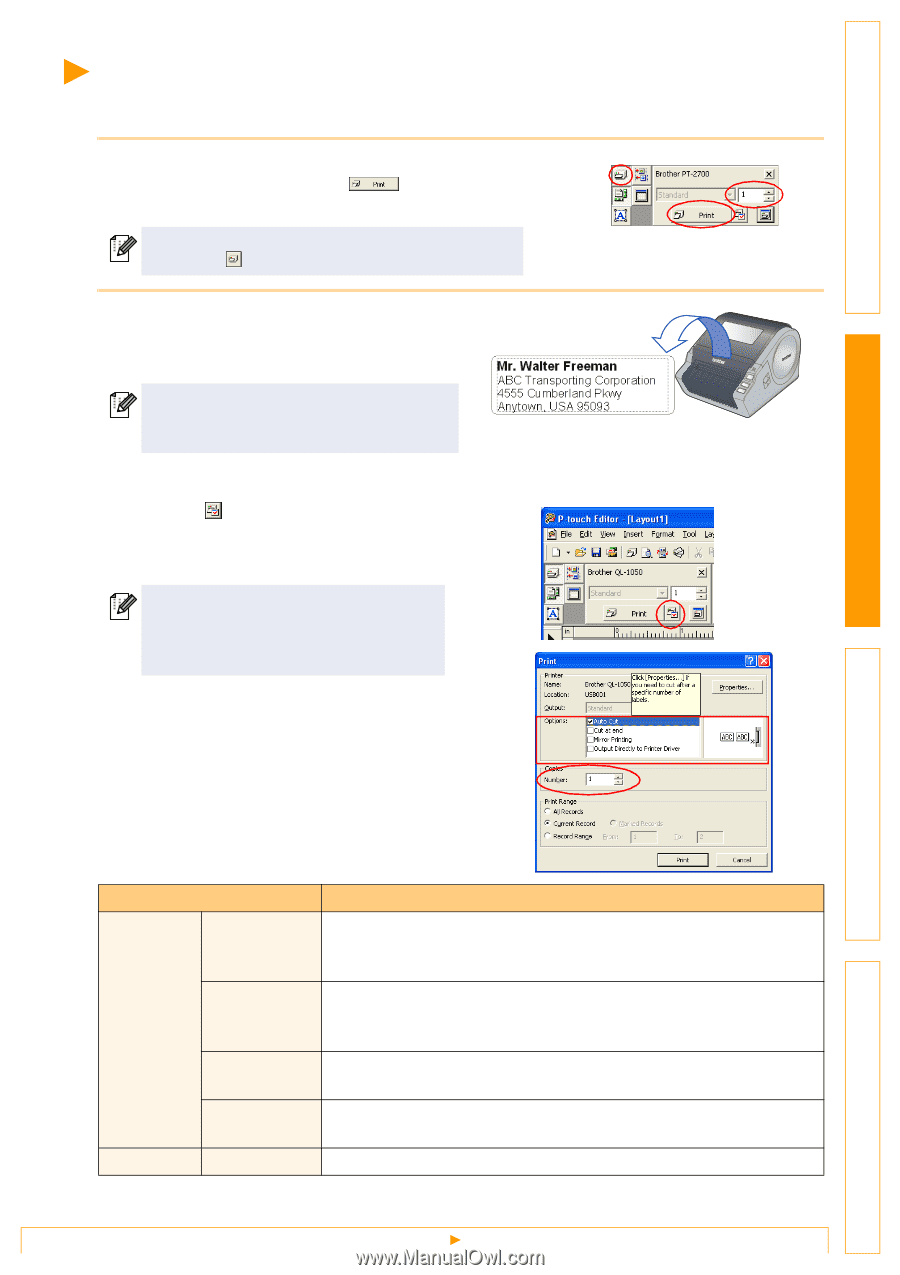
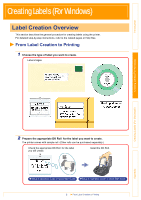
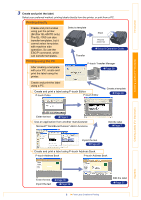
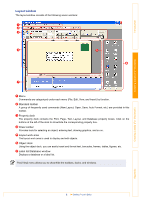
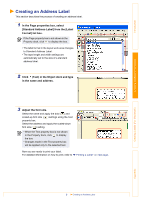
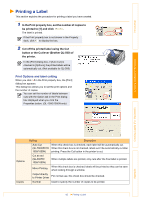
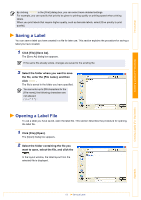
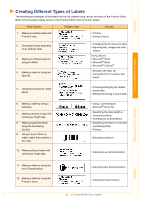
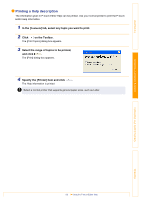
Introduction Printing a Label This section explains the procedure for printing a label you have created. 1 In the Print property box, set the number of copies to be printed to [1] and click . The label is printed. If the Print property box is not shown in the Property dock, click to display the box. 2 Cut off the printed label using the Cut button or the Cut lever (Brother QL-500) of the printer. In the [Print] dialog box, if [Auto Cut] is checked in [Options], the printed labels will be automatically cut. (Not available for QL-500) Print Options and label cutting When you click in the Print property box, the [Print] dialog box appears. This dialog box allows you to set the print options and the number of copies. You can set the number of labels between cuts with the Option tab in the Print dialog box displayed when you click the Properties button. (QL-1050/1050N only) Creating Labels (For Windows) Creating Labels (For Macintosh) Options Copies Setting Description Auto Cut When this check box is checked, each label will be automatically cut. (QL-550/650TD/ When this check box is not checked, labels won't be automatically cut after 1050/1050N) printing. Press the Cut button in the printer to cut. Cut at end (QL-650TD/ 1050/1050N) When multiple labels are printed, only cuts after the final label is printed. When this check box is checked, labels will be printed so they can be seen Mirror Printing when looking through a window. Output directly For normal use, this check box should be checked. to Printer Driver Number Used to specify the number of copies to be printed. 10 Printing a Label Appendix
-
 1
1 -
2
-
3
-
4
-
 5
5 -
 6
6 -
 7
7 -
 8
8 -
 9
9 -
 10
10 -
 11
11 -
 12
12 -
 13
13 -
 14
14 -
 15
15 -
16
-
17
-
18
-
19
-
20
-
21
-
22
-
23
-
24
-
25
-
26
-
27
-
28
-
29
-
30
-
31
-
32
-
33
-
34
-
35
-
36
-
37
-
38
-
39
-
40
-
41
-
42
-
43
-
44
-
45
-
46
-
47
-
48
-
49
-
50
-
51
-
52
-
53
-
54
-
55
-
56
-
57
-
58
-
59
-
60
-
61
-
62
-
63
-
64
-
65
-
66
-
67
 |
 |