Brother International andtrade; QL-500 Software Users Manual - English - Page 26
Creating Labels with Other Applications, Add-In settings
 |
View all Brother International andtrade; QL-500 manuals
Add to My Manuals
Save this manual to your list of manuals |
Page 26 highlights
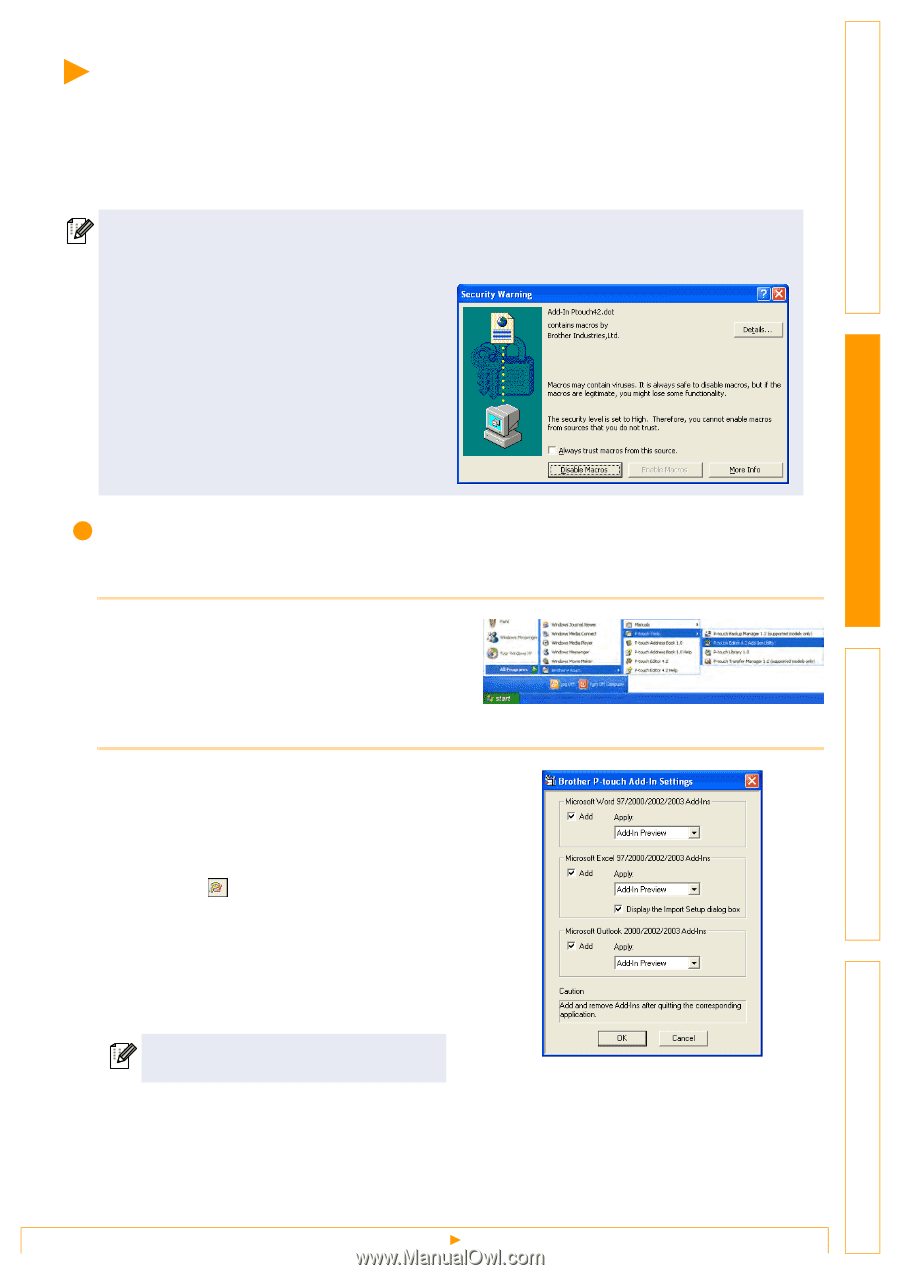
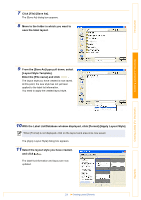
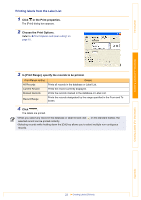
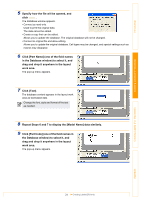
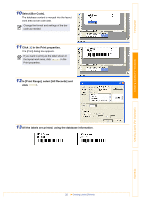
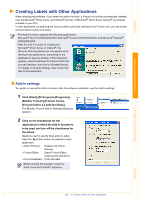
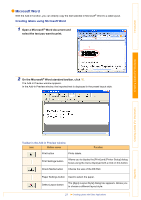
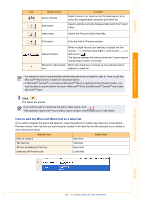
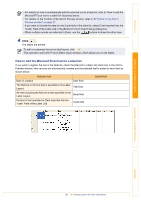
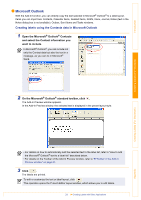
Introduction Creating Labels (For Windows) Creating Labels with Other Applications When installing the software, if you select the Add-In function, a P-touch tool will be automatically installed onto the Microsoft® Word, Excel, and Outlook® tool bar. (If Microsoft® Word, Excel, Outlook® are already installed on your PC.) In each application, by selecting the text you want to print and clicking on the P-touch icon, you can create and print labels quickly and easily. • The Add-In function supports the following applications: Microsoft® Word 97/2000/2002/2003, Microsoft® Excel 97/2000/2002/2003, and Microsoft® Outlook® 2000/2002/2003 • After the Add-In function is installed into Microsoft® Word, Excel, or Outlook®, the [Security Warning] dialog box may appear when starting these applications, depending on the application's security settings. If this dialog box appears, check the [Always trust macros from this source] checkbox, and click on [Enable Macros]. For details on security settings, refer to the Help files for the application. Add-In settings To register or cancel the Add-In function, after the software installation, use the Add-In settings. 1 Click [Start]-[All Programs(Programs)]- [Brother P-touch]-[P-touch Tools][P-touch Editor 4.2 Add-Ins Utility]. The [Brother P-touch Add-In Settings] dialog box appears. 2 Click on the checkboxes for the applications in which the Add-In function is to be used, and turn off the checkboxes for the others. [Apply] is used to specify what action is taken when the (Add-In button) is pressed in each application. • Add-In Preview : Displays the Add-In Preview. • P-touch Editor : Starts P-touch Editor, enabling edit operations. • Print Immediately : Prints the label. Before running this program, close the Word, Excel and Outlook® programs. Creating Labels (For Macintosh) Appendix 26 Creating Labels with Other Applications
-
 1
1 -
2
-
3
-
4
-
5
-
6
-
7
-
8
-
9
-
10
-
11
-
12
-
13
-
14
-
15
-
16
-
17
-
18
-
19
-
20
-
 21
21 -
 22
22 -
 23
23 -
 24
24 -
 25
25 -
 26
26 -
 27
27 -
 28
28 -
 29
29 -
 30
30 -
 31
31 -
32
-
33
-
34
-
35
-
36
-
37
-
38
-
39
-
40
-
41
-
42
-
43
-
44
-
45
-
46
-
47
-
48
-
49
-
50
-
51
-
52
-
53
-
54
-
55
-
56
-
57
-
58
-
59
-
60
-
61
-
62
-
63
-
64
-
65
-
66
-
67
 |
 |