Canon BJ-30 User Guide - Page 118
Windows Problems, Troubleshooting, Using the, Printer With Your Software
 |
View all Canon BJ-30 manuals
Add to My Manuals
Save this manual to your list of manuals |
Page 118 highlights
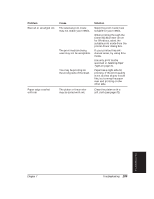
Windows Problems The following table contains problems and solutions related to using your printer with Windows applications. Problem Printer does not print or prints garbage Cause Solution Cable connections may not be secure. Check that the cable and power cord connections are secure. Printer may not be turned on. Turn on the printer. Printer driver may not be set up. Make sure the printer driver is properly installed and set up. See Chapter 4, Using the Printer With Your Software, for details. Print Manager may be causing the problem. Check Print Manager for stalled print jobs caused by printer not being ready to accept data. Delete all stalled jobs, make sure the printer is on-line, and try to print again. If errors continue, turn off the Print Manager. Cannot print from file menu Printer may not be securely connected to the computer. Check that the printer is correctly connected to the computer and that it is turned on. If the problem still exists, follow these steps: 1. Open the Printers icon, which is located in the Control Panel. 2. Select the Canon BJ-30 printer as the default printer by double-clicking on its name. 3. If the Canon BJ-30 does not appear as the default printer, click on the Connect button. 4. Make sure the correct port is selected and choose OK. 5. Double-click on the Canon BJ-30 name again. 110 Troubleshooting Chapter 7
-
 1
1 -
2
-
3
-
4
-
5
-
6
-
7
-
8
-
9
-
10
-
11
-
12
-
13
-
14
-
15
-
16
-
17
-
18
-
19
-
20
-
21
-
22
-
23
-
24
-
25
-
26
-
27
-
28
-
29
-
30
-
31
-
32
-
33
-
34
-
35
-
36
-
37
-
38
-
39
-
40
-
41
-
42
-
43
-
44
-
45
-
46
-
47
-
48
-
49
-
50
-
51
-
52
-
53
-
54
-
55
-
56
-
57
-
58
-
59
-
60
-
61
-
62
-
63
-
64
-
65
-
66
-
67
-
68
-
69
-
70
-
71
-
72
-
73
-
74
-
75
-
76
-
77
-
78
-
79
-
80
-
81
-
82
-
83
-
84
-
85
-
86
-
87
-
88
-
89
-
90
-
91
-
92
-
93
-
94
-
95
-
96
-
97
-
98
-
99
-
100
-
101
-
102
-
103
-
104
-
105
-
106
-
107
-
108
-
109
-
110
-
111
-
112
-
 113
113 -
 114
114 -
 115
115 -
 116
116 -
 117
117 -
 118
118 -
 119
119 -
 120
120 -
 121
121 -
 122
122 -
 123
123 -
124
-
125
-
126
-
127
-
128
-
129
-
130
-
131
-
132
-
133
-
134
-
135
-
136
-
137
-
138
-
139
-
140
-
141
-
142
-
143
-
144
-
145
-
146
-
147
-
148
-
149
-
150
-
151
-
152
-
153
-
154
-
155
-
156
-
157
-
158
-
159
-
160
-
161
-
162
-
163
-
164
-
165
-
166
-
167
-
168
-
169
-
170
-
171
-
172
-
173
-
174
-
175
-
176
-
177
-
178
-
179
-
180
-
181
-
182
-
183
 |
 |
