Canon CanoScan D660U CanoScan Toolbox v1.5 User's Guide - Page 6
Starting CanoScan Toolbox - with Start Buttons, on the document cover, [Copy] - scanner
 |
View all Canon CanoScan D660U manuals
Add to My Manuals
Save this manual to your list of manuals |
Page 6 highlights
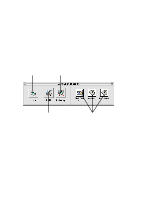
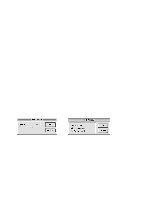
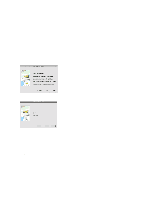
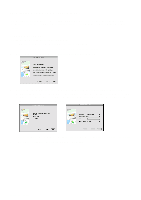
3. Starting CanoScan Toolbox - with Start Buttons Pressing the Start Button on front of the scanner or the Film Scan Button on the document cover, CanoScan Toolbox starts and the Canon Scanner Assistant will be displayed. Pressing the Start Button on front of the scanner shows the assistant for scanning the photos or documents from the platen while pressing the Film Scan Button on the document cover shows the assistant for scanning the films from the film adapter unit. [Scan and Open the Image in Toolbox editor], [FAX](not available when you press the Film Scan Button on the document cover), [Copy], [Show CanoScan Toolbox Toolbar before scanning], [Scan with same settings as the previous scan] are the options. Select one from the dialog and click [Next]. Several setting dialogs (the numbers of the dialogs and the content differs from the functions) are displayed. After setting these dialogs, the function starts. CanoScan Toolbox 6
-
 1
1 -
 2
2 -
 3
3 -
 4
4 -
 5
5 -
 6
6 -
 7
7 -
 8
8 -
 9
9 -
 10
10 -
 11
11 -
 12
12 -
13
-
14
-
15
-
16
-
17
-
18
-
19
-
20
-
21
-
22
-
23
 |
 |
